Introduction
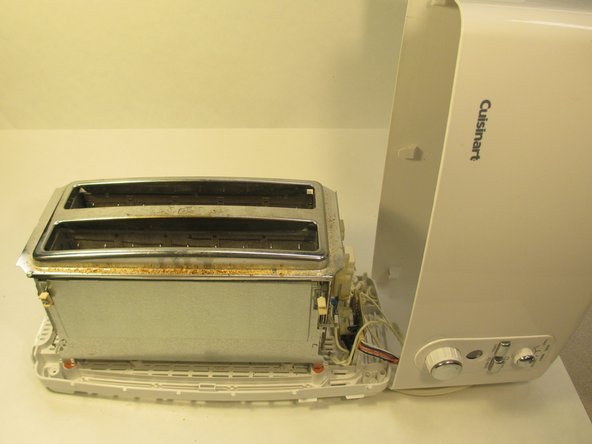
Ce guide fait partie d'un projet d'ingénierie inverse pour EE 460. On nous a donné un grille-pain tandem Cuisinart à 4 tranches, et nous l'avons décomposé en ses composants les plus élémentaires.
Ce dont vous avez besoin
-
-
Les points forts techniques de ce grille-pain Cuisinart incluent :
-
Grille-pain tandem à 2 fentes
-
Fentes de grillage de 1½" de large
-
Molette de contrôle des fonctions
-
Sélections bagel, décongélation et réchauffage
-
Commande d'abat-jour à DEL bleue avec de grands chiffres faciles à lire
-
bouton 2 ou 4 tranches ; bouton annuler
-
-
-
Sur le dessous du grille-pain, dévisser les 4 vis Torx (à l'aide d'un tournevis)
…and the fasteners shown in these photos are not “torx”. they are Phillips. Further, note that you will need a regular #2 and a #1 stubby to get the controls off as shown in step 7. A regular #2 will not fit in the top screw well, and a regular length Phillips will not allow you to get a straight shot onto the screw head.
-
-
-
Tirez la poignée de la presse vers le bas et loin du grille-pain pour déconnecter le corps.
-
Soulevez le corps du grille-pain.
Note that on the underside of the lever that the handle is connected to, towards the inside, you need to release a plastic hook tab to remove the lever.
-
-
-
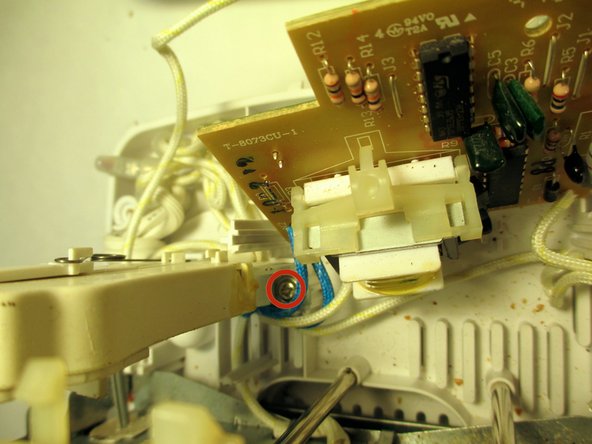
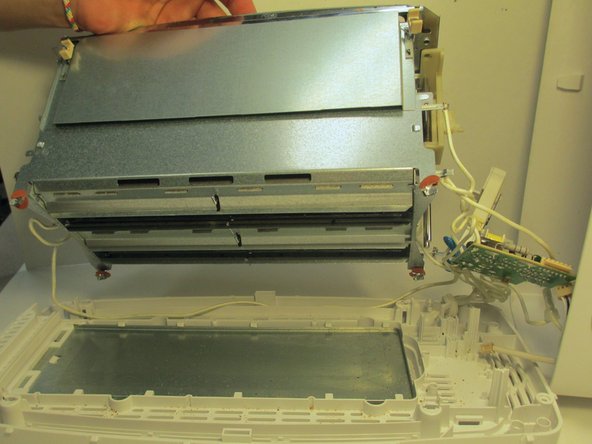
Retirez les 5 vis Torx pour détacher l'unité de chauffage du bas de l'unité du grille-pain.
Note that the part identified in this description as the “heating unit” is NOT the heating unit. Rather, it is the primary current control switch. This is a MECHANICAL switch which conducts the heavy current required to heat the heating elements, which are located inside the toaster bays. The heating elements are the flat metallic ribbons that you see glowing dull orange when the toaster is operating. When you push down the toaster handle, that action physically closes these contacts, which then conduct current to the heating elements. When you push the right-hand switch on the front called “2 slices / 4 slices” that is a SECOND and fully mechanical switch which interrupts current to just one of the four heating elements, thereby disabling 1/2 of the second toaster bay. (The center section is a single winding, and always heats on both sides) So, to be clear - ALL current switching in this toaster is performed by mechanical switches. The electronics described later only manage toast-time functions.
-
-
-
-
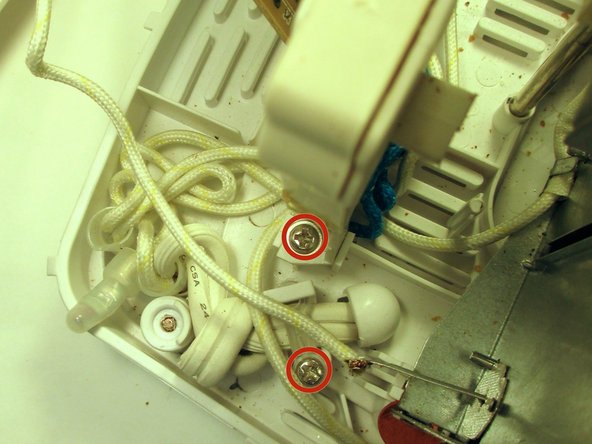
À l'aide d'un outil d'ouverture en plastique, ouvrez délicatement le boîtier métallique sous le grille-pain.
The four sheet metal twist-lok retaining tabs (with the orange paper washers stuck on them, as seen in the picture) are simply metal tabs. They are twisted into place to retain the toaster body onto the plastic baseplate. You will need small pair of needlenose pliers, a flat screwdriver and perhaps a pair of heavy hemostats to be able to straighten them out enough to line them up with the factory slots in the plastic base. A “plastic tool” will not work for this function, and if you force it without untwisting them, you will break the plastic baseplate.
-
-
-
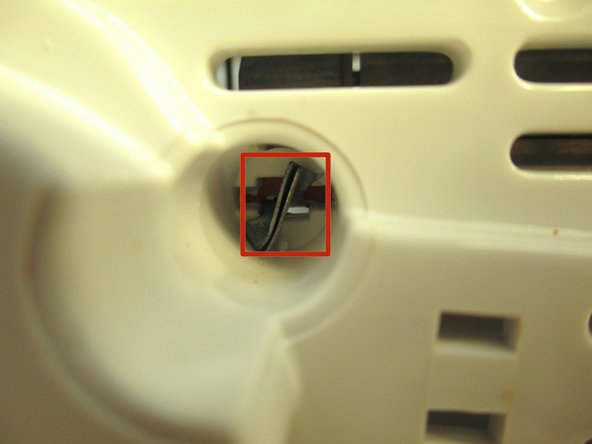
Retirez les vis pour détacher les commandes de la coque en plastique du grille-pain.
Note that when you reinstall this part, you will need to properly phase up the rotary control face for the browning selector knob, as well as the four click rotary selector for Toast/Bagel/etc. If you do not phase them up correctly, the switches will not align with the housing, or will be blocked from their full range of travel. Don’t miss this detail. Check rotary switch and browning level adjustment knob for full range of travel BEFORE reassembling the toaster.
Also, note that you will need a #2 and a #1 stubby Phillips to get the controls off as shown in step 7. Notice how that big orange screwdriver they’re showing in the picture is being held at an extreme angle? Why? Simple - because the tool is TOO LONG. :-) The handle is hitting the other side of the body of the toaster. You will never get these three screws out with this tool. You MUST have a short or stubby #2 or #1 (or a tapered shaft #2 bit in a stubby handle, ratchet handle, etc.) And yes, you WILL need to deal with this tapered issue, because a regular sized #2 Phillips stubby driver shaft will not fit in the top screw’s recessed well, even though the screw heads are actually #2 Phillips. That’s a manufacturering duh right there.
-
-
-
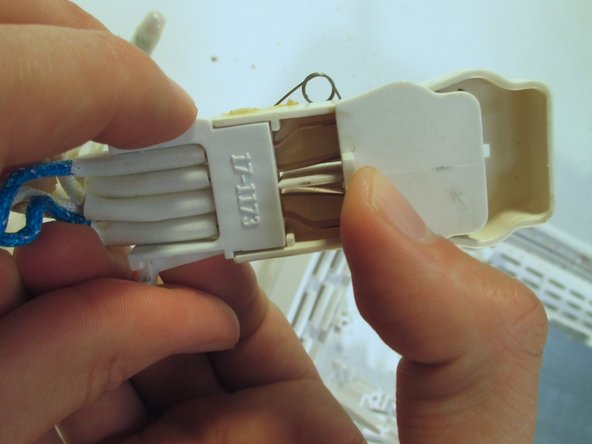
Retirez le fil soudé qui est accroché à chaque partie de l'assemblage de la plaque d'extrémité.
I would NOT “remove the soldered wire”. First of all, it is not “soldered” - it is crimped in place and there is no real reason to remove it for most service procedures. Second, note that the MOST COMMON FAILURE for this toaster is the failure of the center heating element power connection. Follow the cloth covered high temperature wire that passes into the bottom of the center element on the right side of the toaster chamber. It will lead you to where this failure occurs. This connection is only crimped, and highly prone to corrosion. When it corrodes, the center element will not heat, or will heat poorly or intermittently. The solution is to disassemble the toaster chamber enough to access this difficult to get to piece. Restrip the wire, open up the crimped rivet end, clean it, and then recrimp and solder using only SILVER braze. Do NOT use lead solder for reasons of toxicity. Do not use silver solder either, as the toaster element gets hot enough to melt solder. If you don’t have braze, crimp and hope.
-
-
-
Il s'agit du circuit imprimé utilisé pour contrôler chaque sous-système du grille-pain.
-
Le circuit intégré référencé 4541 contient un oscillateur qui oscille à quelques centaines ou milliers d'oscillations par seconde, la vitesse étant déterminée par le réglage de brunissage. Il contient également un compteur binaire qui peut compter jusqu'à 65 536.
-
Le circuit intégré marqué 4066 contient plusieurs portes logiques qui sélectionnent la valeur de comptage requise pour normal, dégivrage ou réchauffage.
-
Pendant le comptage, les portes logiques fournissent un petit courant au transistor, l'amenant à exciter l'électroaimant. A la fin du comptage sélectionné, les portes logiques coupent ce courant et le transistor désexcite l'électroaimant.
-
Lorsqu'il est sous tension, l'électroaimant maintient le levier vers le bas. Lorsque le courant est coupé, le levier est relâché et le ressort soulève le toast.
-
Les grille-pain de cet âge utilisent fréquemment ces circuits intégrés "série 4000" car ils peuvent fonctionner sur une large gamme de tensions d'alimentation. Les grille-pain plus récents utilisent un microcontrôleur (essentiellement un simple micro-ordinateur) car il est plus flexible dans ses fonctions .
-
-
-
Assemblage de l'élément principal
-
Ramasse-miettes avec cordon d'alimentation
-
Circuiterie avec composant de chauffage
-
Interface de contrôle utilisateur avec boutons
-
Appuyez sur le ressort de la poignée
If your problem is the center element is not glowing, but the outside elements in both toasting chambers is glowing - then go right to step 9 and read my comment. This will help you to decide whether this repair is within your skills. If you are mechanically adept and have a few hand tools, it is easy to fix. Reading my comment will merely tell you right where to look for the problem, saving you diagnosis time.
-


Merci à ces traducteurs :
100%
[deleted] nous aide à réparer le monde ! Vous voulez contribuer ?
Commencez à traduire ›

3 commentaires
Have this broken device and would be glad to us this demonstration to fix it!
Muy detallado desmontaje felicitaciones
Is there a simple fix when the toast won’t stay down.? The handle just keeps popping up.
mannyvalder@gmail.com - Réponse