Aller au contenu principal

Ce dont vous avez besoin

Cette vue éclatée n'est pas un tutoriel de réparation. Pour réparer votre Datatronics Discovery 2400CM, utilisez notre manuel de réparation.

  1. Datatronics Discovery 2400CM Teardown, remove front cover: étape 1, image 1 de 3 Datatronics Discovery 2400CM Teardown, remove front cover: étape 1, image 2 de 3 Datatronics Discovery 2400CM Teardown, remove front cover: étape 1, image 3 de 3
    • The front is attached to the body with 2 latches.

    • Using the spudger, open a latch on one side.

    • Open the latch on the other side next to detach the front.

  2. Datatronics Discovery 2400CM Teardown, remove back cover: étape 2, image 1 de 2 Datatronics Discovery 2400CM Teardown, remove back cover: étape 2, image 2 de 2
    • The back cover is attached to the body the same way as the front.

    • Open both latches to detach to back cover.

  3. Datatronics Discovery 2400CM Teardown, remove board from housing: étape 3, image 1 de 3 Datatronics Discovery 2400CM Teardown, remove board from housing: étape 3, image 2 de 3 Datatronics Discovery 2400CM Teardown, remove board from housing: étape 3, image 3 de 3
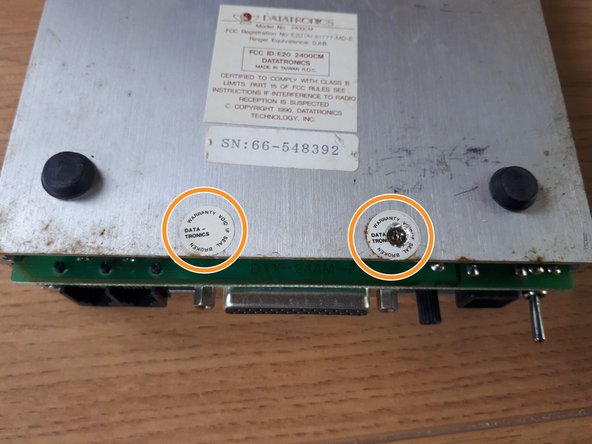
    • The board is attached to the body with 2 screws. The screws are hidden under "warranty voidance" stickers.

    • Remove the stickers so you can unscrew the screws.

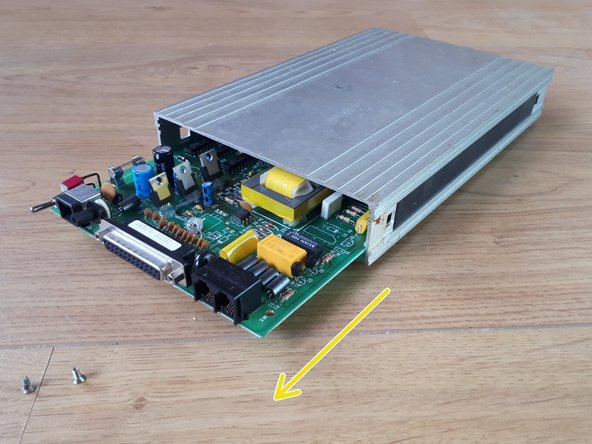
    • Slide the board from the body.

  4. Datatronics Discovery 2400CM Teardown, overview: étape 4, image 1 de 3 Datatronics Discovery 2400CM Teardown, overview: étape 4, image 2 de 3 Datatronics Discovery 2400CM Teardown, overview: étape 4, image 3 de 3
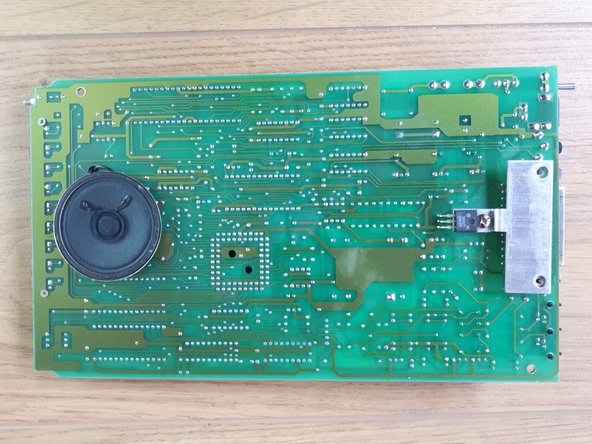
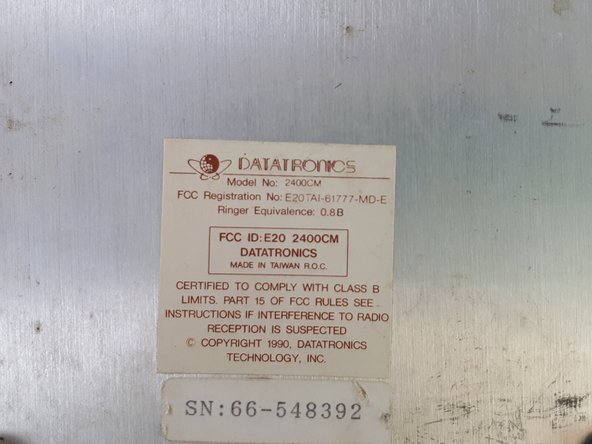
    • Overview of the front and back of the board, as well as a detailed view of the label.

knipwim

Membre depuis le 09/01/18

8 527 Réputation

30 tutoriels rédigés

0 commentaires

Ajouter un commentaire

Nombre de vues :

Dernières 24 heures : 0

7 derniers jours : 0

30 derniers jours : 5

Total : 900