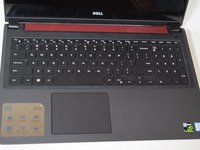
Aller au contenu principal

Ce dont vous avez besoin

Cette vue éclatée n'est pas un tutoriel de réparation. Pour réparer votre Dell Inspiron 15-7559 Repair, utilisez notre manuel de réparation.

  1. Dell Inspiron 15-7559 Teardown, Back Panel: étape 1, image 1 de 1
    • Turn off the computer.

    • Disconnect the charging cable from the computer.

    • Failure to turn off the device and disconnect the cable could lead to personal injury or device damage.

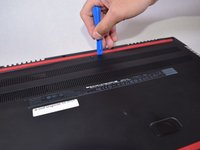
    • Flip the computer upside down.

  2. Dell Inspiron 15-7559 Teardown: étape 2, image 1 de 3 Dell Inspiron 15-7559 Teardown: étape 2, image 2 de 3 Dell Inspiron 15-7559 Teardown: étape 2, image 3 de 3
    • Remove the captive screw located on the top section of the back panel, using a Philips #1 screwdriver.

    • Keep in mind that the screw cannot be fully removed from the panel, even when fully loosened.

  3. Dell Inspiron 15-7559 Teardown: étape 3, image 1 de 3 Dell Inspiron 15-7559 Teardown: étape 3, image 2 de 3 Dell Inspiron 15-7559 Teardown: étape 3, image 3 de 3
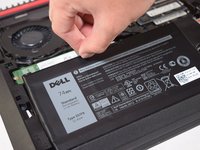
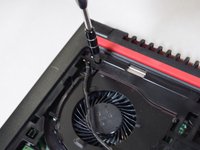
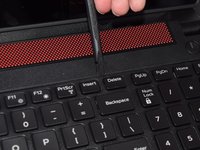
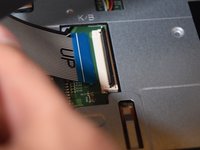
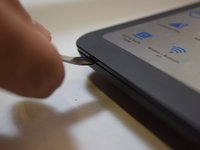
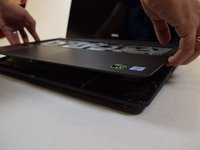
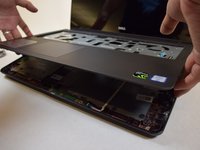
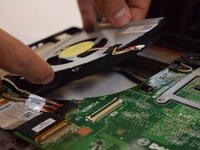
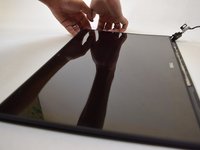
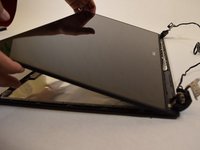
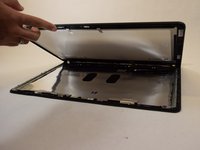
    • Use the blue, plastic opening tool to gently pry a section of the back panel open.

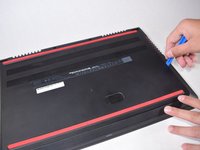
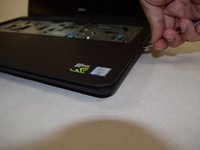
    • Next slide the opening tool around the back panel to disconnect the clips holding the panel in place.

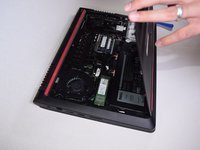
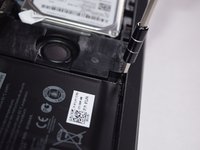
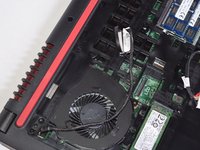
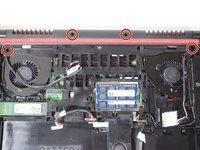
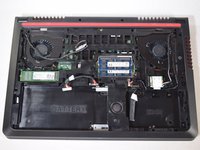
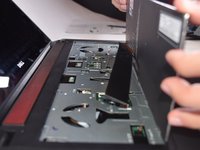
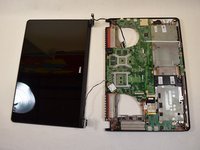
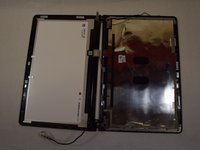
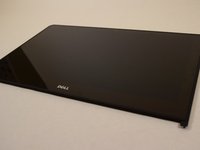
    • After the clips have been disconnected, the back panel can then be easily lifted off the computer.

  4. Dell Inspiron 15-7559 Teardown, Battery: étape 4, image 1 de 1
    • Locate the battery on the bottom left side of the laptop.

  5. Dell Inspiron 15-7559 Teardown: étape 5, image 1 de 3 Dell Inspiron 15-7559 Teardown: étape 5, image 2 de 3 Dell Inspiron 15-7559 Teardown: étape 5, image 3 de 3
    • Unscrew the 5 x 2mm x 5mm screws, using the T8 Torx screwdriver.

  6. Dell Inspiron 15-7559 Teardown: étape 6, image 1 de 3 Dell Inspiron 15-7559 Teardown: étape 6, image 2 de 3 Dell Inspiron 15-7559 Teardown: étape 6, image 3 de 3
    • Using the tab above the battery, raise the battery far enough to disconnect the cables attached to it.

    • Using your hand grab the white portion connecting the cables to the battery and disconnect it.

    • Do not pull on the cables directly. This would risk damaging them or tearing them from the device.

  7. Dell Inspiron 15-7559 Teardown: étape 7, image 1 de 1
    • Now lift the battery from the device to remove it.

  8. Dell Inspiron 15-7559 Teardown, Hard Drive: étape 8, image 1 de 1
    • Locate the hard drive on the bottom right side of the laptop.

  9. Dell Inspiron 15-7559 Teardown: étape 9, image 1 de 2 Dell Inspiron 15-7559 Teardown: étape 9, image 2 de 2
    • Unscrew the 4 x 2.5mm x 5mm screws, using the Philips #1 screwdriver.

  10. Dell Inspiron 15-7559 Teardown: étape 10, image 1 de 3 Dell Inspiron 15-7559 Teardown: étape 10, image 2 de 3 Dell Inspiron 15-7559 Teardown: étape 10, image 3 de 3
    • Using your hands, raise the hard drive far enough to disconnect the cables attached to it.

    • Using your hand grab the black portion connecting the cables to the battery and disconnect it.

    • Do not pull on the cables directly. This would risk damaging them or tearing them from the device.

  11. Dell Inspiron 15-7559 Teardown, Dell Inspiron 15-7559 Teardown: étape 11, image 1 de 1
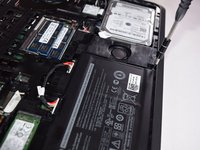
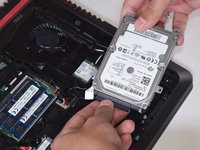
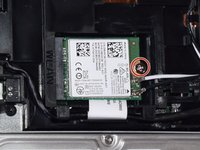
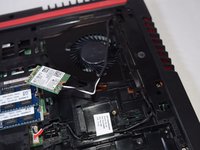
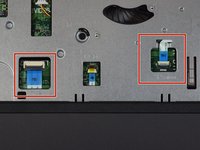
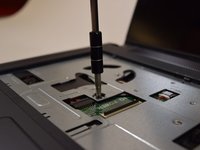
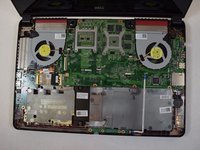
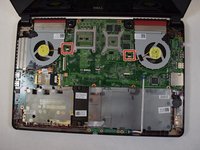
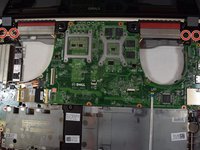
    • Locate the WLAN card. It will be on the right sides of the laptop.

  12. Dell Inspiron 15-7559 Teardown: étape 12, image 1 de 3 Dell Inspiron 15-7559 Teardown: étape 12, image 2 de 3 Dell Inspiron 15-7559 Teardown: étape 12, image 3 de 3
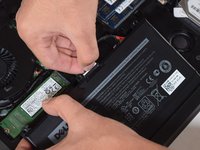
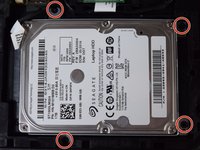
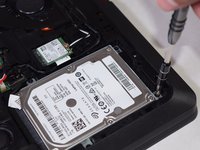
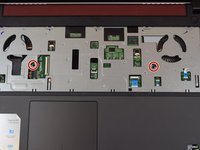
    • Using a Philips #1 screwdriver, unscrew the 2mm x 3mm screw, holding the WLAN card in place.

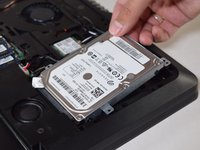
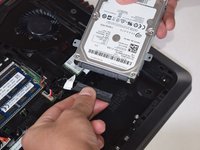
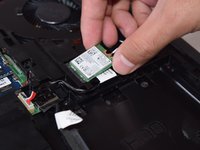
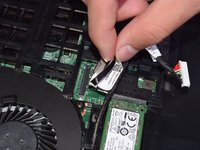
    • Using your hand disconnect the WLAN card by pulling it horizontally along the device.

    • After the WLAN card has been disconnected, make sure to dethread the wires connecting it so that they sit freely.
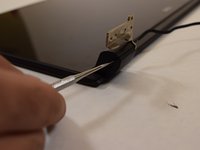
  13. Dell Inspiron 15-7559 Teardown: étape 13, image 1 de 1
    • Locate the LCD cable, near the center of the laptop.

  14. Dell Inspiron 15-7559 Teardown: étape 14, image 1 de 3 Dell Inspiron 15-7559 Teardown: étape 14, image 2 de 3 Dell Inspiron 15-7559 Teardown: étape 14, image 3 de 3
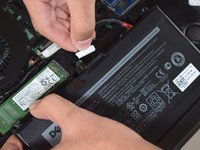
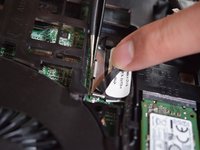
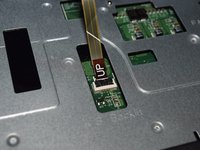
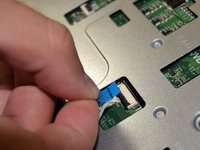
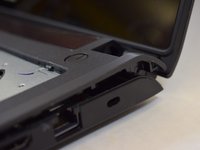
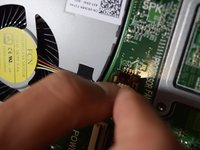
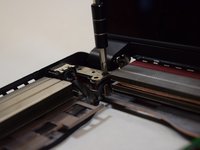
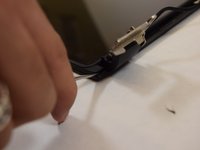
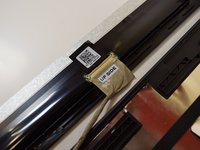
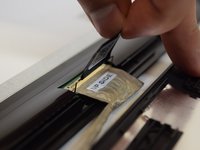
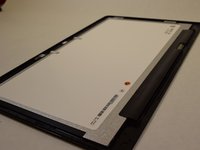
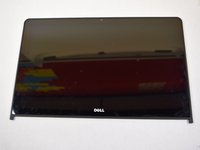
    • Using tweezers pull the metal tab, on the back of LCD connection point, away from it.

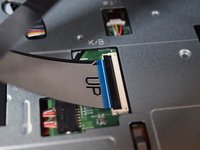
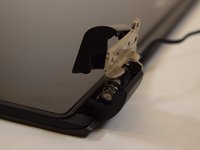
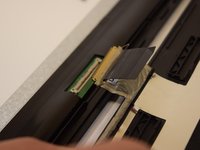
    • Once the metal tab is sufficiently released, pull the black strap to disconnect the LCD.

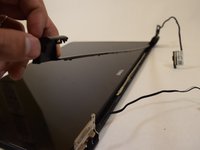
    • After the LCD has been disconnected, make sure to dethread the wires connecting it so that they sit freely.

  15. Dell Inspiron 15-7559 Teardown: étape 15, image 1 de 3 Dell Inspiron 15-7559 Teardown: étape 15, image 2 de 3 Dell Inspiron 15-7559 Teardown: étape 15, image 3 de 3
    • Using the Philips #1 screwdriver, unscrew the 4 x 2mm x 5mm screws, located on the top of the laptop.

  16. Dell Inspiron 15-7559 Teardown: étape 16, image 1 de 2 Dell Inspiron 15-7559 Teardown: étape 16, image 2 de 2
    • Flip the device over and lift the screen.

  17. Dell Inspiron 15-7559 Teardown: étape 17, image 1 de 3 Dell Inspiron 15-7559 Teardown: étape 17, image 2 de 3 Dell Inspiron 15-7559 Teardown: étape 17, image 3 de 3
    • Using the flat end of the spudger press in the 5 tabs, located on top of the keyboard, as you use the spudger to pry each section up.

    • After releasing the 5 tabs, slide the opening tool around the top and sides of the keyboard to make sure it is fully released.

  18. Dell Inspiron 15-7559 Teardown: étape 18, image 1 de 2 Dell Inspiron 15-7559 Teardown: étape 18, image 2 de 2
    • Now lift the keyboard enough to access the ribbon cables beneath it.

  19. Dell Inspiron 15-7559 Teardown: étape 19, image 1 de 3 Dell Inspiron 15-7559 Teardown: étape 19, image 2 de 3 Dell Inspiron 15-7559 Teardown: étape 19, image 3 de 3
    • For the two ribbon cables connecting the keyboard to the laptop, use your finger to lift the latch up.

    • Once the latch is raised, lift the ribbon cable up and out of the latch.

  20. Dell Inspiron 15-7559 Teardown: étape 20, image 1 de 1
    • Now that the keyboard has been fully disconnected from the laptop, lift it off of the device.

  21. Dell Inspiron 15-7559 Teardown: étape 21, image 1 de 3 Dell Inspiron 15-7559 Teardown: étape 21, image 2 de 3 Dell Inspiron 15-7559 Teardown: étape 21, image 3 de 3
    • Locate the ribbon cable for the track pad and the power.

    • For both ribbon cables, use your finger to lift the latches up.

    • Once the latches are raised, lift the ribbon cables up and out of the latches.

  22. Dell Inspiron 15-7559 Teardown: étape 22, image 1 de 2 Dell Inspiron 15-7559 Teardown: étape 22, image 2 de 2
    • Locate the two screws near the center of the laptop.

    • Unscrew the 2 x 2.5mm x 5mm screws, using the Philips #1 screwdriver.

  23. Dell Inspiron 15-7559 Teardown: étape 23, image 1 de 3 Dell Inspiron 15-7559 Teardown: étape 23, image 2 de 3 Dell Inspiron 15-7559 Teardown: étape 23, image 3 de 3
    • Using the metal spudger pry open the edges of the top panel of the laptop.

    • You will hear a snap as you disconnect the panel tabs, this is normal.

    • It is easiest to start at a corner, and work your way around.

  24. Dell Inspiron 15-7559 Teardown: étape 24, image 1 de 3 Dell Inspiron 15-7559 Teardown: étape 24, image 2 de 3 Dell Inspiron 15-7559 Teardown: étape 24, image 3 de 3
    • Now raise the top panel off of the laptop.

    • If you feel any resistance as you lift the panel, stop and make sure that you have completed all previous steps.

  25. Dell Inspiron 15-7559 Teardown: étape 25, image 1 de 3 Dell Inspiron 15-7559 Teardown: étape 25, image 2 de 3 Dell Inspiron 15-7559 Teardown: étape 25, image 3 de 3
    • Locate the fan connections on both the left and right side of the laptop.

    • Using your hand grab the white portion and pull it away from the port.

    • Do not pull on the cables directly. This would risk damaging them or tearing them from the device.

    • Once the fans are disconnected lift and remove them from the laptop.

  26. Dell Inspiron 15-7559 Teardown: étape 26, image 1 de 3 Dell Inspiron 15-7559 Teardown: étape 26, image 2 de 3 Dell Inspiron 15-7559 Teardown: étape 26, image 3 de 3
    • Locate the 4 hinge screws at the top of the laptop.

    • Unscrew the 4 x 2mm x 5mm screws, using the Philips #1 screwdriver.

    • Remove the screen from the laptop.

  27. Dell Inspiron 15-7559 Teardown: étape 27, image 1 de 3 Dell Inspiron 15-7559 Teardown: étape 27, image 2 de 3 Dell Inspiron 15-7559 Teardown: étape 27, image 3 de 3
    • Using the metal spudger disconnect the frame around the hinges.

    • It is easiest to disconnect the frame around one hinge and then use your hand to pull the rest of the frame off. You will hear some snaps as the tabs disconnect, this is normal.

  28. Dell Inspiron 15-7559 Teardown: étape 28, image 1 de 3 Dell Inspiron 15-7559 Teardown: étape 28, image 2 de 3 Dell Inspiron 15-7559 Teardown: étape 28, image 3 de 3
    • This next step will likely cause some of the tabs, that hold the display, to snap. They will still function and hold the display in place and there should be no noticeable issues once put back together, but the tabs will have permanent damage and repeated disassembly will most likely require replacement.

    • Using the metal spudger pry open the frame around the display.

    • It is easiest to start at the bottom left hand corner and work your way around. Once you have enough of the frame released you can use your hands to finish the rest.

  29. Dell Inspiron 15-7559 Teardown: étape 29, image 1 de 3 Dell Inspiron 15-7559 Teardown: étape 29, image 2 de 3 Dell Inspiron 15-7559 Teardown: étape 29, image 3 de 3
    • Lift the screen, rotating along the hinges, so that it will lie open.

  30. Dell Inspiron 15-7559 Teardown: étape 30, image 1 de 3 Dell Inspiron 15-7559 Teardown: étape 30, image 2 de 3 Dell Inspiron 15-7559 Teardown: étape 30, image 3 de 3
    • Locate the wire that connects the display to the back panel. There will be a sticker with a qr code on it.

    • Peel the the sticker and pull it back to disconnect the cables.

  31. Dell Inspiron 15-7559 Teardown: étape 31, image 1 de 3 Dell Inspiron 15-7559 Teardown: étape 31, image 2 de 3 Dell Inspiron 15-7559 Teardown: étape 31, image 3 de 3
    • The display is now fully disconnected.

Trenton Greevebiester

Membre depuis le 10/19/17

1 536 Réputation

6 tutoriels rédigés

Équipe

UW Tacoma, Team S3-G2, Liner Fall 2017 Membre de l'équipe UW Tacoma, Team S3-G2, Liner Fall 2017

UWT-LINER-F17S3G2

5 membres

9 tutoriels rédigés

7 commentaires

Its really good work and Professional one. You can also expect the same from Ncentric systems which are offering the Computer and Laptop Repairing in Hyderabad

nagarjuna karna - Réponse

Seems a bit rude of them to make you take out the battery and hard drive in order to get to the fans; I tried to open mine up to dust off the inside, but I dont have a Torx screwdriver on me. Looks like I'll have to come back when I have one

Gamera Ramen - Réponse

I was hoping to see the switch (reed?) for the lid opening and closing and where it is located.

bill1229 - Réponse

I have the same question, where is the reed/ lid switch located?

Rexzone Live - Réponse

Anyone know the size of the screws on the top of the hinge?

Frederick White - Réponse

Ajouter un commentaire

Nombre de vues :

Dernières 24 heures : 11

7 derniers jours : 39

30 derniers jours : 190

Total : 44,033