Introduction
This guide will demonstrate how to apart the Dell Inspiron 15-7559.
Ce dont vous avez besoin
-
-
Turn off the computer.
-
Disconnect the charging cable from the computer.
-
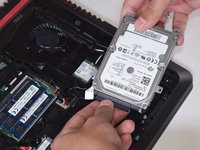
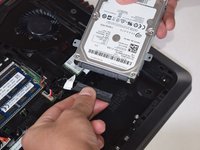
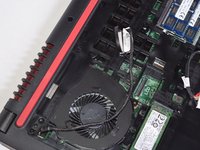
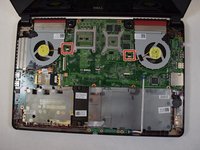
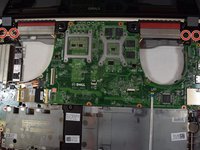
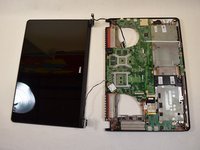
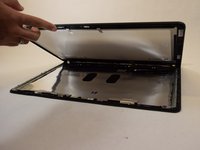
Flip the computer upside down.
-
-
-
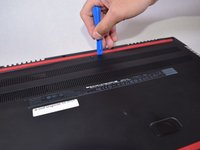
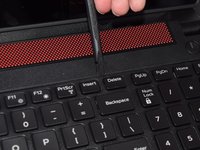
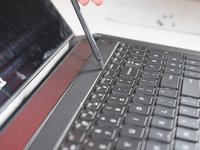
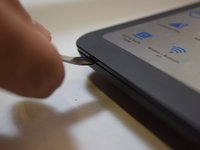
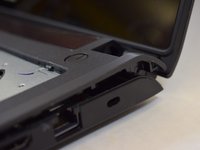
Use the blue, plastic opening tool to gently pry a section of the back panel open.
-
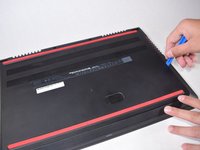
Next slide the opening tool around the back panel to disconnect the clips holding the panel in place.
-
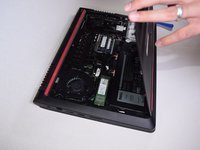
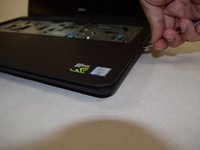
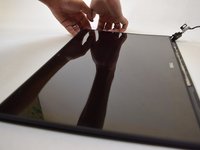
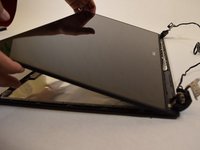
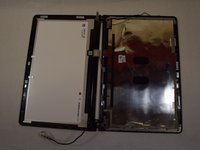
After the clips have been disconnected, the back panel can then be easily lifted off the computer.
-
-
-
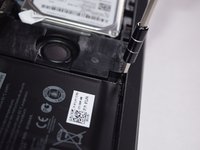
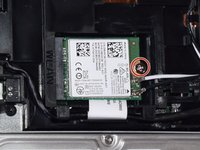
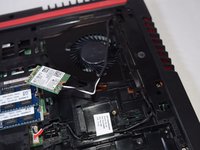
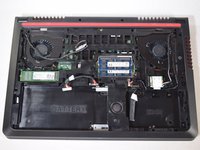
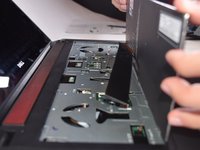
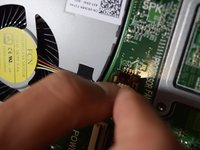
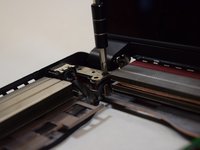
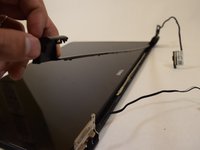
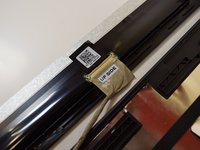
Locate the WLAN card. It will be on the right sides of the laptop.
-
-
-
-
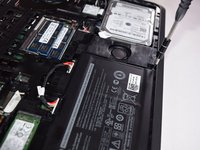
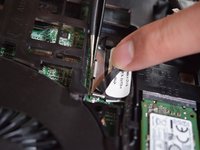
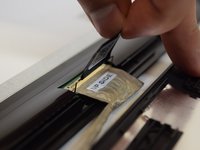
Using a Philips #1 screwdriver, unscrew the 2mm x 3mm screw, holding the WLAN card in place.
-
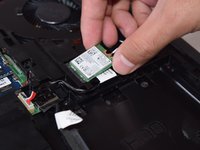
Using your hand disconnect the WLAN card by pulling it horizontally along the device.
-
After the WLAN card has been disconnected, make sure to dethread the wires connecting it so that they sit freely.
-
-
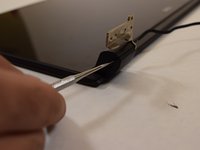
Outil utilisé dans cette étape :Tweezers$4.99
-
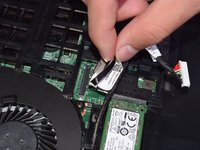
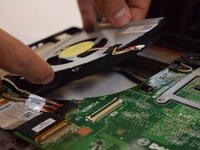
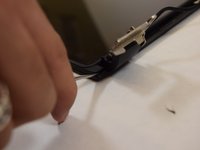
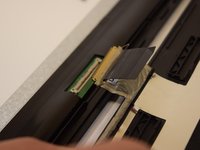
Using tweezers pull the metal tab, on the back of LCD connection point, away from it.
-
Once the metal tab is sufficiently released, pull the black strap to disconnect the LCD.
-
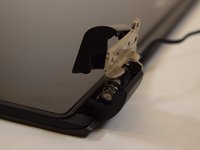
After the LCD has been disconnected, make sure to dethread the wires connecting it so that they sit freely.
-
-
-
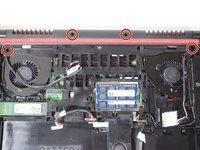
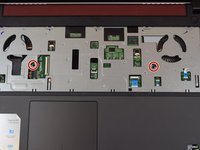
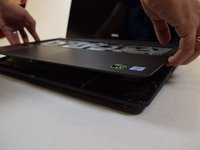
Using the flat end of the spudger press in the 5 tabs, located on top of the keyboard, as you use the spudger to pry each section up.
-
After releasing the 5 tabs, slide the opening tool around the top and sides of the keyboard to make sure it is fully released.
-
-
-
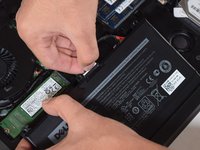
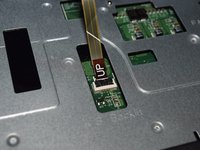
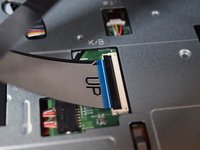
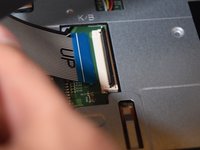
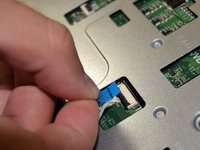
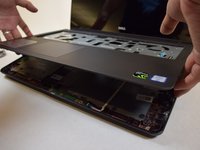
Locate the ribbon cable for the track pad and the power.
-
For both ribbon cables, use your finger to lift the latches up.
-
Once the latches are raised, lift the ribbon cables up and out of the latches.
I have the middle one, where it says LED, cable broken, where can i get that cable. Please help email hsymtech@gmail.com
-
-
-
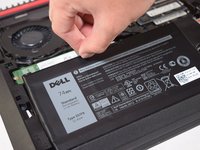
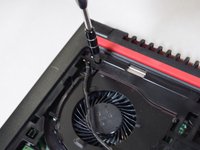
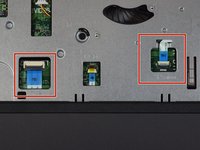
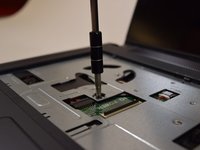
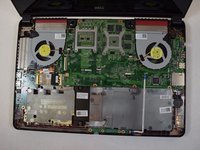
Locate the two screws near the center of the laptop.
-
Unscrew the 2 x 2.5mm x 5mm screws, using the Philips #1 screwdriver.
-


Équipe

UW Tacoma, Team S3-G2, Liner Fall 2017 Membre de l'équipe UW Tacoma, Team S3-G2, Liner Fall 2017
UWT-LINER-F17S3G2
5 membres
9 tutoriels rédigés
7 commentaires
Its really good work and Professional one. You can also expect the same from Ncentric systems which are offering the Computer and Laptop Repairing in Hyderabad
Seems a bit rude of them to make you take out the battery and hard drive in order to get to the fans; I tried to open mine up to dust off the inside, but I dont have a Torx screwdriver on me. Looks like I'll have to come back when I have one
I have the same question, where is the reed/ lid switch located?
Anyone know the size of the screws on the top of the hinge?
I have a question regarding the M2x5 screws holding the fans and hard drive in place — are they countersunk? Cant’ make out from the pictures
Thanks
The LCD (on the 4k touchscreen model where the glass is pretty much edge to edge) is attached to the bezel frame by adhesive strips - a hairdryer and pry tool go a long way to separate and remove the adhesive strips. I had to finish the job off with adhesive remover but I had that on hand anyway as I was replacing the LCD due to fluid leakage.