Aller au contenu principal

Ce dont vous avez besoin

Cette vue éclatée n'est pas un tutoriel de réparation. Pour réparer votre Dell Latitude CP, utilisez notre manuel de réparation.

  1. Dell Latitude CP Teardown, Remove Battery and Drives: étape 1, image 1 de 1
    • To start, you need to remove the CD or Floppy Drive, whichever is installed, and the battery. They remove the same way. Push left on the tab and pull out on the drives to remove them. My battery has gone MIA at the moment, but it removes the same way.

  2. Dell Latitude CP Teardown, Remove RAM: étape 2, image 1 de 3 Dell Latitude CP Teardown, Remove RAM: étape 2, image 2 de 3 Dell Latitude CP Teardown, Remove RAM: étape 2, image 3 de 3
    • Slide off the RAM cover by lifting up on the right side and sliding it to the right. Then push out on the tabs on the side of the RAM till they pop up, then you can pull them out.

  3. Dell Latitude CP Teardown, PCMIA Card: étape 3, image 1 de 2 Dell Latitude CP Teardown, PCMIA Card: étape 3, image 2 de 2
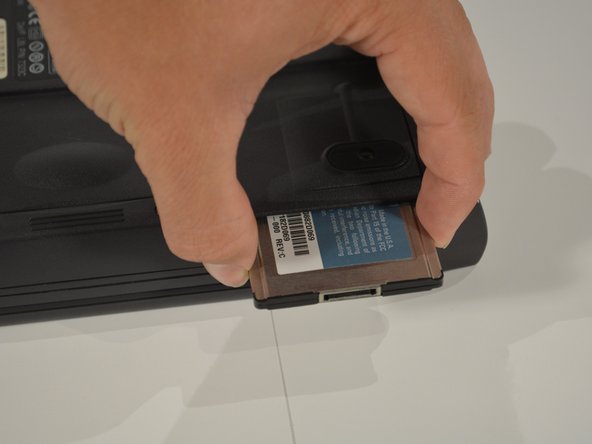
    • Push on the button next to the slot your card is in till and it will pop out. Push in on it again to pop out the actual card.

  4. Dell Latitude CP Teardown, Remove Hard Drive: étape 4, image 1 de 2 Dell Latitude CP Teardown, Remove Hard Drive: étape 4, image 2 de 2
    • Unscrew the two screws holding in the hard drive caddy, and slide out the hard drive.

    • Two 5mm Screws

  5. Dell Latitude CP Teardown, Back IO Panel: étape 5, image 1 de 3 Dell Latitude CP Teardown, Back IO Panel: étape 5, image 2 de 3 Dell Latitude CP Teardown, Back IO Panel: étape 5, image 3 de 3
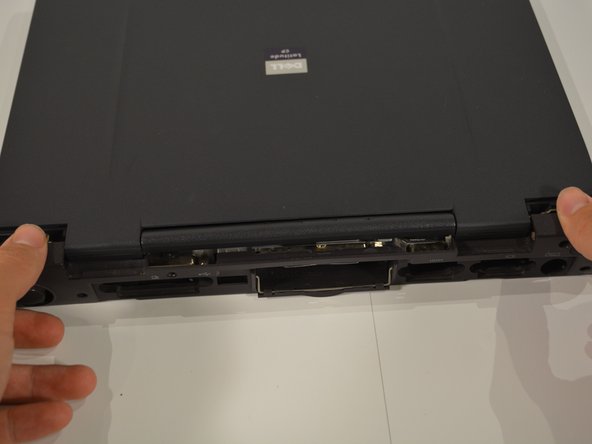
    • Unscrew the five screws along the bottom of the laptop, then remove another seven screws along the back of the laptop, then simply pull off the IO cover.

    • Five 5mm Screws

  6. Dell Latitude CP Teardown, Keyboard Screws: étape 6, image 1 de 1
    • Remove all ten screws on the back of the laptop.

    • Nine 12mm Screws

    • One 2.5mm Screw

  7. Dell Latitude CP Teardown, Keyboard: étape 7, image 1 de 2 Dell Latitude CP Teardown, Keyboard: étape 7, image 2 de 2
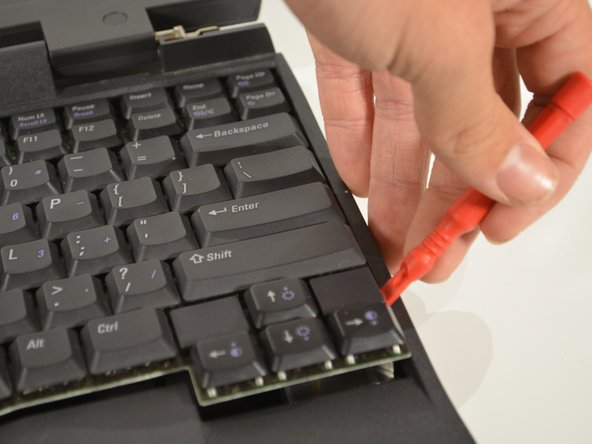
    • Use a plastic pry tool or a small flat-head screw driver to gently pry up on the left side of the keyboard until it pops up. Do the same for the right side, and slowly lift up the keyboard.

  8. Dell Latitude CP Teardown, Keyboard Ribbon Cable: étape 8, image 1 de 2 Dell Latitude CP Teardown, Keyboard Ribbon Cable: étape 8, image 2 de 2
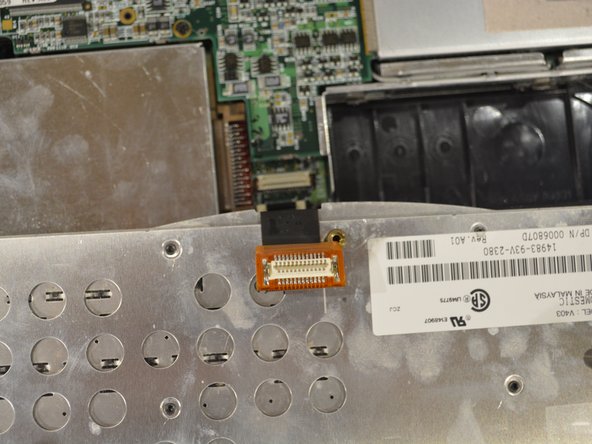
    • Use a plastic pry too of a small flat-head screwdriver to VERY gently pry on the keyboard cable connector on it pops off.

  9. Dell Latitude CP Teardown, Touchpad Ribbon Cable: étape 9, image 1 de 1
    • Use the screwdriver you've been using and gently put it under the ribbon cable and pull up until it pops out.

  10. Dell Latitude CP Teardown, Palmrest: étape 10, image 1 de 3 Dell Latitude CP Teardown, Palmrest: étape 10, image 2 de 3 Dell Latitude CP Teardown, Palmrest: étape 10, image 3 de 3
    • There is one screw to remove that is holding on the palm rest. Pop up both sides of the palm rest. They may be very tough to pull off, but they shouldn't break.

    • One 5mm Screw

  11. Dell Latitude CP Teardown, LCD Ribbon Cable: étape 11, image 1 de 3 Dell Latitude CP Teardown, LCD Ribbon Cable: étape 11, image 2 de 3 Dell Latitude CP Teardown, LCD Ribbon Cable: étape 11, image 3 de 3
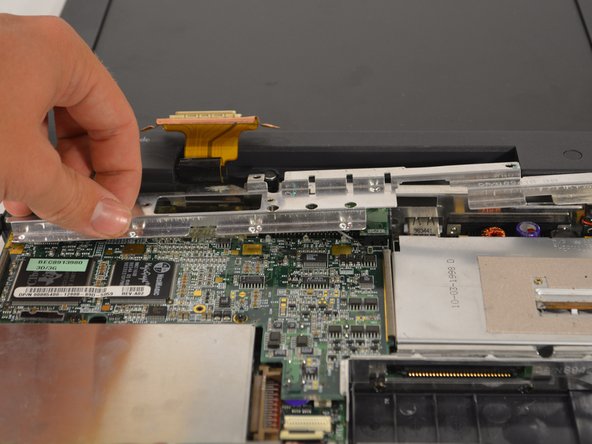
    • Remove both grounding screws on either side of the ribbon cable. Gently pull up on the ribbon cable with your fingers until the cable pops off.

    • Two 5mm Screws

  12. Dell Latitude CP Teardown, IO Shield: étape 12, image 1 de 2 Dell Latitude CP Teardown, IO Shield: étape 12, image 2 de 2
    • Remove the four screws holding the IO shield, and pull up and to the right to remove it.

    • Four 5mm Screws

  13. Dell Latitude CP Teardown, IR Blaster: étape 13, image 1 de 2 Dell Latitude CP Teardown, IR Blaster: étape 13, image 2 de 2
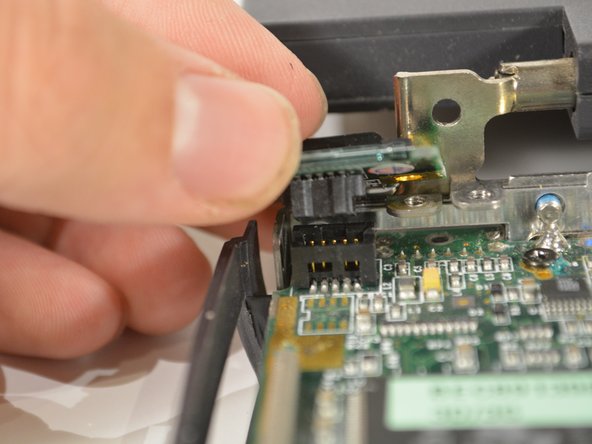
    • Remove the screw holding it on and pull up on the IR blaster till it disconnects.

    • One 5mm Screw

  14. Dell Latitude CP Teardown, LED Indicator Lights: étape 14, image 1 de 2 Dell Latitude CP Teardown, LED Indicator Lights: étape 14, image 2 de 2
    • Pull up on the LED board till is pops off.

  15. Dell Latitude CP Teardown, Audio Board: étape 15, image 1 de 1
    • Remove the screw holding the audio board cover, then pull off the cover. Remove all three cables connected to board by gently pulling on them with your finger nails. Simply pop off the audio board then pull it out to the left.

    • One 5mm Screw

  16. Dell Latitude CP Teardown, Speaker Wire: étape 16, image 1 de 1
    • Remove the speaker wire from bottom bracket holdings and bend it out of the way to remove the bottom case bracket.

  17. Dell Latitude CP Teardown, Bottom Case Bracket: étape 17, image 1 de 3 Dell Latitude CP Teardown, Bottom Case Bracket: étape 17, image 2 de 3 Dell Latitude CP Teardown, Bottom Case Bracket: étape 17, image 3 de 3
    • There are two screws on either side of the bracket to remove. You need use a small screwdriver to push up on a plastic clip on the middle of the bracket.

    • Four 5mm Screws

  18. Dell Latitude CP Teardown, Speakers: étape 18, image 1 de 1
    • Lift out both speakers from the case.

  19. Dell Latitude CP Teardown, LCD Hinges: étape 19, image 1 de 3 Dell Latitude CP Teardown, LCD Hinges: étape 19, image 2 de 3 Dell Latitude CP Teardown, LCD Hinges: étape 19, image 3 de 3
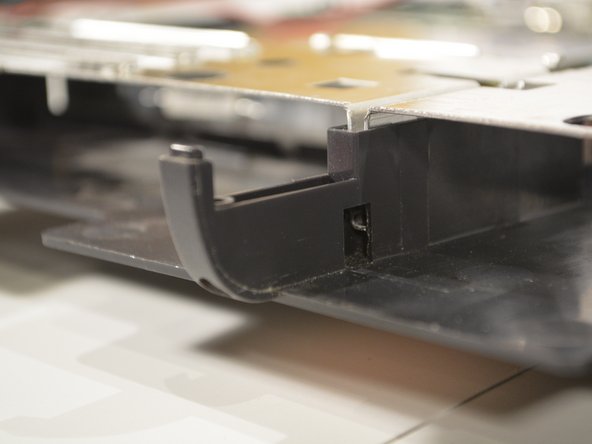
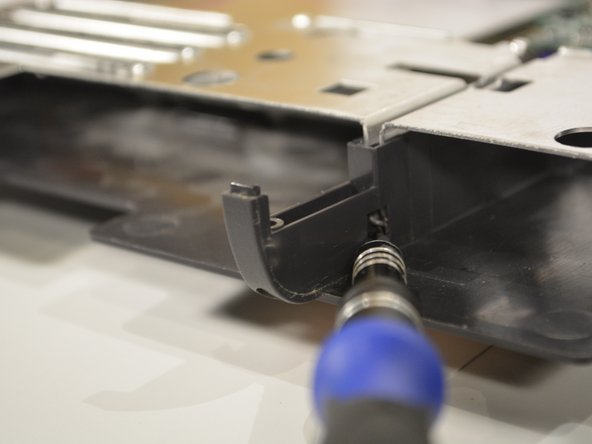
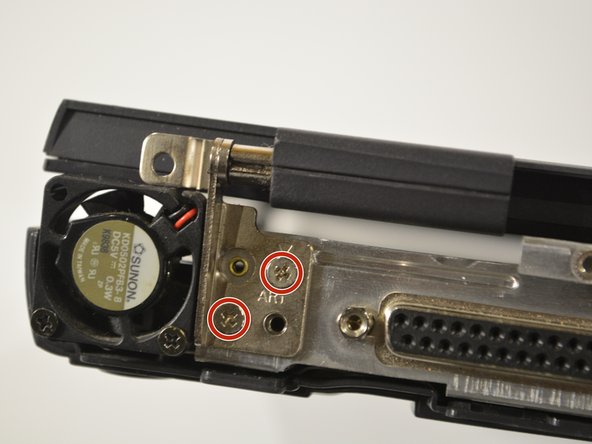
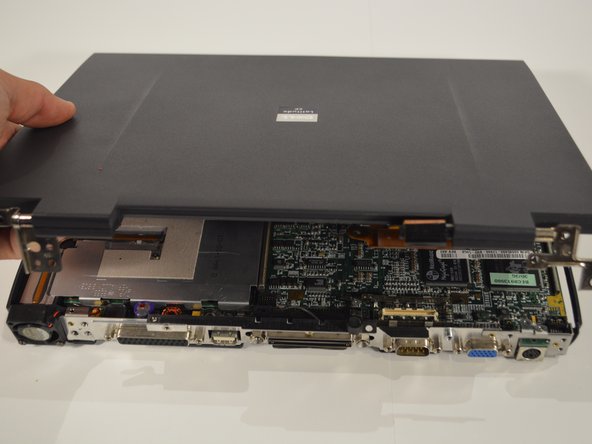
    • There are two screws on each hinge, remove them and take off the whole LCD assembly.

    • Four 5mm screws

  20. Dell Latitude CP Teardown, Fan: étape 20, image 1 de 2 Dell Latitude CP Teardown, Fan: étape 20, image 2 de 2
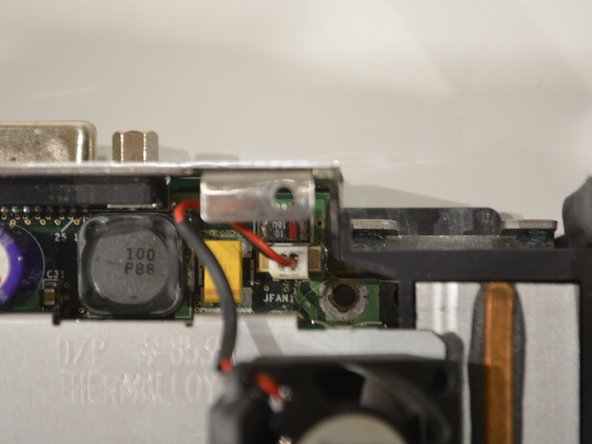
    • Remove the two screws holding the fan in, and disconnect the fan connector using your fingernails.

    • Two 12mm Screws

  21. Dell Latitude CP Teardown, Thermal Cooling Assembly: étape 21, image 1 de 2 Dell Latitude CP Teardown, Thermal Cooling Assembly: étape 21, image 2 de 2
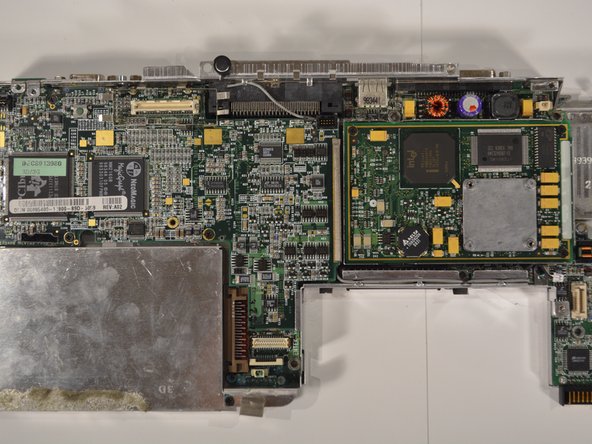
    • Remove the two screws holding in the thermal cooling assembly, and lift it out, along with the plastic air flow duct that is around the heat sink.

    • Two 2.5mm Screws

  22. Dell Latitude CP Teardown, System Board Assembly: étape 22, image 1 de 3 Dell Latitude CP Teardown, System Board Assembly: étape 22, image 2 de 3 Dell Latitude CP Teardown, System Board Assembly: étape 22, image 3 de 3
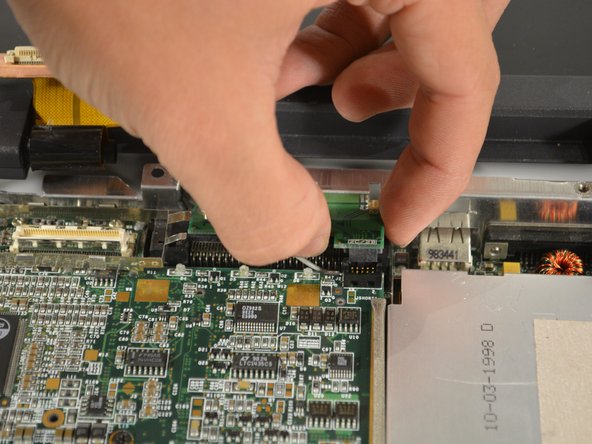
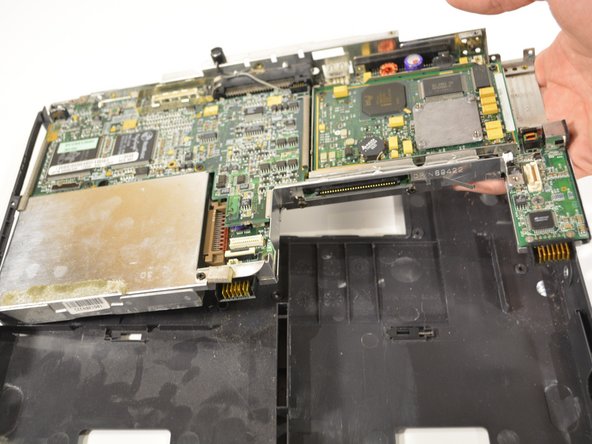
    • There is one screw to remove, then you can lift out the entire board by lifting up on the right side, and pulling out to the right.

    • One 5mm Screw

Pièces jointes

Aidan Mann

Membre depuis le 09/26/19

325 Réputation

1 tutoriel rédigé

0 commentaires

Ajouter un commentaire

Nombre de vues :

Dernières 24 heures : 0

7 derniers jours : 2

30 derniers jours : 26

Total : 1,141