Aller au contenu principal

Ce dont vous avez besoin

Cette vue éclatée n'est pas un tutoriel de réparation. Pour réparer votre Digital Caliper, utilisez notre manuel de réparation.

  1. Digital Caliper Teardown, Remove Battery: étape 1, image 1 de 2 Digital Caliper Teardown, Remove Battery: étape 1, image 2 de 2
    • Slide the battery compartment open.

    • Pull out the battery.

  2. Digital Caliper Teardown, Screw out the housing: étape 2, image 1 de 2 Digital Caliper Teardown, Screw out the housing: étape 2, image 2 de 2
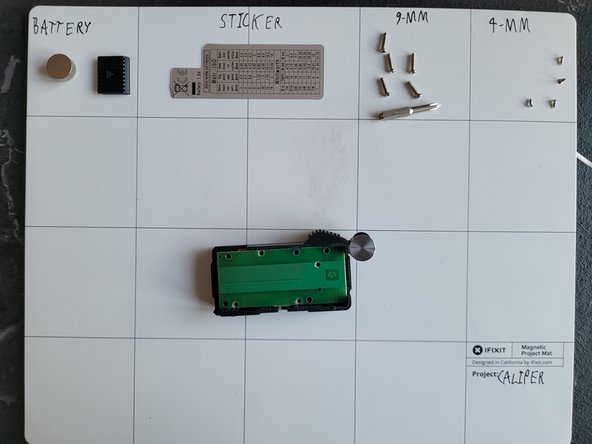
    • Remove the sticker and place it on a clean sticker-friendly surface.

    • Screw out the 9-mm screws using the J0 Bit.

  3. Digital Caliper Teardown, Housing dissasembly: étape 3, image 1 de 3 Digital Caliper Teardown, Housing dissasembly: étape 3, image 2 de 3 Digital Caliper Teardown, Housing dissasembly: étape 3, image 3 de 3
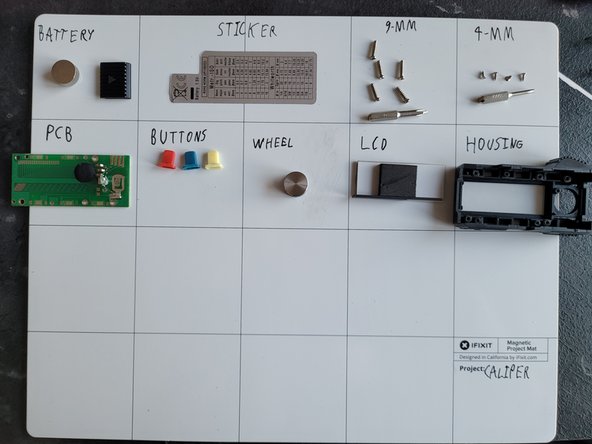
    • Screw out the 4-mm screws holding the PCB in place. Use the J000 bit.

    • Now take out all the parts from the housing.

  4. Digital Caliper Teardown, Body: étape 4, image 1 de 2 Digital Caliper Teardown, Body: étape 4, image 2 de 2
    • Remove the right/bottom 6mm screws.

    • Then the last 2 and the tightener screws. So you can pull it apart.

Sebastian

Membre depuis le 12/02/21

532 Réputation

2 tutoriels rédigés

0 commentaires

Ajouter un commentaire

Nombre de vues :

Dernières 24 heures : 8

7 derniers jours : 23

30 derniers jours : 107

Total : 1,477