Aller au contenu principal

Ce dont vous avez besoin

Cette vue éclatée n'est pas un tutoriel de réparation. Pour réparer votre DirectPower DE157 Cordless drill-screwdriver, utilisez notre manuel de réparation.

  1. DirectPower DE157 Cordless drill-screwdriver Teardown, DirectPower DE157 Cordless drill-screwdriver Teardown: étape 1, image 1 de 2 DirectPower DE157 Cordless drill-screwdriver Teardown, DirectPower DE157 Cordless drill-screwdriver Teardown: étape 1, image 2 de 2
    • The driver kit.

    • This is a more-or-less no-name cordless screwdriver/drill kit, but its construction more or less matches most of these devices.

  2. DirectPower DE157 Cordless drill-screwdriver Teardown: étape 2, image 1 de 3 DirectPower DE157 Cordless drill-screwdriver Teardown: étape 2, image 2 de 3 DirectPower DE157 Cordless drill-screwdriver Teardown: étape 2, image 3 de 3
    • The charger consist of a standard wallwart, output 14.4V 350mA, along with a little block (weighing nothing at all) to connect to one of the battery packs.

    • To open the charger block, unscrew three #1 Phillips screws.

  3. DirectPower DE157 Cordless drill-screwdriver Teardown: étape 3, image 1 de 2 DirectPower DE157 Cordless drill-screwdriver Teardown: étape 3, image 2 de 2
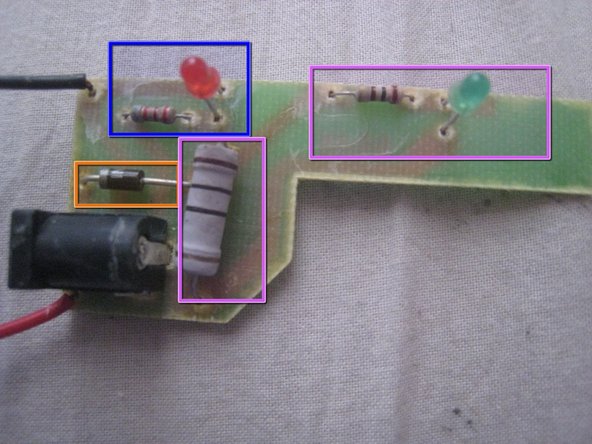
    • After lifting off the bottom, the PCB is exposed, and you can lift it out of the charger block along with the battery contacts. On the PCB we find:

    • A diode to protect against reverse current.

    • An LED and resistor that is on so long as the box gets power.

    • A giant 10 Ohm resistor to slightly current-limit the charge, and across which the green led and resistor are placed -- this will therefore light up as long as significant current passes to the battery.

  4. DirectPower DE157 Cordless drill-screwdriver Teardown: étape 4, image 1 de 2 DirectPower DE157 Cordless drill-screwdriver Teardown: étape 4, image 2 de 2
    • One of the two battery packs. To open, remove

    • Four #1 Phillips screws.

  5. DirectPower DE157 Cordless drill-screwdriver Teardown: étape 5, image 1 de 3 DirectPower DE157 Cordless drill-screwdriver Teardown: étape 5, image 2 de 3 DirectPower DE157 Cordless drill-screwdriver Teardown: étape 5, image 3 de 3
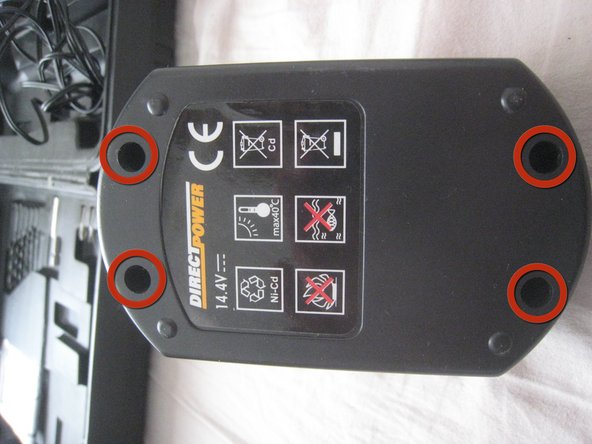
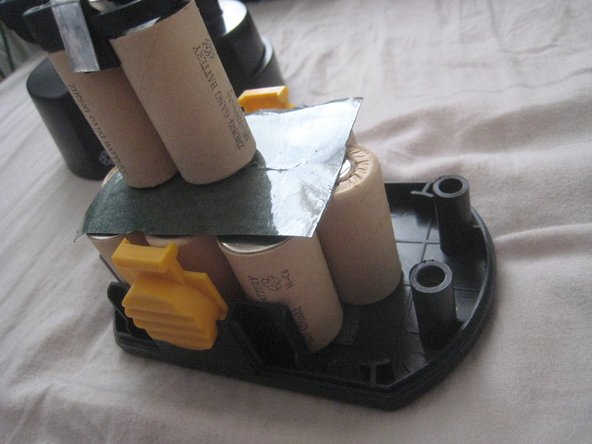
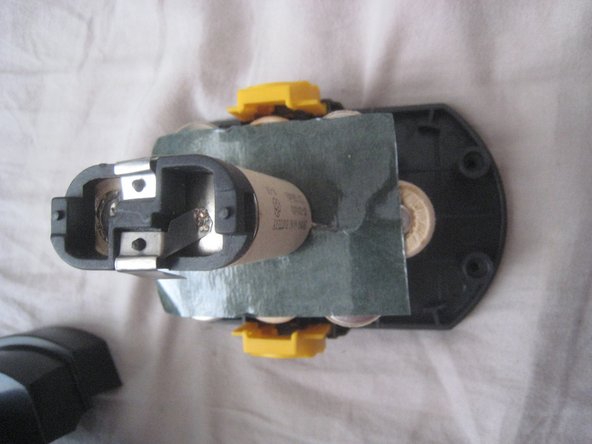
    • After removing the screws, turn right side up again and lift off the plastic cover, exposing 12 NiCd cells in a string, and nothing else.

    • Note that there is room on the right side for three more cells, which would make a 18V battery pack.

    • Especially cheaper makers usually have versions for 7.2V/9.6V/12/14.4/18V all using the same plastic, just more or less cells and a different motor.

Jasper

Membre depuis le 05/02/10

136 Réputation

1 tutoriel rédigé

0 commentaires

Ajouter un commentaire

Nombre de vues :

Dernières 24 heures : 0

7 derniers jours : 0

30 derniers jours : 0

Total : 2,436