Aller au contenu principal

Ce dont vous avez besoin

Cette vue éclatée n'est pas un tutoriel de réparation. Pour réparer votre Galaxy S23 Plus, utilisez notre manuel de réparation.

  1. Galaxy S23+ Teardown, Remove the SIM Tray: étape 1, image 1 de 2 Galaxy S23+ Teardown, Remove the SIM Tray: étape 1, image 2 de 2
    • Using a SIM card eject tool remove the SIM holder and the SIM if present.

  2. Galaxy S23+ Teardown, Remove the rear glass: étape 2, image 1 de 2 Galaxy S23+ Teardown, Remove the rear glass: étape 2, image 2 de 2
    • Using an opening pick and a suction handle, cut the underlying adhesive and remove the rear glass.

  3. Galaxy S23+ Teardown: étape 3, image 1 de 1
    • Remove the 20 #00 Phillips screws.

  4. Galaxy S23+ Teardown, Remove wireless charging: étape 4, image 1 de 1
    • Unplug the two connectors connecting the wireless charging to the motherboard and remove it.

  5. Galaxy S23+ Teardown, Remove the speaker: étape 5, image 1 de 1
    • Disconnect the 5 connectors.

    • Remove the speaker.

  6. Galaxy S23+ Teardown, Unplug the front camera.: étape 6, image 1 de 1
    • Unplug the connector of the front camera.

    • REMOVE THE FRONT CAMERA ONLY IF NEEDED BECAUSE IT'S GLUED TO THE SCREEN!

  7. Galaxy S23+ Teardown, Remove the Motherboard: étape 7, image 1 de 3 Galaxy S23+ Teardown, Remove the Motherboard: étape 7, image 2 de 3 Galaxy S23+ Teardown, Remove the Motherboard: étape 7, image 3 de 3
    • Using an opening pick pull up the motherboard.

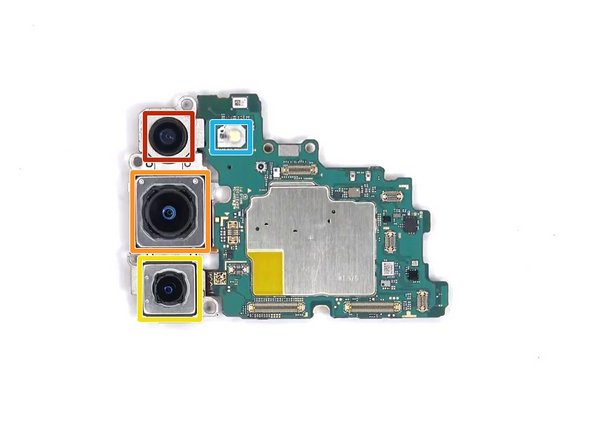
    • 12 MP Ultrawide camera.

    • 50 MP wide camera with OIS.

    • 10 MP telephoto lens camera with OIS.

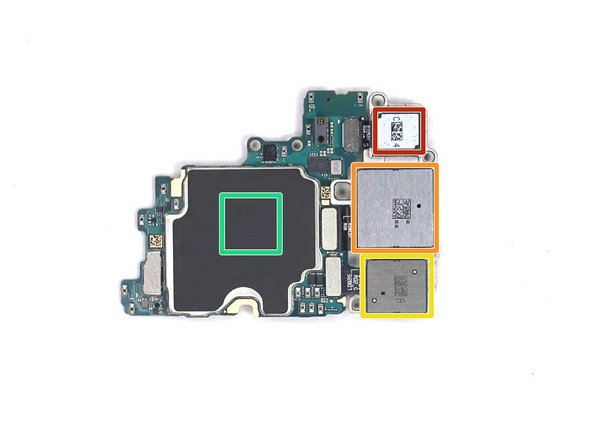
    • Under this there's the RAM with the CPU.

    • A secondary microphone and the flash light.

  8. Galaxy S23+ Teardown, Remove the Charging Board: étape 8, image 1 de 2 Galaxy S23+ Teardown, Remove the Charging Board: étape 8, image 2 de 2
    • Use an opening pick to remove the speaker assembly.

    • Unplug the three connectors.

    • Unscrew the three Phillips #00 screws that secure the charging board and remove it.

  9. Galaxy S23+ Teardown, Remove the battery: étape 9, image 1 de 2 Galaxy S23+ Teardown, Remove the battery: étape 9, image 2 de 2
    • Using the tab provided, remove the battery.

Andrea Alfani

Membre depuis le 04/20/22

7 777 Réputation

5 tutoriels rédigés

Équipe

Kid fixers Membre de l'équipe Kid fixers

Community

172 membres

229 tutoriels rédigés

0 commentaires

Ajouter un commentaire

Nombre de vues :

Dernières 24 heures : 4

7 derniers jours : 37

30 derniers jours : 173

Total : 2,995