Aller au contenu principal

Ce dont vous avez besoin

Cette vue éclatée n'est pas un tutoriel de réparation. Pour réparer votre Galaxy S23, utilisez notre manuel de réparation.

  1. Galaxy S23 Teardown, Remove the rear glass: étape 1, image 1 de 2 Galaxy S23 Teardown, Remove the rear glass: étape 1, image 2 de 2
    • First we heat the rear glass of the phone to melt all the adhesive that glues the glass to the rest of the phone. We can do it either with an iOpener or with a heat gun.

    • Now with a flat object or with an opening pick we cut the remaining adhesive by inserting it between the glass and the rest of the phone and passing it along the entire edge.

    • Now we can raise the back panel and we're done.

  2. Galaxy S23 Teardown, Remove the Wireless Coil and NFC Antenna: étape 2, image 1 de 1
    • Unscrew the 6 Phillips #00 screws that weld the wireless charging base and the NFC antenna.

    • Disconnect the connector connecting the two antennas and remove everything.

  3. Galaxy S23 Teardown, Disconnect the Battery: étape 3, image 1 de 1
    • Unplug the connector to disconnect the battery.

  4. Galaxy S23 Teardown, Unscrew the Charging Board: étape 4, image 1 de 1
    • Remove the 7 #00 Phillips screws that secure the charging board to the rest of the phone.

  5. Galaxy S23 Teardown, Remove the SIM: étape 5, image 1 de 1
    • Use a fine tool to pull out the SIM tray.

  6. Galaxy S23 Teardown, Remove the connectors: étape 6, image 1 de 1
    • Remove the connector with your fingers or a flat tool.

    • Remove the connector with your fingers or a flat tool.

    • Remove the connector with your fingers or a flat tool.

  7. Galaxy S23 Teardown, Remove the Front Camera Protector: étape 7, image 1 de 1
    • Unscrew the 5 Phillips #00 screws that secure the front camera protector to the rest of the phone.

  8. Galaxy S23 Teardown, Remove the Front Camera: étape 8, image 1 de 1
    • Unplug the front camera connector and remove it.

  9. Galaxy S23 Teardown, Remove the Rear Cameras: étape 9, image 1 de 2 Galaxy S23 Teardown, Remove the Rear Cameras: étape 9, image 2 de 2
    • Remove the two Phillips #00 screws that secure the rear camera protector to the rest of the phone.

    • Unplug the three connectors of the three rear cameras and remove them.

  10. Galaxy S23 Teardown, Remove the Charging Board: étape 10, image 1 de 1
    • Unscrew the three Phillips #00 screws that secure the docking board to the rest of the phone and then remove it.

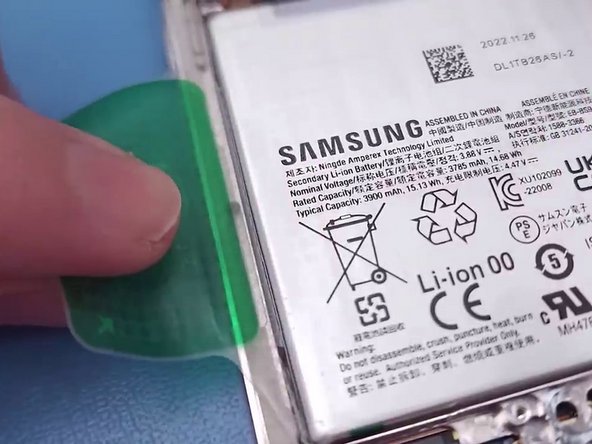
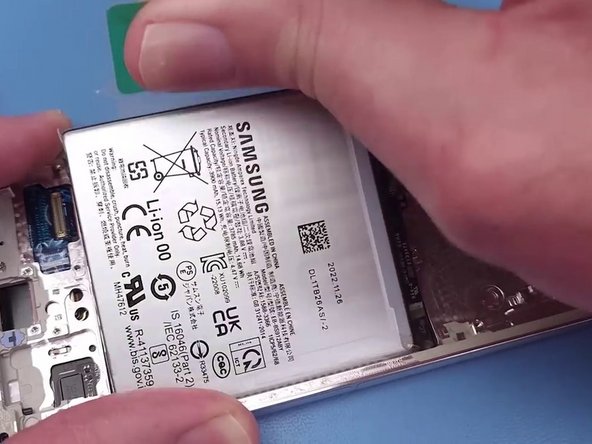
  11. Galaxy S23 Teardown, Remove the battery: étape 11, image 1 de 3 Galaxy S23 Teardown, Remove the battery: étape 11, image 2 de 3 Galaxy S23 Teardown, Remove the battery: étape 11, image 3 de 3
    • With the special tab, detach it and pull to facilitate the removal of the battery.

  12. Galaxy S23 Teardown, Remove add-ons: étape 12, image 1 de 2 Galaxy S23 Teardown, Remove add-ons: étape 12, image 2 de 2
    • Remove the volume keys motherboard and them too.

  13. Galaxy S23 Teardown, Finished: étape 13, image 1 de 1
    • We have completely disassembled the new Samsung Galaxy S23.

Andrea Alfani

Membre depuis le 04/20/22

7 697 Réputation

5 tutoriels rédigés

Équipe

Kid fixers Membre de l'équipe Kid fixers

Community

164 membres

300 tutoriels rédigés

8 commentaires

You beat iFixit to the punch! Nice work. They're really falling behind. Good thing we have awesome users like yourself! Thank you!

Damien Lobb - Réponse

Thank You so much i really appreciate it thank you so much i really appreciate it

Andrea Alfani -

Will the microphone get damage if I wrongly insert the sim pin into it?

apple terr - Réponse

Mine did not damaged, all works properly)

Ramil Salakhetdinov -

Ajouter un commentaire

Nombre de vues :

Dernières 24 heures : 55

7 derniers jours : 403

30 derniers jours : 1,660

Total : 28,846