Aller au contenu principal

Cette vue éclatée n'est pas un tutoriel de réparation. Pour réparer votre Geek Bar Pulse, utilisez notre manuel de réparation.

  1. Geek Bar Pulse Teardown, Loosen clear cover: étape 1, image 1 de 1
    • Use a wood chisel (~1 inch) along the seam to break loose the clear cover. The cover snaps into place but may be lightly glued.

  2. Geek Bar Pulse Teardown, Pull out the internals: étape 2, image 1 de 1
    • Pull out the internals. You will need to push in the on/off switch at bottom of unit to get the insides to slide out.

  3. Geek Bar Pulse Teardown, Detach tank: étape 3, image 1 de 1
    • Detach tank. Note location of wiring if you are going to reassemble unit.

  4. Geek Bar Pulse Teardown, Disassemble tank: étape 4, image 1 de 3 Geek Bar Pulse Teardown, Disassemble tank: étape 4, image 2 de 3 Geek Bar Pulse Teardown, Disassemble tank: étape 4, image 3 de 3
    • Pull off top of tank.

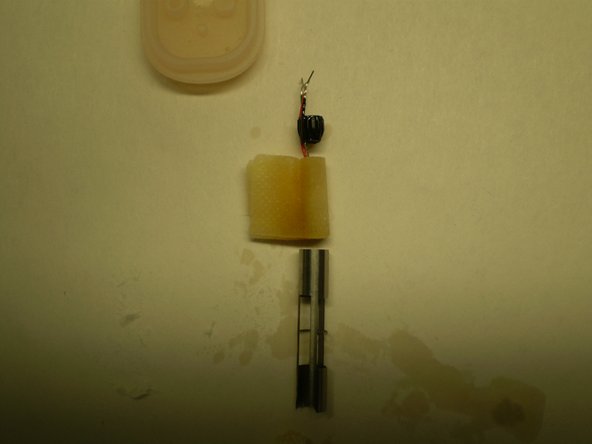
    • Pull heater unit out of steel sleeve.

    • Remove flat wick from heater

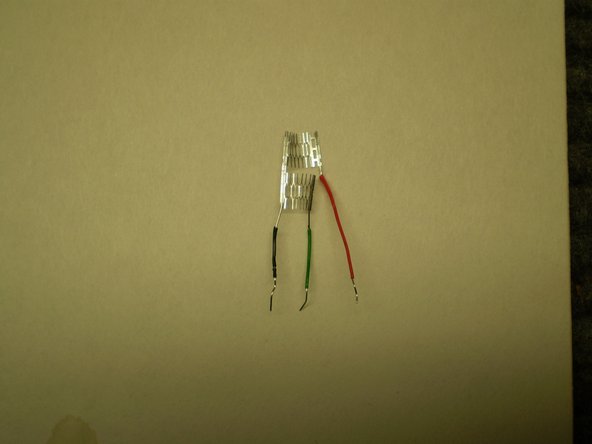
    • Observe basket style heater unit. Resistance readings: blk-grn: 1.1 ohms; blk-red: 1.1 ohms; red-grn: 2.2 ohms

  5. Geek Bar Pulse Teardown, Disassemble electronics: étape 5, image 1 de 2 Geek Bar Pulse Teardown, Disassemble electronics: étape 5, image 2 de 2
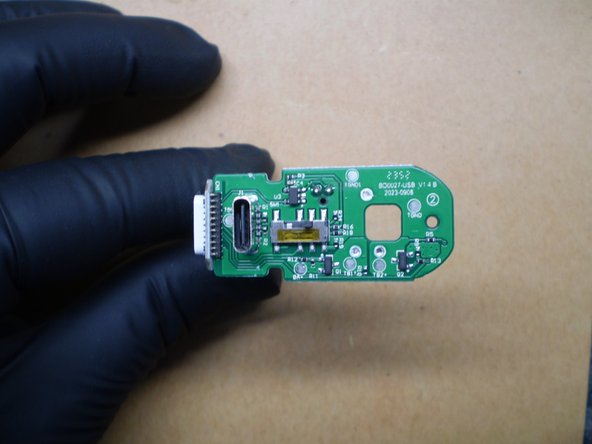
    • Unsnap the circuit board from the L-shaped plastic holder.

    • View board.

  6. Geek Bar Pulse Teardown, Remove lip piece: étape 6, image 1 de 1
    • The lip piece can be unsnapped from the inside, pulled out from the top and disassembled as shown.

Greg

Membre depuis le 08/23/20

239 Réputation

2 tutoriels rédigés

0 commentaires

Ajouter un commentaire

Nombre de vues :

Dernières 24 heures : 20

7 derniers jours : 153

30 derniers jours : 356

Total : 400