Aller au contenu principal

Ce dont vous avez besoin

Cette vue éclatée n'est pas un tutoriel de réparation. Pour réparer votre Kyocera Oystr, utilisez notre manuel de réparation.

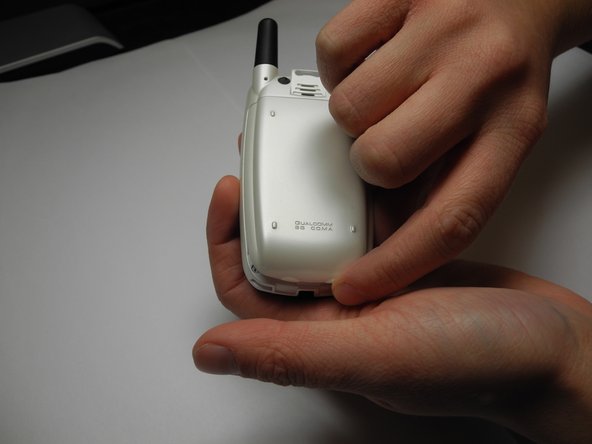
  1. Kyocera Oystr Teardown, Removing the battery: étape 1, image 1 de 3 Kyocera Oystr Teardown, Removing the battery: étape 1, image 2 de 3 Kyocera Oystr Teardown, Removing the battery: étape 1, image 3 de 3
    • Make sure the phone is turned off before disassembly.

    • Lift the bottom of the phone's back cover upwards, revealing the phone's battery housing.

    • Remove the battery from the casing. This is simply a precaution.

    • Turn the phone over, so that the front side is facing you. Open the device in preparation for the next step.

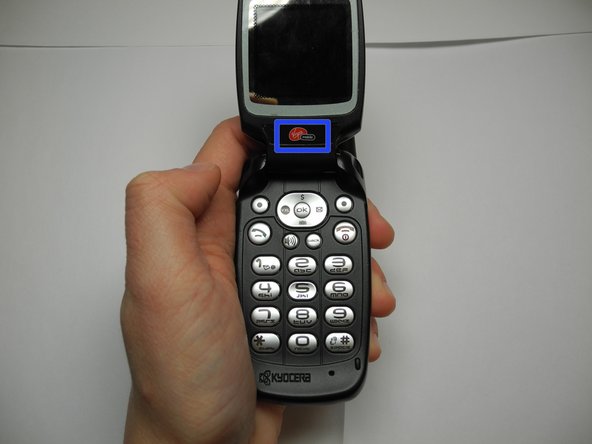
  2. Kyocera Oystr Teardown, Removing screws from screen: étape 2, image 1 de 3 Kyocera Oystr Teardown, Removing screws from screen: étape 2, image 2 de 3 Kyocera Oystr Teardown, Removing screws from screen: étape 2, image 3 de 3
    • Peel the Virgin Mobile sticker off of the phone's screen to reveal two screws beneath it.

    • Use the Tri-Wing Y0 screwdriver to remove the two screws from the screen.

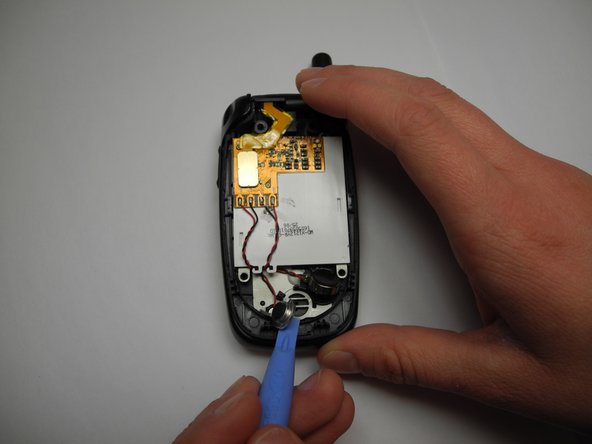
  3. Kyocera Oystr Teardown, Exposing internal components: étape 3, image 1 de 3 Kyocera Oystr Teardown, Exposing internal components: étape 3, image 2 de 3 Kyocera Oystr Teardown, Exposing internal components: étape 3, image 3 de 3
    • Lift the plastic cover of the phone screen upwards with a plastic opening tool.

    • Remove the two screws from the metal cover.

  4. Kyocera Oystr Teardown, Removing metal cover: étape 4, image 1 de 1
    • Remove the metal cover by lifting up and away from the device.

  5. Kyocera Oystr Teardown, Screen removal: étape 5, image 1 de 3 Kyocera Oystr Teardown, Screen removal: étape 5, image 2 de 3 Kyocera Oystr Teardown, Screen removal: étape 5, image 3 de 3
    • Use the plastic opening tool to pry the phone's speakers up and away from the device. These speakers will dangle by the wires attached to the board.

    • Use your fingernail to detach the ribbon connecting the board to the screen.

    • Remove the damaged screen from the device.

  6. Kyocera Oystr Teardown, Completing the repair: étape 6, image 1 de 1
    • Follow these steps in reverse order to replace Kyocera Oystr’s screen.

David

Membre depuis le 10/04/11

24 Réputation

2 tutoriels rédigés

Équipe

UW Stout, Team 5-7, Zhou Fall 2011 Membre de l'équipe UW Stout, Team 5-7, Zhou Fall 2011

UWSTOUT-ZHOU-F11S5G7

2 membres

4 tutoriels rédigés

2 commentaires

where do I get a new screen?

LARS ANDERSEN - Réponse

where do i get a new screen

thanks

LARS ANDERSEN - Réponse

Ajouter un commentaire

Nombre de vues :

Dernières 24 heures : 0

7 derniers jours : 1

30 derniers jours : 6

Total : 4,320