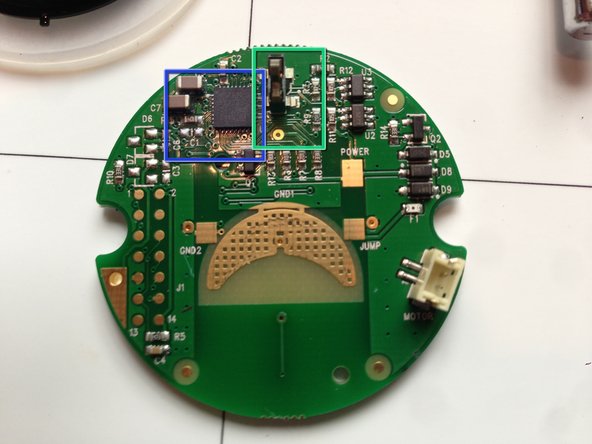
Aller au contenu principal

Ce dont vous avez besoin

Cette vue éclatée n'est pas un tutoriel de réparation. Pour réparer votre MasterLock 1500EDBX, utilisez notre manuel de réparation.

  1. MasterLock 1500EDBX Teardown, MasterLock 1500EDBX Teardown: étape 1, image 1 de 2 MasterLock 1500EDBX Teardown, MasterLock 1500EDBX Teardown: étape 1, image 2 de 2
    • A new lock, now with more buttons and less spinning!

  2. MasterLock 1500EDBX Teardown: étape 2, image 1 de 3 MasterLock 1500EDBX Teardown: étape 2, image 2 de 3 MasterLock 1500EDBX Teardown: étape 2, image 3 de 3
    • Prepare lock for spuding

    • Insert spudger and tap with hammer

    • Gently pry until the lock opens

  3. MasterLock 1500EDBX Teardown: étape 3, image 1 de 2 MasterLock 1500EDBX Teardown: étape 3, image 2 de 2
    • Open lock with mechanisms exposed

    • Vibrator

    • Locking mechanisms

  4. MasterLock 1500EDBX Teardown: étape 4, image 1 de 3 MasterLock 1500EDBX Teardown: étape 4, image 2 de 3 MasterLock 1500EDBX Teardown: étape 4, image 3 de 3
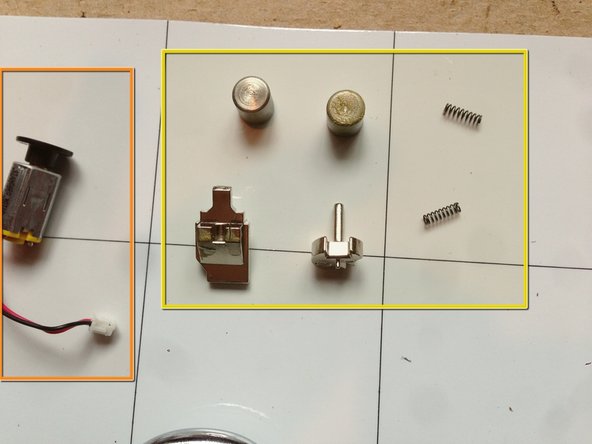
    • Complete internals of the lock

    • Main processing board

    • MSP430 based!

    • Servo that interacts with locking components

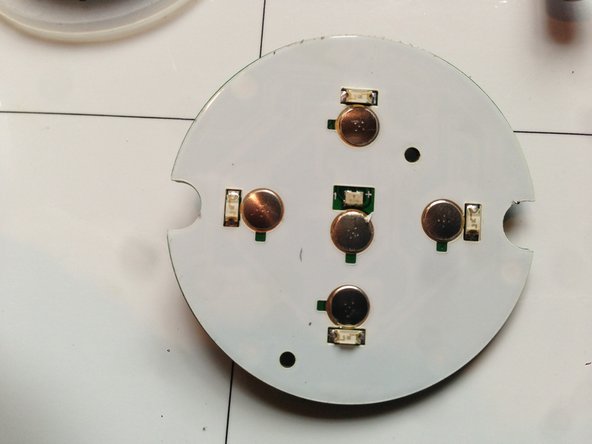
    • Reactive buttons and LEDs

  5. MasterLock 1500EDBX Teardown: étape 5, image 1 de 1
    • The real lock PCB

    • As a note, this device does not function as a lock once torn down. Repairability = 0.

Josh Thomas

Membre depuis le 12/29/12

951 Réputation

3 tutoriels rédigés

0 commentaires

Ajouter un commentaire

Nombre de vues :

Dernières 24 heures : 0

7 derniers jours : 4

30 derniers jours : 12

Total : 3,233