Aller au contenu principal

Ce dont vous avez besoin

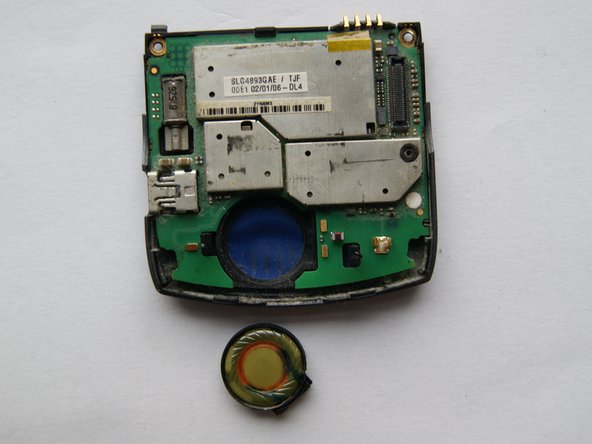
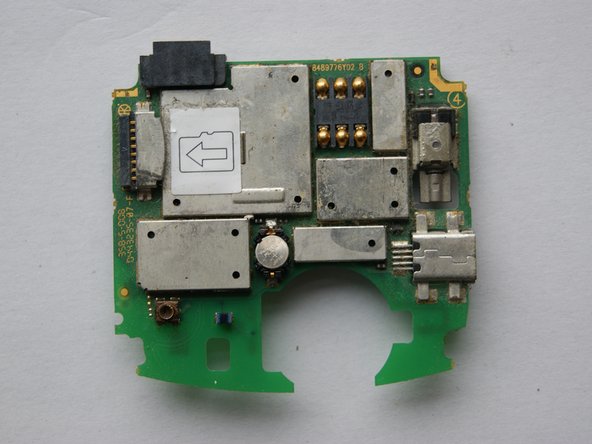
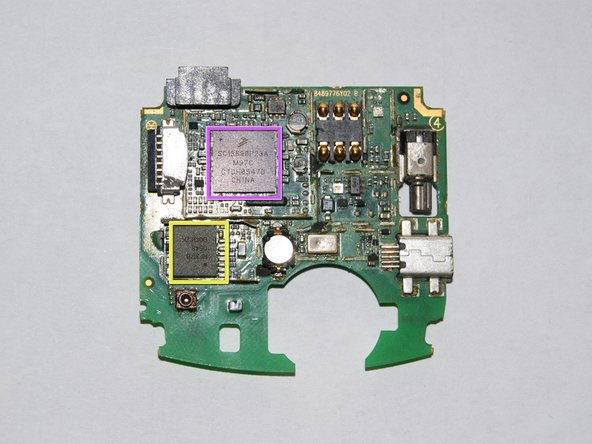
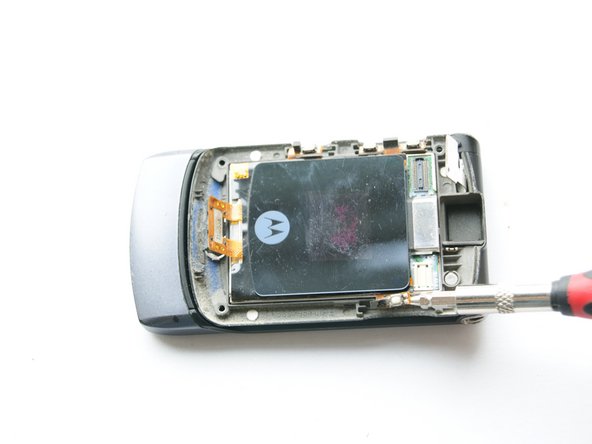
Cette vue éclatée n'est pas un tutoriel de réparation. Pour réparer votre Motorola V3i, utilisez notre manuel de réparation.

  1. Motorola V3i Teardown, Motorola V3i Teardown: étape 1, image 1 de 1
    • A Motorola V3i!

    • Let's see what's inside...

  2. Motorola V3i Teardown: étape 2, image 1 de 2 Motorola V3i Teardown: étape 2, image 2 de 2
    • Let's turn it and take out the battery.

    • Remove these two screws.

  3. Motorola V3i Teardown: étape 3, image 1 de 1
    • Now you can easily flip the cover.

  4. Motorola V3i Teardown: étape 4, image 1 de 3 Motorola V3i Teardown: étape 4, image 2 de 3 Motorola V3i Teardown: étape 4, image 3 de 3
    • You need to detach these two plastic lashes from the surounding.

    • Now you can remove this transparent plastic case.

    • Now you can take out the speaker.

    • The metal thing on the end of the picture is the antenna.

  5. Motorola V3i Teardown: étape 5, image 1 de 2 Motorola V3i Teardown: étape 5, image 2 de 2
    • So, that's the board.

    • Vibra motor.

    • Mini USB.

    • Connector for the antenna.

    • After I took these EMI shields away it looks like this...

  6. Motorola V3i Teardown: étape 6, image 1 de 2 Motorola V3i Teardown: étape 6, image 2 de 2
    • Bluetooth chip by Broadcom.

    • 32Mbit PSRAM by STMicroelectronics.

    • Baseband Processor (Main Processor) by Freescale (90nm structure).

    • RF Transmitter by RF Micro Devices.

    • Battery controller by Freescale.

    • Quad-Band Transmit Module by RF Micro Devices.

  7. Motorola V3i Teardown: étape 7, image 1 de 2 Motorola V3i Teardown: étape 7, image 2 de 2
    • Remove these 4 rubbers.

    • Then remove the four torx screws.

    • You can easily lose these rubbers. (That's why I have only 3 of them...)

  8. Motorola V3i Teardown: étape 8, image 1 de 2 Motorola V3i Teardown: étape 8, image 2 de 2
    • Filp the device and you can remove the top housing.

    • Remove the three buttons on the side of the device.

    • Remove the connector to the mainboard...

    • and to the camera.

  9. Motorola V3i Teardown: étape 9, image 1 de 1
    • Remove the camera by lifting it up.

    • That's a 1,3Mpix camera!

  10. Motorola V3i Teardown: étape 10, image 1 de 3 Motorola V3i Teardown: étape 10, image 2 de 3 Motorola V3i Teardown: étape 10, image 3 de 3
    • Lift up the speaker.

    • Then, that's a tricky part,remove all the buttons around the screen housing. Caution: They are really thin and they easily break!

    • After you did this tricky part you can lift the top of the phone away.

  11. Motorola V3i Teardown: étape 11, image 1 de 2 Motorola V3i Teardown: étape 11, image 2 de 2
    • Now lift up the front glass from the top of the device. It's held with adhesives.

    • After you did this it should look like this.

  12. Motorola V3i Teardown: étape 12, image 1 de 2 Motorola V3i Teardown: étape 12, image 2 de 2
    • Around the screen there are some lashes. Detach them to release the screen of the metal housing.

    • Then you can lift the metal housing up.

  13. Motorola V3i Teardown: étape 13, image 1 de 2 Motorola V3i Teardown: étape 13, image 2 de 2
    • The metal housing is very fragile!

    • an ATI Imageon chip! It's a mulitmedia co-processor, it is used for record video and mobile gaming. It support up to a 2Mpix camera.

  14. Motorola V3i Teardown: étape 14, image 1 de 2 Motorola V3i Teardown: étape 14, image 2 de 2
    • Again there's a small lash on the botton of the front screen housing.

    • After that you can remove the front screen with the PCB.

  15. Motorola V3i Teardown: étape 15, image 1 de 1
    • The front screen.

    • Yes, my front screen has some dead pixels. (They are pink?!)

  16. Motorola V3i Teardown: étape 16, image 1 de 1
    • Thank you for reading my Teardown:)

Peddy

Membre depuis le 12/28/09

159 Réputation

2 tutoriels rédigés

Un commentaire

Have an old V3i and the screen has just stopped working - have a feeling it’s become disconnected, is it work tearing it down like this to try fix the problem? Want it still to work after though

Iala - Réponse

Ajouter un commentaire

Nombre de vues :

Dernières 24 heures : 0

7 derniers jours : 5

30 derniers jours : 38

Total : 24,620