Introduction
In honor of the 20th anniversary of its release, I decided to give the Nintendo 64 a proper teardown, and take a look inside the legendary console that defined a generation.
Ce dont vous avez besoin
-
-
The Nintendo 64 was Nintendo's third home console. Released in 1996 for the US and Japan, the N64 boasted 64-bit graphics for the most realistic gaming experience ever made to date. The N64 was co-developed by Nintendo and Silicon Graphics.
-
NEC VR4300 64-bit CPU, running at 93.75 Mhz
-
Silicon Graphics Reality Coprocessor (RCP) GPU
-
576i (720×576) Composite output
-
Support for up to 4 players
-
-
-
-
Flip the console upright, and the top cover just comes right off.
-
Remove the 10 crossbar screws using a Philips #2 screwdriver.
-
Take out the 2 screws holding in one piece of the expansion slot shield, also with a Philips #2
-
The 2 black screws and the one at the bottom left of the expansion slot shield are easily removed with a Philips #2.
-
Finally, remove the 2 long screws from the 2 ends of the slot with a Philips #0.
-
-
-
The heatsink crossbar comes right off, which gives us access to the motherboard shield.
-
The 5 screws on the two sides of the shield are swiftly removed with a Philips #2
-
The 2 screws on each side of the Game Pak slot are quite long, and are removed with a Philips #2.
-
With that, the shield slips right off, letting us gaze at the Nintendo 64's source of power.
-
-
-
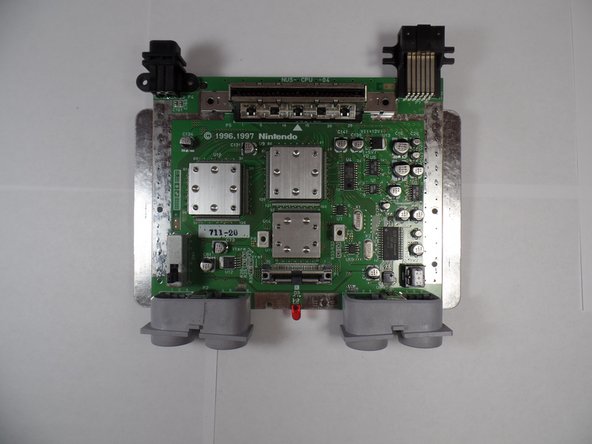
On the motherboard are 3 very pronounced steel blocks, which indicates that the important stuff is under there. But before removing these, it's best to take the motherboard out of the bottom case.
-
In order to remove the motherboard, unscrew the 4 Philips #2 screws from the two back I/O ports, allowing extraction of the motherboard.
-


4 commentaires
Thank you, this tear down was real helpful. I was able to open up an N64 and clean the corrosion between some pins that kept it from turning on. :D
I’m really glad to hear that! The N64 has always had a special place in my heart since it was the first home console I ever had.
dang one in the same Christian same first console my second was the PlayStation 1(actually just called PlayStation) and the PlayStation 2 my third the Nintendo GameCube then handheld consoles the game boy, game boy advanced, and Nintendo 2dsi , and the Nintendo 3-DS, and then fourth the non-handheld online consoles the Wii and the Xbox 360.
This in my opinion was one of the best consoles. The Zelda games for the 64 were amazing. Love the idea I can fix mine.