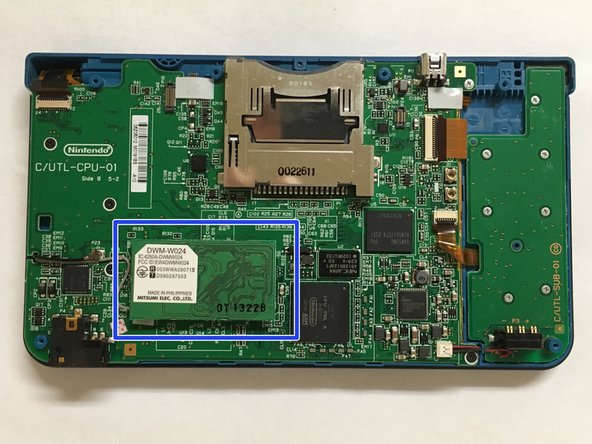
Aller au contenu principal
Tutoriel Archivé
Ce tutoriel est conservé uniquement à des fins de suivis historiques. Utilisez la version actuelle du tutoriel pour effectuer votre réparation.

Ce dont vous avez besoin

Cette vue éclatée n'est pas un tutoriel de réparation. Pour réparer votre Nintendo DSi XL, utilisez notre manuel de réparation.

  1. Nintendo DSi XL Wi-fi Board Teardown, Nintendo DSi XL Wi-fi Board Teardown: étape 1, image 1 de 2 Nintendo DSi XL Wi-fi Board Teardown, Nintendo DSi XL Wi-fi Board Teardown: étape 1, image 2 de 2
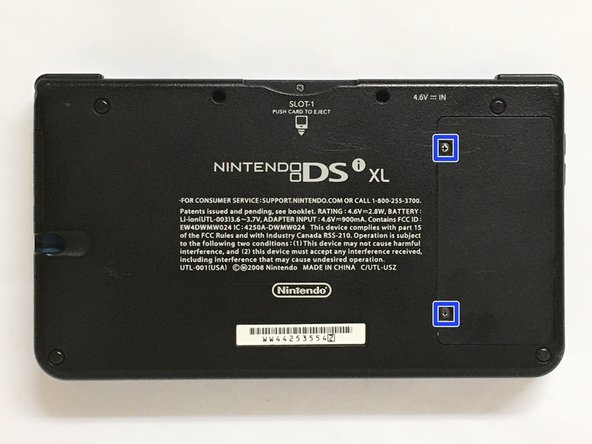
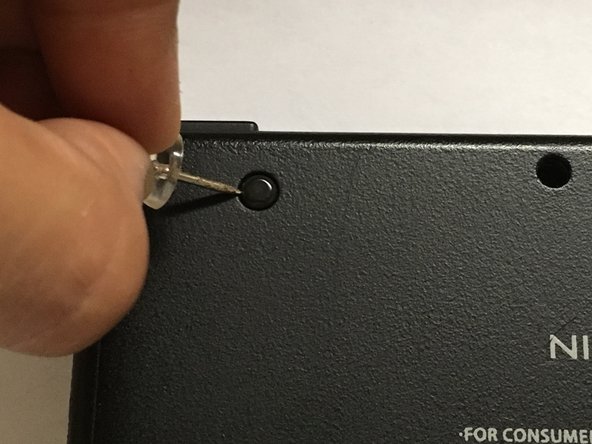
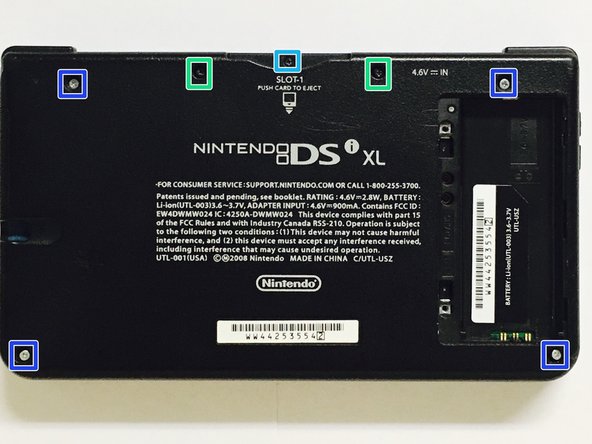
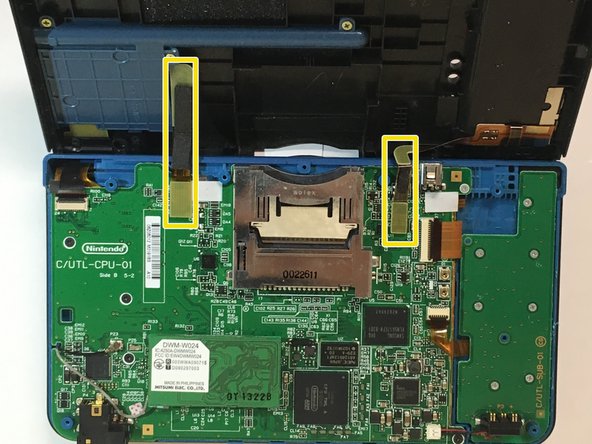
    • Remove the two screws at the place of the battery under the Dsi Xl.

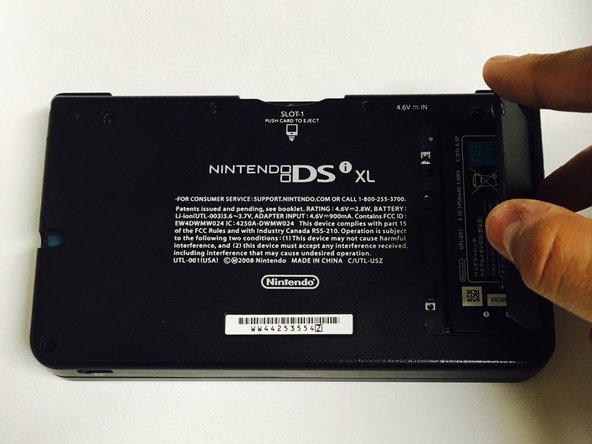
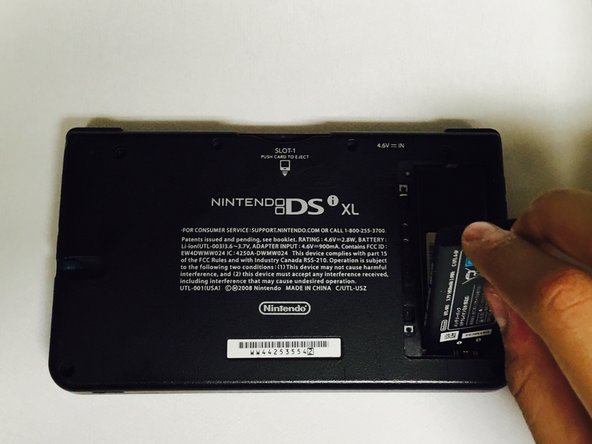
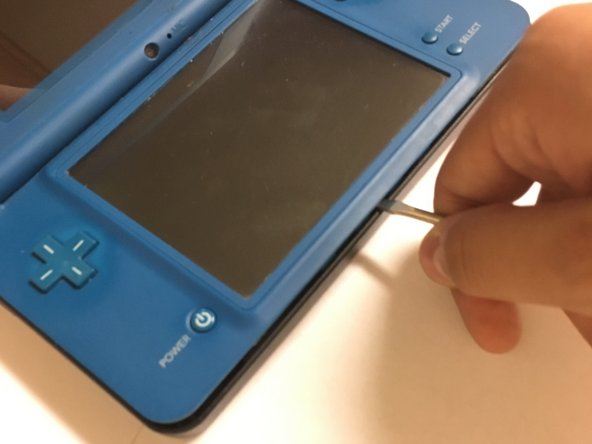
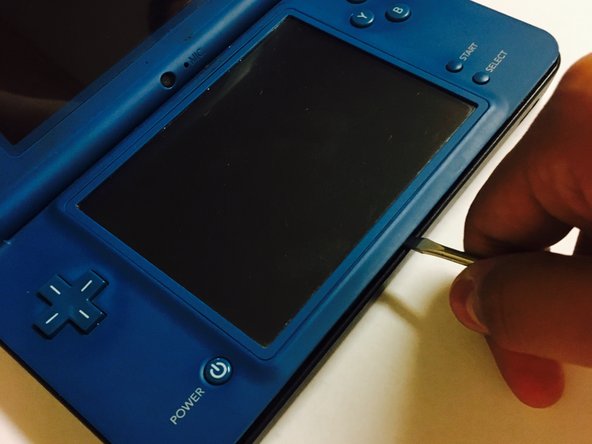
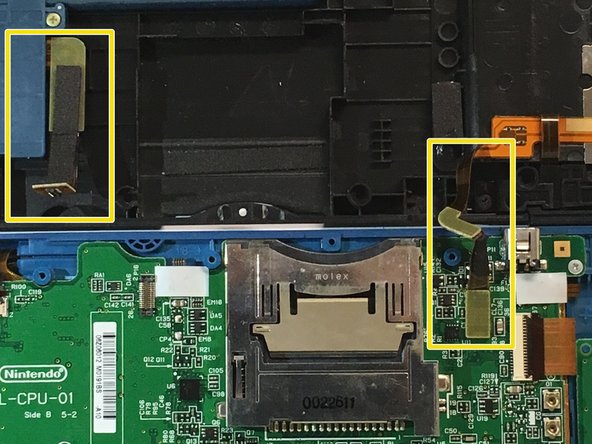
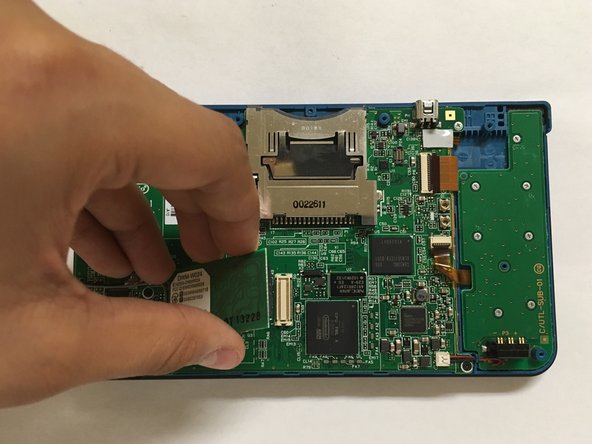
    • Lift the protector from the battery.

  2. Nintendo DSi XL Wi-fi Board Teardown: étape 2, image 1 de 1
    • Take the battery off the Dsi Xl.

  3. Nintendo DSi XL Wi-fi Board Teardown: étape 3, image 1 de 2 Nintendo DSi XL Wi-fi Board Teardown: étape 3, image 2 de 2
    • Remove the rubber blocking the screws on the Dsi Xl with a push pin don't hesitate about it.

  4. Nintendo DSi XL Wi-fi Board Teardown: étape 4, image 1 de 1
    • Remove the presenting screws in order to take the bottom part of the Dsi Xl off.

    • x4 silver 5.33m screws

    • x2 black 5.3m screws

    • x1 black 2.5m screw

  5. Nintendo DSi XL Wi-fi Board Teardown: étape 5, image 1 de 2 Nintendo DSi XL Wi-fi Board Teardown: étape 5, image 2 de 2
    • Turn the Dsi Xl over & open it.

    • Insert the spudger (or anything similar to it)between the uper and lower part of the case at the left or right corner it doesn't really matter.

    • Keep on doing the same around the case.

  6. Nintendo DSi XL Wi-fi Board Teardown: étape 6, image 1 de 3 Nintendo DSi XL Wi-fi Board Teardown: étape 6, image 2 de 3 Nintendo DSi XL Wi-fi Board Teardown: étape 6, image 3 de 3
    • Using your hands unconnect the connectors from both sides ( you can always put them back.)

  7. Nintendo DSi XL Wi-fi Board Teardown: étape 7, image 1 de 3 Nintendo DSi XL Wi-fi Board Teardown: étape 7, image 2 de 3 Nintendo DSi XL Wi-fi Board Teardown: étape 7, image 3 de 3
    • Lift the Wi-fi Board off of its socket.(you can also put this back.)

  8. Nintendo DSi XL Wi-fi Board Teardown: étape 8, image 1 de 2 Nintendo DSi XL Wi-fi Board Teardown: étape 8, image 2 de 2
    • Pull off the Wi-fi cable from The Wi-fi Board.

    • Careful while this process in which this peice can easily rip off.

    • Finally you've finished and you have Dsi Xl Wi-fi Board:)

Gabriel Rendon

Membre depuis le 10/24/16

151 Réputation

1 tutoriel rédigé

0 commentaires

Ajouter un commentaire

Nombre de vues :

Dernières 24 heures : 0

7 derniers jours : 1

30 derniers jours : 1

Total : 239