Aller au contenu principal

Ce dont vous avez besoin

Cette vue éclatée n'est pas un tutoriel de réparation. Pour réparer votre Palm IIIc, utilisez notre manuel de réparation.

  1. Palm IIIc Teardown, Removing broken LCD screen: étape 1, image 1 de 1
    • Keep track of all pieces removed from the device.

    • Gently pull off the device cover. The cover snaps on and off easily where the cover attaches to the Palm IIIc device

  2. Palm IIIc Teardown: étape 2, image 1 de 1
    • Using a Phillips head screwdriver, take out the four screws on the back of the device. You may have to pull them out with your hands once they are unscrewed.

    • There will be two long screws and two short screws. The long screws come from the top of the device, and the short screws come from the bottom of the device.

  3. Palm IIIc Teardown, Remove the Front and Back Covers: étape 3, image 1 de 1
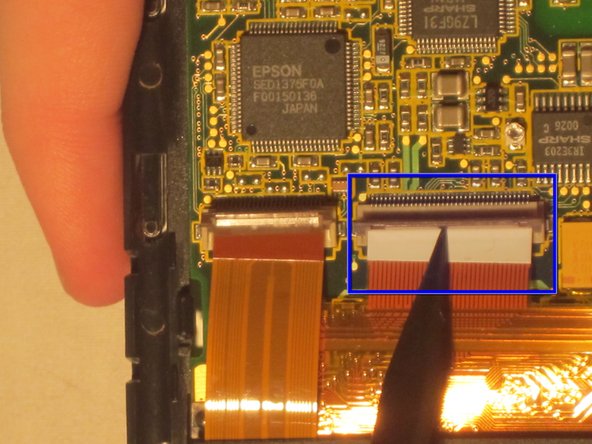
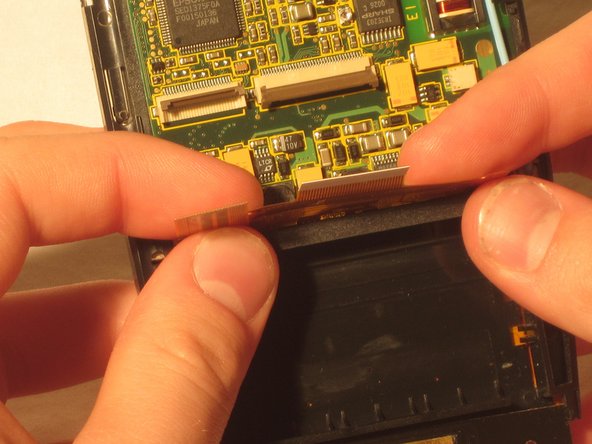
    • Using a spudger, carefully pry open the front and back covers along the side seam.

    • A small sensor cover will fall out when the front and back covers are removed. Keep track of it.

  4. Palm IIIc Teardown, Palm IIIc Teardown: étape 4, image 1 de 1
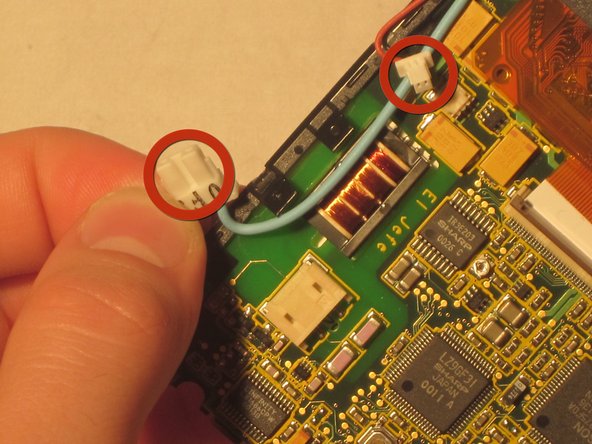
    • Unhook battery cable from the motherboard and remove the battery.

  5. Palm IIIc Teardown: étape 5, image 1 de 2 Palm IIIc Teardown: étape 5, image 2 de 2
    • Behind the motherboard remove the brown plastic clamp and remove the front screen cover.

  6. Palm IIIc Teardown: étape 6, image 1 de 2 Palm IIIc Teardown: étape 6, image 2 de 2
    • Unhook the blue and red screen cables.

  7. Palm IIIc Teardown: étape 7, image 1 de 3 Palm IIIc Teardown: étape 7, image 2 de 3 Palm IIIc Teardown: étape 7, image 3 de 3
    • Pop out the other two brown plastic clamps to release the screen and buttons.

  8. Palm IIIc Teardown: étape 8, image 1 de 1
    • The black clips on the edges of the device (see picture) must be unclipped to remove the motherboard.

    • Carefully remove the motherboard from the device, pulling the motherboard away from the clips.

  9. Palm IIIc Teardown: étape 9, image 1 de 1
    • Pull the screen out from the front.

  10. Palm IIIc Teardown: étape 10, image 1 de 1
    • The object is now fully disassembled.

Paulina Trujillo

Membre depuis le 04/07/11

265 Réputation

8 tutoriels rédigés

Équipe

Cal Poly, Team 20-69, Walters Spring 2011 Membre de l'équipe Cal Poly, Team 20-69, Walters Spring 2011

CPSU-WALTERS-S11S20G69

5 membres

8 tutoriels rédigés

0 commentaires

Ajouter un commentaire

Nombre de vues :

Dernières 24 heures : 0

7 derniers jours : 0

30 derniers jours : 2

Total : 4,897