Aller au contenu principal

Cette vue éclatée n'est pas un tutoriel de réparation. Pour réparer votre PlayStation 3, utilisez notre manuel de réparation.

  1. PlayStation 3 Fat 4 USB Teardown, The console case: étape 1, image 1 de 1
    • Inserir instruções aqui.

  2. PlayStation 3 Fat 4 USB Teardown, Remove the screws: étape 2, image 1 de 3 PlayStation 3 Fat 4 USB Teardown, Remove the screws: étape 2, image 2 de 3 PlayStation 3 Fat 4 USB Teardown, Remove the screws: étape 2, image 3 de 3
    • Inserir instruções aqui.

  3. PlayStation 3 Fat 4 USB Teardown, Open the console: étape 3, image 1 de 1
    • Inserir instruções aqui.

  4. PlayStation 3 Fat 4 USB Teardown, Remove the power supply: étape 4, image 1 de 2 PlayStation 3 Fat 4 USB Teardown, Remove the power supply: étape 4, image 2 de 2
    • Inserir instruções aqui.

  5. PlayStation 3 Fat 4 USB Teardown, The power supply board: étape 5, image 1 de 3 PlayStation 3 Fat 4 USB Teardown, The power supply board: étape 5, image 2 de 3 PlayStation 3 Fat 4 USB Teardown, The power supply board: étape 5, image 3 de 3
    • Inserir instruções aqui.

  6. PlayStation 3 Fat 4 USB Teardown, Remove the bluray driver: étape 6, image 1 de 3 PlayStation 3 Fat 4 USB Teardown, Remove the bluray driver: étape 6, image 2 de 3 PlayStation 3 Fat 4 USB Teardown, Remove the bluray driver: étape 6, image 3 de 3
    • Be very careful to do not break the data connector because it is very fragile.

  7. PlayStation 3 Fat 4 USB Teardown, Remove the SD card slot: étape 7, image 1 de 3 PlayStation 3 Fat 4 USB Teardown, Remove the SD card slot: étape 7, image 2 de 3 PlayStation 3 Fat 4 USB Teardown, Remove the SD card slot: étape 7, image 3 de 3
    • Inserir instruções aqui.

  8. PlayStation 3 Fat 4 USB Teardown, Remove the bluethoot board: étape 8, image 1 de 2 PlayStation 3 Fat 4 USB Teardown, Remove the bluethoot board: étape 8, image 2 de 2
    • Inserir instruções aqui.

  9. PlayStation 3 Fat 4 USB Teardown, Remove the intire motherboard from the case: étape 9, image 1 de 3 PlayStation 3 Fat 4 USB Teardown, Remove the intire motherboard from the case: étape 9, image 2 de 3 PlayStation 3 Fat 4 USB Teardown, Remove the intire motherboard from the case: étape 9, image 3 de 3
    • Inserir instruções aqui.

  10. PlayStation 3 Fat 4 USB Teardown, Remove the coller and mother board shield: étape 10, image 1 de 3 PlayStation 3 Fat 4 USB Teardown, Remove the coller and mother board shield: étape 10, image 2 de 3 PlayStation 3 Fat 4 USB Teardown, Remove the coller and mother board shield: étape 10, image 3 de 3
    • Inserir instruções aqui.

  11. PlayStation 3 Fat 4 USB Teardown, The cooler specifications and ball bearing: étape 11, image 1 de 2 PlayStation 3 Fat 4 USB Teardown, The cooler specifications and ball bearing: étape 11, image 2 de 2
    • Inserir instruções aqui.

  12. PlayStation 3 Fat 4 USB Teardown, The gigantic and unefective cooler: étape 12, image 1 de 3 PlayStation 3 Fat 4 USB Teardown, The gigantic and unefective cooler: étape 12, image 2 de 3 PlayStation 3 Fat 4 USB Teardown, The gigantic and unefective cooler: étape 12, image 3 de 3
    • Inserir instruções aqui.

  13. PlayStation 3 Fat 4 USB Teardown, The mother board: étape 13, image 1 de 3 PlayStation 3 Fat 4 USB Teardown, The mother board: étape 13, image 2 de 3 PlayStation 3 Fat 4 USB Teardown, The mother board: étape 13, image 3 de 3
    • Inserir instruções aqui.

  14. PlayStation 3 Fat 4 USB Teardown, The processors: étape 14, image 1 de 3 PlayStation 3 Fat 4 USB Teardown, The processors: étape 14, image 2 de 3 PlayStation 3 Fat 4 USB Teardown, The processors: étape 14, image 3 de 3
    • Inserir instruções aqui.

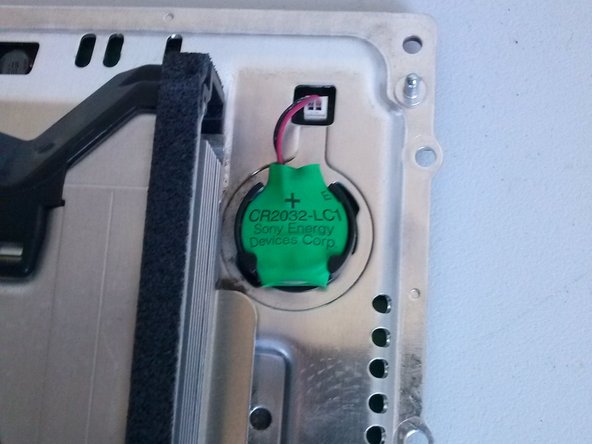
  15. PlayStation 3 Fat 4 USB Teardown, Some details: étape 15, image 1 de 3 PlayStation 3 Fat 4 USB Teardown, Some details: étape 15, image 2 de 3 PlayStation 3 Fat 4 USB Teardown, Some details: étape 15, image 3 de 3
    • Bios battery

    • Power on and eject sensors

    • Main AC power conector and ground conector

  16. PlayStation 3 Fat 4 USB Teardown, Some details: étape 16, image 1 de 2 PlayStation 3 Fat 4 USB Teardown, Some details: étape 16, image 2 de 2
    • HD Slot

    • HD case screw

0 commentaires

Ajouter un commentaire

Nombre de vues :

Dernières 24 heures : 14

7 derniers jours : 85

30 derniers jours : 339

Total : 5,278