Aller au contenu principal

Ce dont vous avez besoin

Cette vue éclatée n'est pas un tutoriel de réparation. Pour réparer votre Ratchet, utilisez notre manuel de réparation.

  1. Ratchet Teardown, Duralast Ratchet Teardown: étape 1, image 1 de 1
    • Complete ratchet

  2. Ratchet Teardown, Removing the flexible head: étape 2, image 1 de 1
    • The head is attached with a machine screw and a split washer to make the head hold its position.

    • If the head slips sometimes the helical split washer can be bent out or replaced.

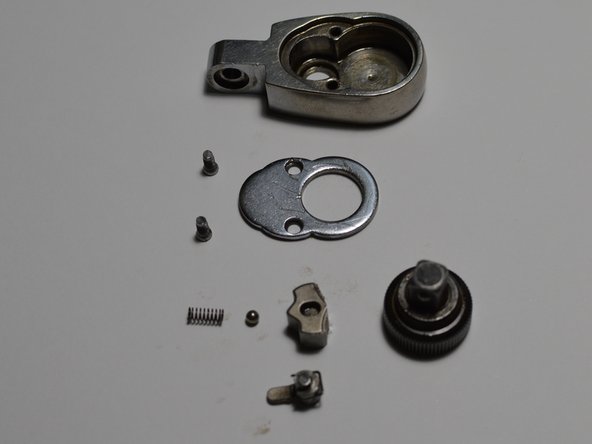
  3. Ratchet Teardown, Removing the ratcheting mechanism: étape 3, image 1 de 2 Ratchet Teardown, Removing the ratcheting mechanism: étape 3, image 2 de 2
    • Head opened and in pieces

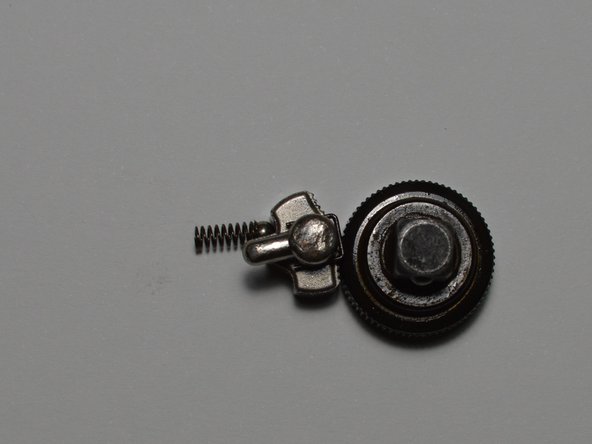
  4. Ratchet Teardown, Ratcheting Mechanism: étape 4, image 1 de 3 Ratchet Teardown, Ratcheting Mechanism: étape 4, image 2 de 3 Ratchet Teardown, Ratcheting Mechanism: étape 4, image 3 de 3
    • Ratcheting mechanism in various views

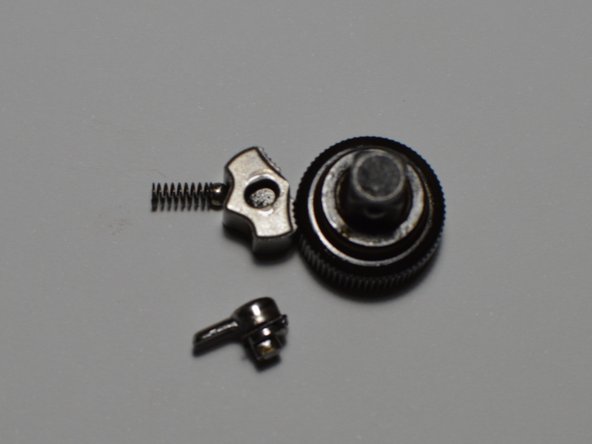
  5. Ratchet Teardown, Ratchet Mechanism Parts: étape 5, image 1 de 1
    • Spring: holds ball bearing against pawl

    • Ball bearing: holds pawl in its position

    • Pawl: allows gear/tang to rotate in only one direction

    • Gear/Tang: part that rotates

    • Lever: selects the pawls position and what direction the gear turns

  6. Ratchet Teardown, Complete Ratchet: étape 6, image 1 de 1
    • All parts laid out

Wieli

Membre depuis le 01/08/23

1 707 Réputation

12 tutoriels rédigés

0 commentaires

Ajouter un commentaire

Nombre de vues :

Dernières 24 heures : 1

7 derniers jours : 10

30 derniers jours : 38

Total : 648