Aller au contenu principal

Ce dont vous avez besoin

Cette vue éclatée n'est pas un tutoriel de réparation. Pour réparer votre Roku RC-MC1 remote, utilisez notre manuel de réparation.

  1. Roku RC-MC1 remote Teardown, Introducing the RC-MC1: étape 1, image 1 de 3 Roku RC-MC1 remote Teardown, Introducing the RC-MC1: étape 1, image 2 de 3 Roku RC-MC1 remote Teardown, Introducing the RC-MC1: étape 1, image 3 de 3
    • Nice design, simple and feature packed!

  2. Roku RC-MC1 remote Teardown, No screws, No problem... The Jimmy will get us in.: étape 2, image 1 de 2 Roku RC-MC1 remote Teardown, No screws, No problem... The Jimmy will get us in.: étape 2, image 2 de 2
    • Starting from either side of the micro USB charging port, insert the tip of the Jimmy and pry back and pop the first locking clip.

    • After that it's like most other plastic shell devices in which you just work your way around, releasing the clips.

  3. Roku RC-MC1 remote Teardown, Battery and microphone connector removal.: étape 3, image 1 de 2 Roku RC-MC1 remote Teardown, Battery and microphone connector removal.: étape 3, image 2 de 2
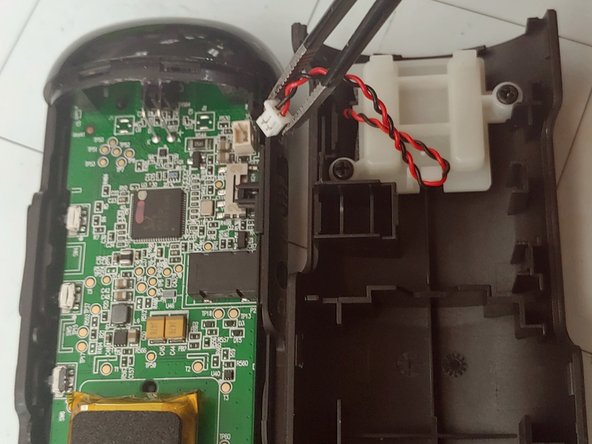
    • Remove the battery connector from the board. Then to free the back cover to remove the microphone connector.

  4. Roku RC-MC1 remote Teardown, Almost there!: étape 4, image 1 de 2 Roku RC-MC1 remote Teardown, Almost there!: étape 4, image 2 de 2
    • To release the circuit board you'll need to gently pry off the IR window.

  5. Roku RC-MC1 remote Teardown, Now it looks like my volume buttons have cracked.: étape 5, image 1 de 1
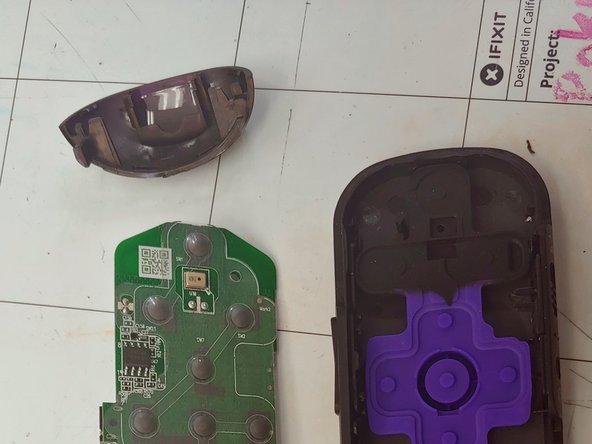
    • Now to find some replacement switches!

    • Surface mount soldering will be required to change these little buggers.

    • They can be salvaged from another circuit board.

RadioShack

Membre depuis le 12/14/17

190 Réputation

1 tutoriel rédigé

0 commentaires

Ajouter un commentaire

Nombre de vues :

Dernières 24 heures : 4

7 derniers jours : 43

30 derniers jours : 164

Total : 3,788