Aller au contenu principal

Ce dont vous avez besoin

Cette vue éclatée n'est pas un tutoriel de réparation. Pour réparer votre Samsung Galaxy Centura, utilisez notre manuel de réparation.

  1. Samsung Galaxy Centura Teardown, Samsung Galaxy Centura Teardown: étape 1, image 1 de 2 Samsung Galaxy Centura Teardown, Samsung Galaxy Centura Teardown: étape 1, image 2 de 2
    • This is the Samsung Galaxy Centura, a low-end smartphone made for the Tracfone/Straight Talk networks.

  2. Samsung Galaxy Centura Teardown: étape 2, image 1 de 2 Samsung Galaxy Centura Teardown: étape 2, image 2 de 2
    • Remove the battery, and then remove the 7 Phillips screws surrounding the outer casing.

  3. Samsung Galaxy Centura Teardown: étape 3, image 1 de 3 Samsung Galaxy Centura Teardown: étape 3, image 2 de 3 Samsung Galaxy Centura Teardown: étape 3, image 3 de 3
    • Pop the 4 clips on both the left and right side of the phone. The outer casing should come right off by pulling.

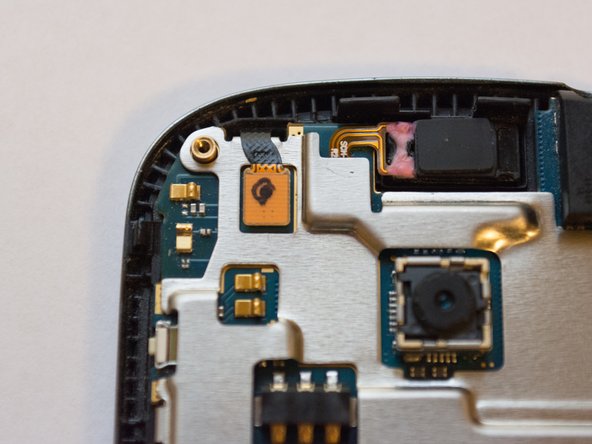
    • This antenna can be removed with a spudger or screwdriver.

    • This is the speaker assembly (with more antennas!)

  4. Samsung Galaxy Centura Teardown: étape 4, image 1 de 3 Samsung Galaxy Centura Teardown: étape 4, image 2 de 3 Samsung Galaxy Centura Teardown: étape 4, image 3 de 3
    • Disconnect the two flex cables with a spudger or plastic opening tool.

  5. Samsung Galaxy Centura Teardown: étape 5, image 1 de 1
    • Now the display assembly is free.

  6. Samsung Galaxy Centura Teardown: étape 6, image 1 de 1
    • Remove the 3 Phillips screws on the back of the motherboard to remove the EMI shielding.

  7. Samsung Galaxy Centura Teardown: étape 7, image 1 de 1
    • Congrats! You've torn down the Samsung Galaxy Centura.

Brooks Robinson

Membre depuis le 07/16/15

127 Réputation

1 tutoriel rédigé

0 commentaires

Ajouter un commentaire

Nombre de vues :

Dernières 24 heures : 0

7 derniers jours : 4

30 derniers jours : 11

Total : 2,382