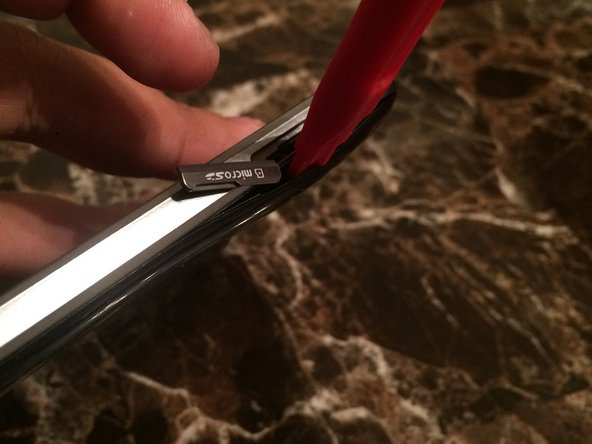
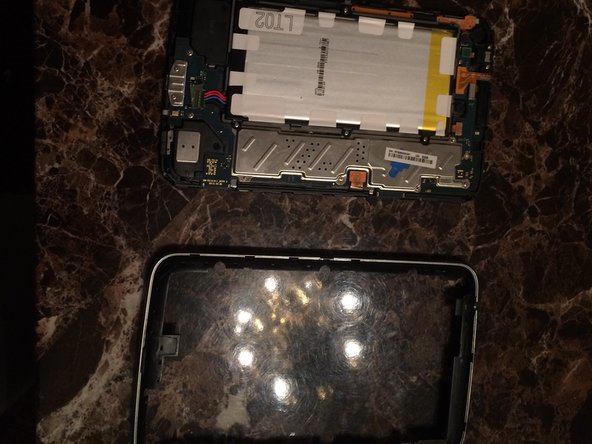
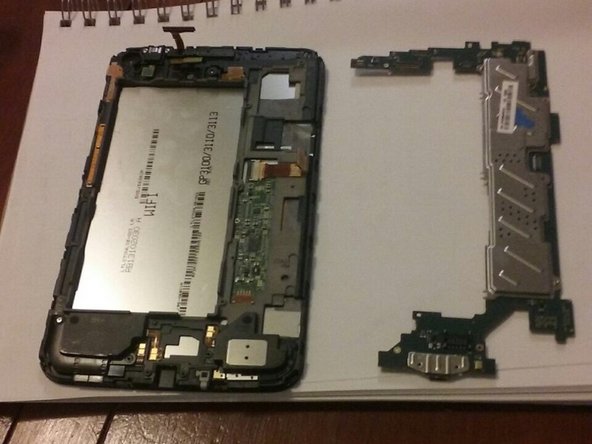
Aller au contenu principal

Cette vue éclatée est en cours – Recharger périodiquement pour voir les derniers changements !

Ce dont vous avez besoin

  1. Samsung Galaxy Tab 3 7.0 Teardown, Samsung Galaxy Tab 3 7.0 Teardown: étape 1, image 1 de 1
    • Make sure u have the essential tools need(Bought this toolkit for 10 dollars at walmart)

  2. Samsung Galaxy Tab 3 7.0 Teardown: étape 2, image 1 de 1
    • Take off the micro sd card cover

  3. Samsung Galaxy Tab 3 7.0 Teardown: étape 3, image 1 de 2 Samsung Galaxy Tab 3 7.0 Teardown: étape 3, image 2 de 2
    • use the mini pry bar

    • Shove into the lining between the back and the micro sd card.

    • When its wedged push it all around the sides

  4. Samsung Galaxy Tab 3 7.0 Teardown: étape 4, image 1 de 1
    • Now that the back is out you are looking at the insides

  5. Samsung Galaxy Tab 3 7.0 Teardown: étape 5, image 1 de 2 Samsung Galaxy Tab 3 7.0 Teardown: étape 5, image 2 de 2
    • turn it around then insert the mini pry bar between the screen and the silver border and slide the pry bar around all sides until the silver lining is poping off the screen

  6. Samsung Galaxy Tab 3 7.0 Teardown: étape 6, image 1 de 1
    • unscrew the screws around the battery

  7. Samsung Galaxy Tab 3 7.0 Teardown: étape 7, image 1 de 1
    • Now take out the connectors (all of them)

  8. Samsung Galaxy Tab 3 7.0 Teardown: étape 8, image 1 de 2 Samsung Galaxy Tab 3 7.0 Teardown: étape 8, image 2 de 2
    • now take out all the screws that are all around the edges

    • than you will see that you can just pull the motherboard out

Jordan Senimanora

Membre depuis le 11/01/16

321 Réputation

1 tutoriel rédigé

0 commentaires

Ajouter un commentaire

Nombre de vues :

Dernières 24 heures : 0

7 derniers jours : 0

30 derniers jours : 1

Total : 2,208