Aller au contenu principal

Ce dont vous avez besoin

Cette vue éclatée n'est pas un tutoriel de réparation. Pour réparer votre Samsung Intensity, utilisez notre manuel de réparation.

  1. Samsung Intensity Teardown, Samsung Intensity Teardown: étape 1, image 1 de 1
    • Remove the back cover and battery

  2. Samsung Intensity Teardown: étape 2, image 1 de 1
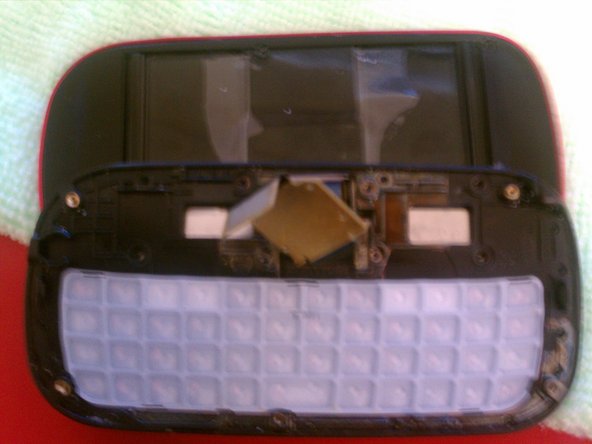
    • Remove the 8 screw that hold the back cover down.

    • Carefully pry back piece off

    • Start at the bottom and work toward the top.

  3. Samsung Intensity Teardown: étape 3, image 1 de 1
    • Use the ipod opening tool to disconnect the Connector

  4. Samsung Intensity Teardown: étape 4, image 1 de 2 Samsung Intensity Teardown: étape 4, image 2 de 2
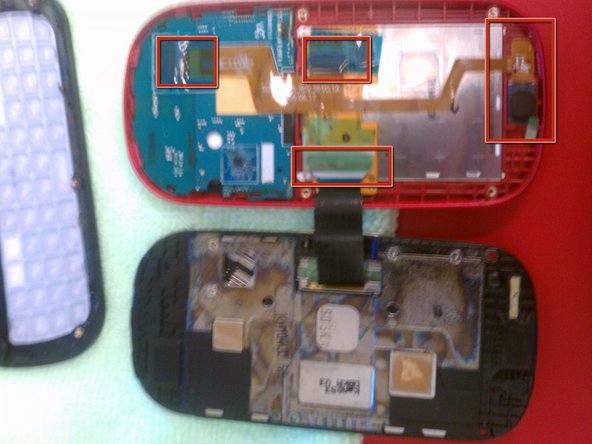
    • Carefully remove the main board

    • Make sure to not tear the microphone cable, pry it from the phone carefully

  5. Samsung Intensity Teardown: étape 5, image 1 de 2 Samsung Intensity Teardown: étape 5, image 2 de 2
    • Remove the 6 screws

    • Pry to ribbon cable assembly loose from the slider

    • Its glued on the left and right side

  6. Samsung Intensity Teardown: étape 6, image 1 de 1
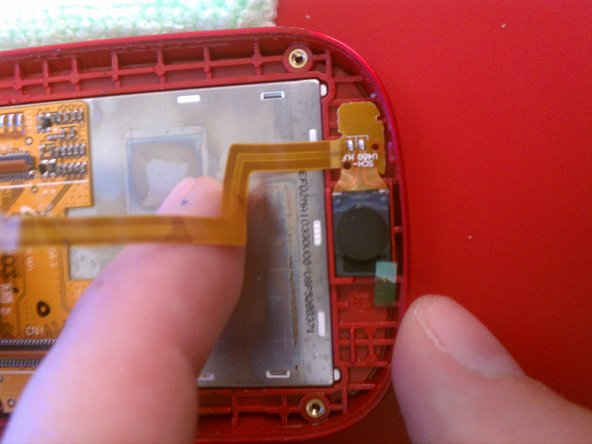
    • Remove the 4 screw the holds the slider to the phone assembly

    • one of the screws will be behind the hinge

    • Carefully pry slider assembly loose from display assembly

  7. Samsung Intensity Teardown: étape 7, image 1 de 3 Samsung Intensity Teardown: étape 7, image 2 de 3 Samsung Intensity Teardown: étape 7, image 3 de 3
    • Remove the tape and pop the connectors and pull all the ribbon cables loose

    • Carefully pry the speaker loose from the case.

  8. Samsung Intensity Teardown: étape 8, image 1 de 1
    • Carefully work the keyboard loose from the display assembly

    • There are a couple fragile clips that hold it in place

  9. Samsung Intensity Teardown: étape 9, image 1 de 2 Samsung Intensity Teardown: étape 9, image 2 de 2
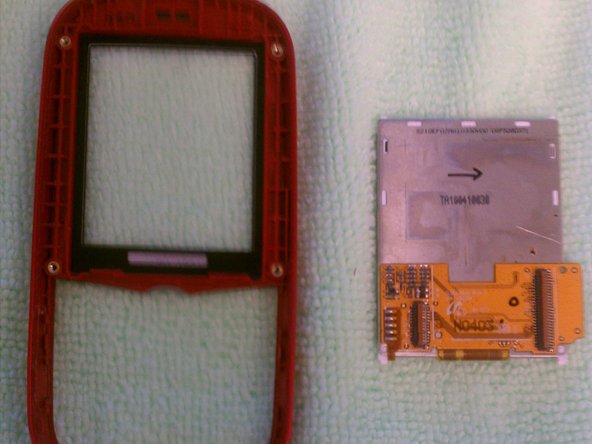
    • LCD comes out pretty easily

    • Pry it from the bottom and work up the sides to release it if stuck

    • The glass can be removed with a little heat from a heat gun or blow dryer

    • Pry it out from the outside edges working around carefully

David

Membre depuis le 08/10/11

148 Réputation

1 tutoriel rédigé

Équipe

West Georgia Technology Membre de l'équipe West Georgia Technology

Business

1 membre

1 tutoriel rédigé

Un commentaire

This was so helpful! How can I show my gratitude to you for these helpful instructions?

teh_pwnerer22 - Réponse

Ajouter un commentaire

Nombre de vues :

Dernières 24 heures : 2

7 derniers jours : 5

30 derniers jours : 7

Total : 4,680