Introduction
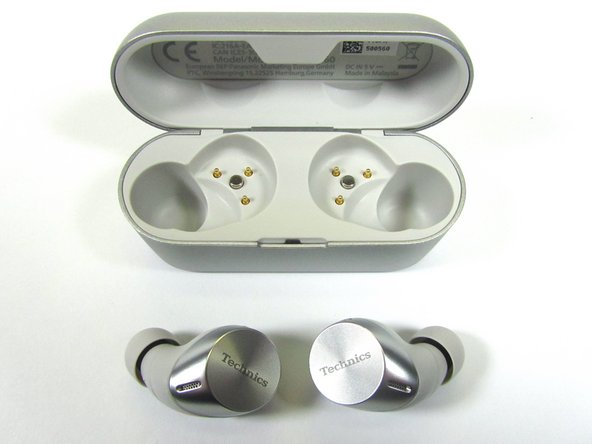
A look inside the Technics EAH-AZ60P-S Bluetooth Headphones
Ce dont vous avez besoin
-
-
Dual Hybrid Noise Canceling for Wideband and Deep Noise Suppression
-
Superior Call Quality with JustMyVoice™ Technology using an Utterance Detection MEMS Microphone.
-
Ambient Sound Mode
-
8 mm Driver Unit with Biocellulose Diaphragm - "Acoustic Control Chamber"
-
7 Hours Playback
-
Bluetooth 5.2
-
Capacitive Touch Sensor Control
-
-
-
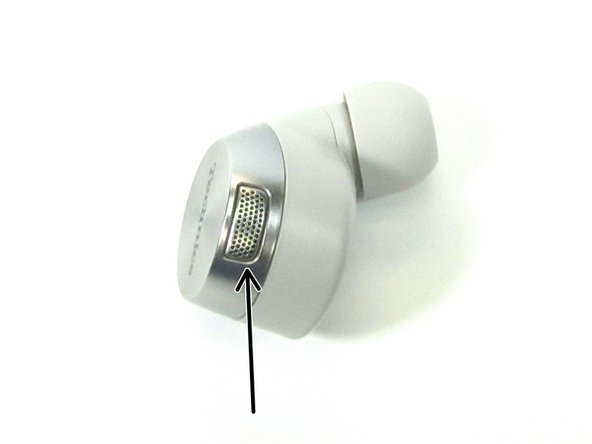
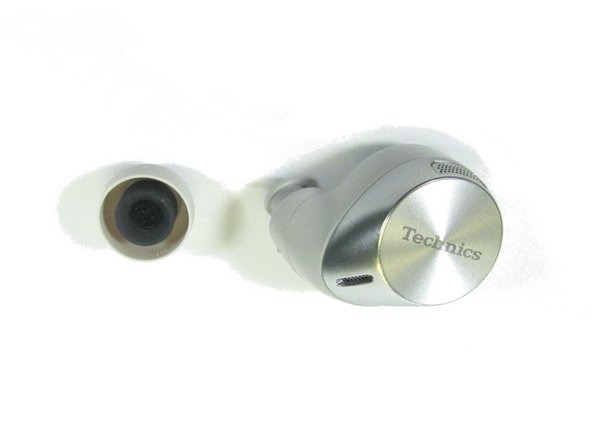
Side View of the Headphone
-
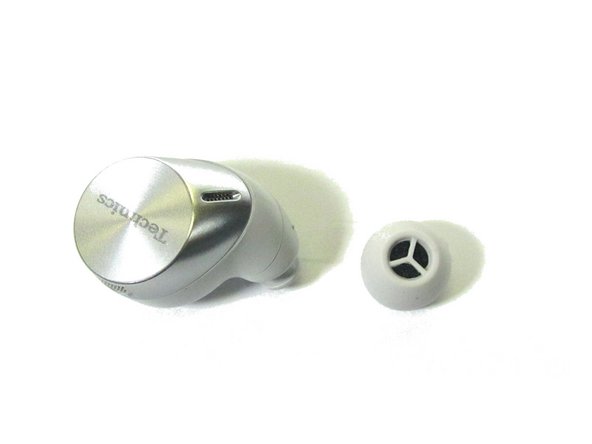
USB D+ / D- Interface
-
Charger Interface VBUS/GND
-
Speaker Sound Port with MEMS Microphone at the back of the port
-
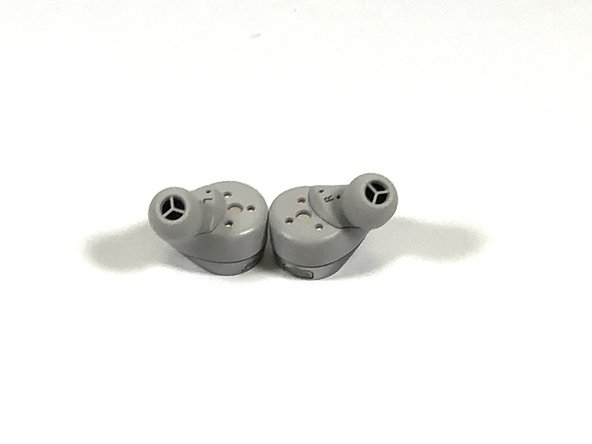
Utterance Detection MEMS Microphone is located in this area
-
Light Pipe for the light detector
-
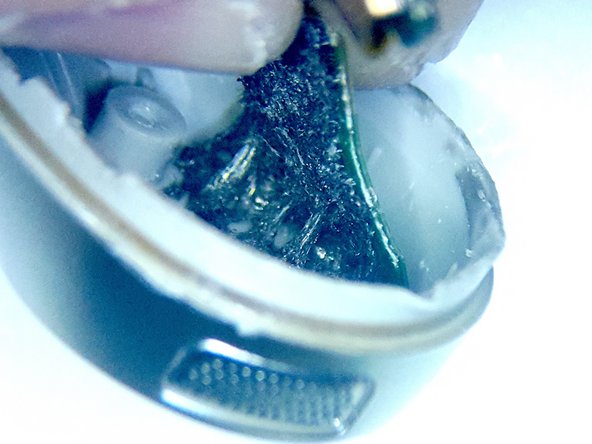
Microphone Port Probably for Voice Calls. Covered by cloth and metal grids
-
Surrounding Sound Microphone
-
-
-
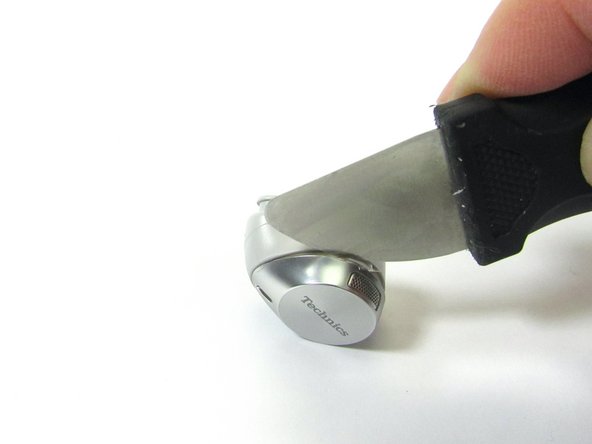
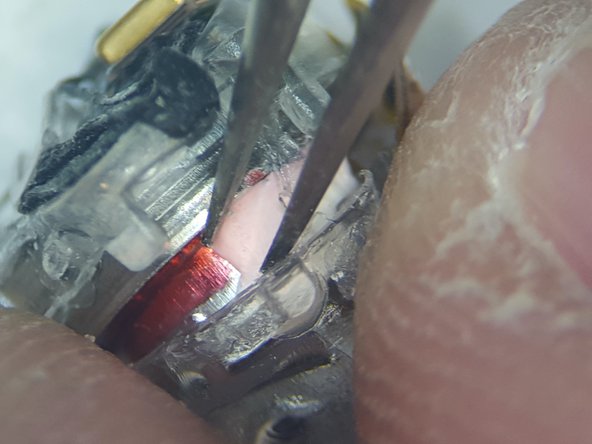
Since the Technics Headphone enclosure was glued together, the only way in was to cut into the headphone. The glue was light and the Touch Sensor cap came away with only a little force applied around headphone at the Touch Sensor cap seam
-
Since the headphone was easy to open to access its components, it may be possible to perform battery changes without damaging the headphone. This is the first possible self serviceable headphone that I have performed a teardown on
-
A utility knife was used at the Touch Sensor cap seam to help loosen and pry the Touch Sensor cap loose. When the Touch Sensor cap appeared loose, a Jimmy Tool was used to pry the cap free to open the headphone
-
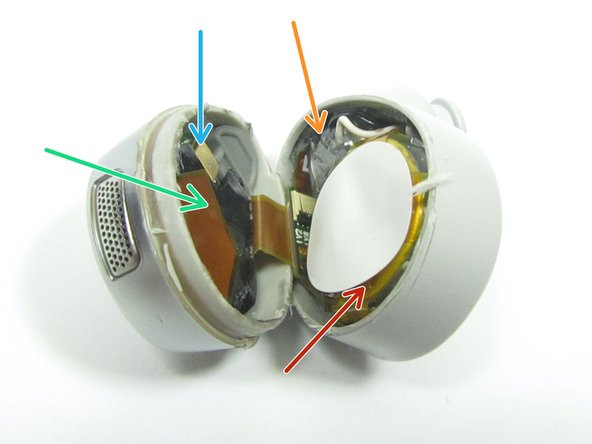
Once opened, we get our first look at the inside of the headphone
-
Battery
-
Speaker Chamber
-
Bluetooth Radio/MCU and Antenna
-
MEMS Microphone
-
-
-
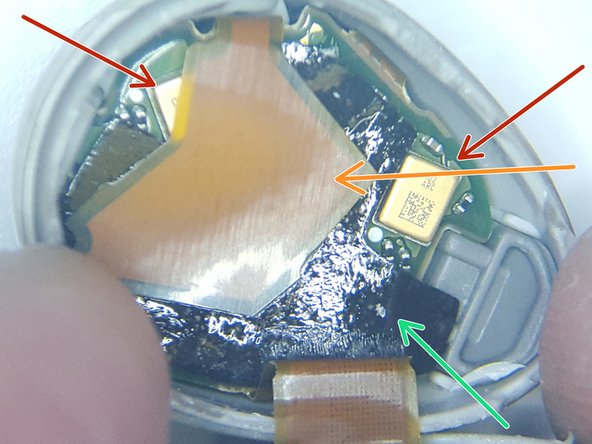
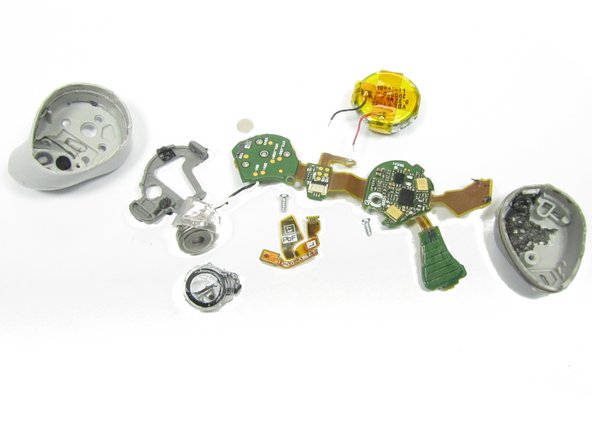
Opening up the headphone, we can see the main PCB, Antenna, and Battery
-
Battery is Li-ion 3.7V / 0.32Wh or 3.7V / 86mAh. The battery appears to be from VDL Electronics Co., Shenzhen, China
-
MEMS Microphones for Voice Call and Surrounding Sound
-
Antenna
-
Double Side Foam Tape
-
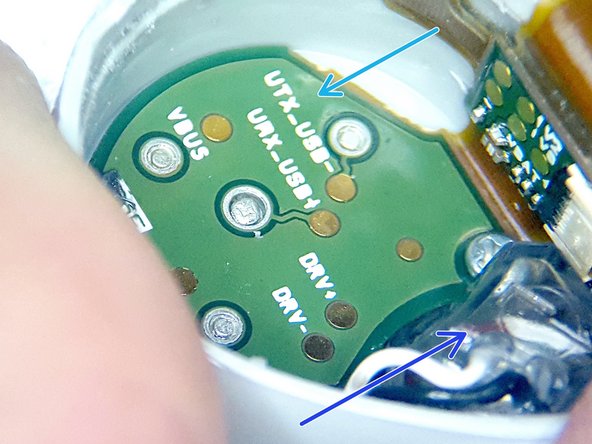
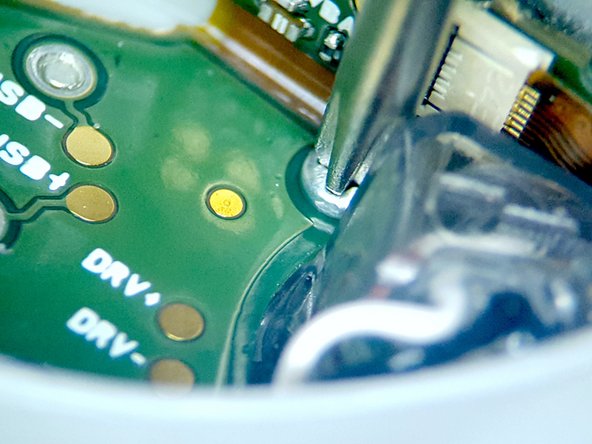
With the battery moved out the way, we can see the USB and Charging Interface connections, and Speaker Chamber
-
USB and Charging Interface Connectons - well marked and with test points
-
Speaker Chamber
-
-
-
-
Peeling back the Antenna from the double sick tape revealed the Main PCB, and that the Main PCB is held in place with a Phillips Head #00 Screw that was also marked on the PCB
-
Once the Phillips Head screw was removed, a small plastic collar had to be removed using tweezers to access the touch sensor PCB
-
-
-
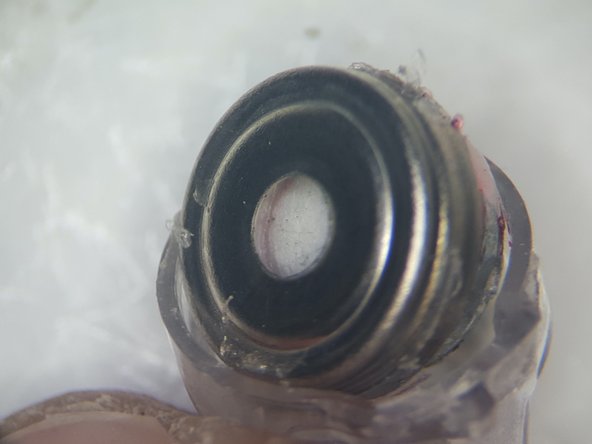
Turning our attention back to the Battery side of the Headphone and moving the battery out of the way, we see that the USB and Charging Interface PCB is also held in place with a Phillips Head #00 Screw
-
Removing the screw, and gently prying against the Charging and USB Interface PCB allowed it to come free and be removed from the Headphone Enclosure
-
The USB and Charging / Interface PCB was held in place via double sided foam tape
-
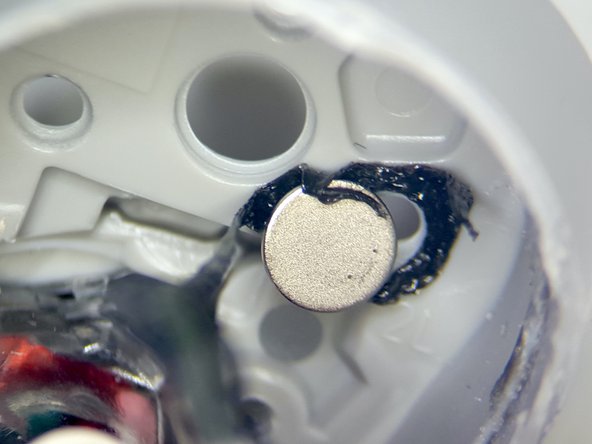
While removing the USB and Charging Interface PCB, a small circular disk was found covering the larger connection hole on the enclosure. This disk is magnetic may be used to help hold the headphone in the charger. The disk was also held in place with foam tape
-
-
-
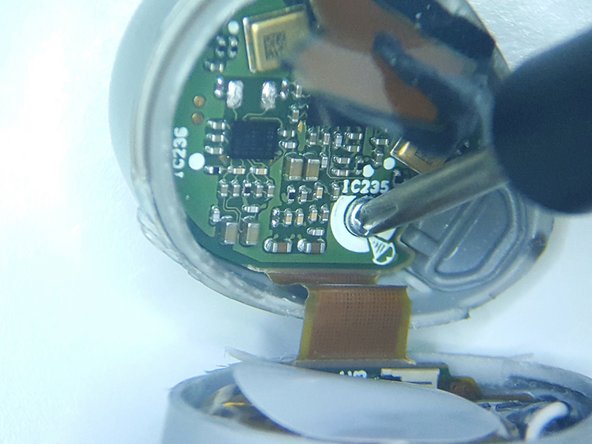
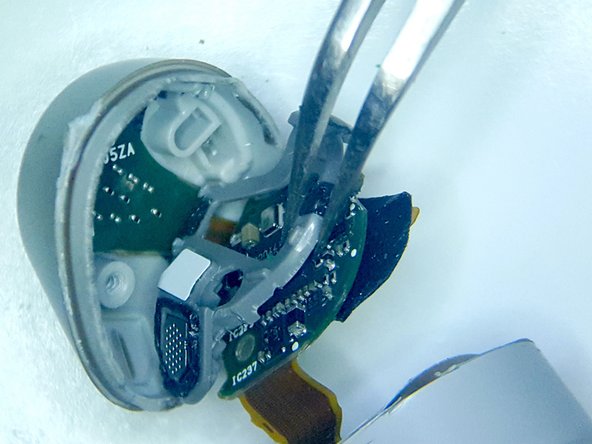
Now, on to removing the Speaker Chamber. The Speaker Chamber has a backside MEMS Microphone used for Noise Cancelation and Speaker Sound detection
-
Another nice find here, was that the Speaker Chamber MEMS Microphone flex PCB was connected to the Main PCB via a low force latching connector. Lifting the connector latch allowed the MEMS Microphone PCB to come free
-
This flex PCB also host the Battery wire solder connections for the system
-
MEMS Microphone PCB connector
-
Battery Wire Solder Tabs
-
MEMS Microphone located on the Speaker Chamber
-
Speaker Chamber
-
-
-
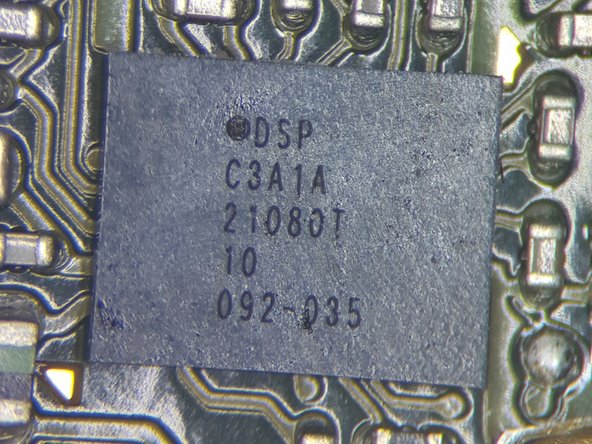
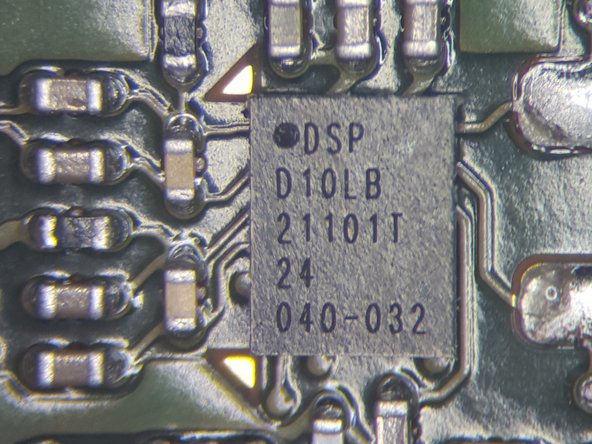
Closeup view under the Antenna of the Main PCB
-
DSP Group - C3A1A may be a Hybrid Active Noise Cancellation (ANC) Codec and Audio Digital Signal Processor (DSP)
-
Could not cross the part number. If you know the part, please leave a comment below
-
DSP Group - D10LB may be a SoC with DSP and Neural Network Accelerator functionality
-
Could not cross the part number. If you know the part, please leave a comment below
-
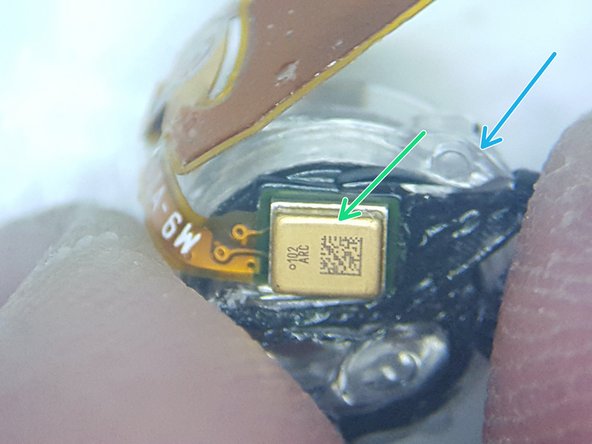
MEMS Microphone for voice and surround noise detections - marked 102 ARC
-
Could not cross the part number. If you know the part, please leave a comment below
-
The 2D bar code on the part reads "FMV1026600TKAR1M"
-
-
-
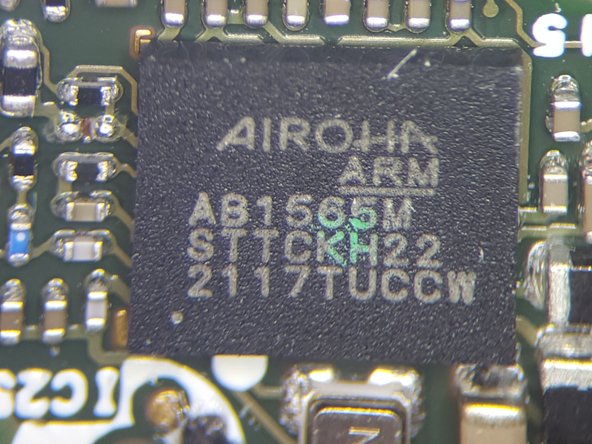
Backside close up view of the Main PCB
-
AIROHA AB1565M - ARM Cortex M4/Bluetooth 5.2 Dual Mode with Active Noise Cancellation
-
Labeled 9FB 06
-
Labeled LGV
-
Crystal Oscillator
-
Labeled SVA CP SH0
-
Labeled C 1BQ
-
Could not cross the part number of the components listed above. If you know the parts, please leave a comment below
-
-
-
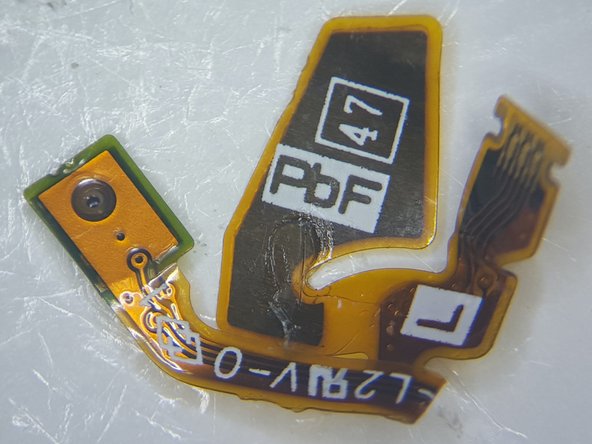
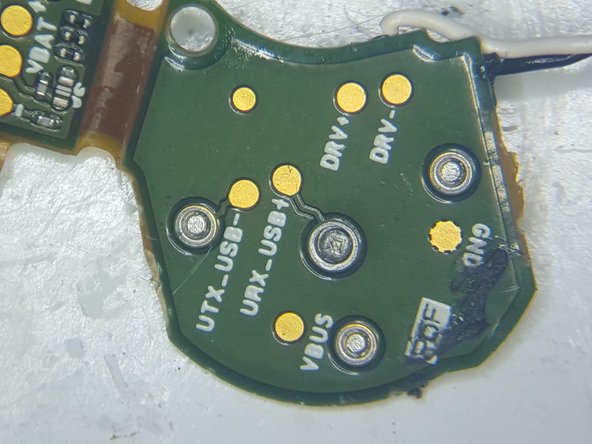
Turing our attention back to the USB and Charger Interface board
-
Backside and Top Side views
-
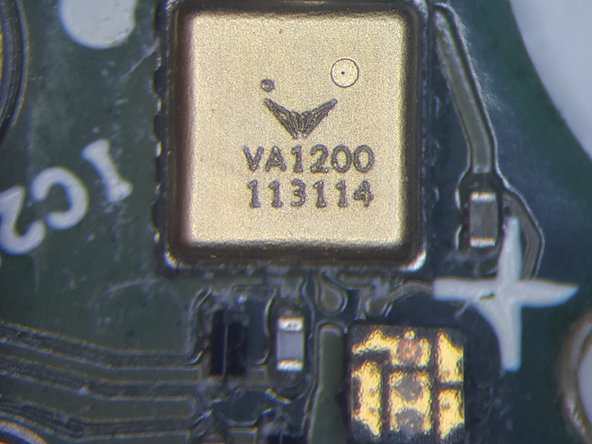
Vesper VA1200 - Analog Piezoelectric MEMS Voice Accelerometer. Bone Sensor - used for Utterance Detection
-
Speaker Solder Connections
-
Unknown component - marked XDR[?]
-
Unknown Component - may be for light detection
-
Charger [power] / USB Connection Interface pads
-
If you know any of the unknown components, please leave a comment below
-
-
-
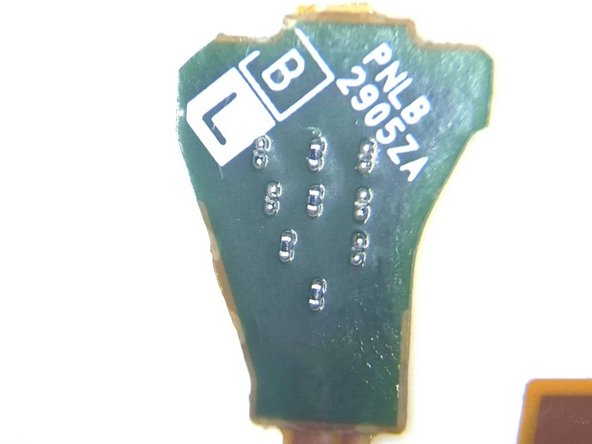
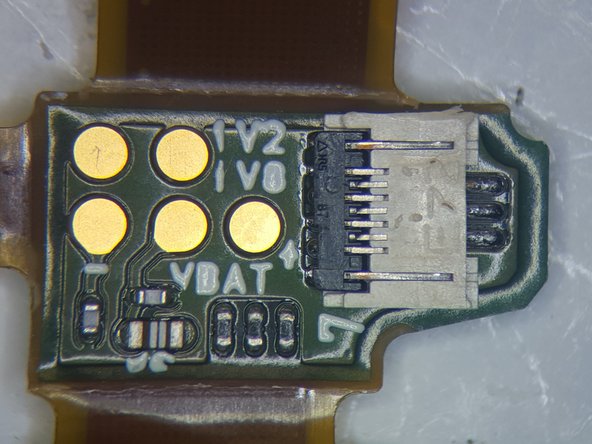
Battery Interface Connection to the system - Top side and backside views
-
Dual MOSFET Battery Protection IC. Markings hard to read. Similar to a part used on other Technics Headphones
-
Unknow component - Labeled 9FB 06
-
Battery Solder Pads. Well marked with + / - markings
-
If you know any of the unknown components, please leave a comment below
-


2 commentaires
Any suggestions on how to clean ear wax out of the small microphone port hole located just below the printed L/R letters on the inner face of the earbuds?
I used a single plastic bristle pulled from a small electric razor head cleaning brush, held by a tweezer, and rotated in the hole to loosen debris and kind of kinked the bristle and dragged laterally to flick/pull and debris out of the channel and that seemed to work.
I was reassured based on this teardown that stated the port was fabric and mesh protected on the inside such that I couldn't damage the mic this way, but if there is a better way to do this, i'd like a suggestion
Thanks for the teardown!
The charging cradle has a Panasonic battery: N4HPGL800007 Moden No. 852236 4,2V made by Chonguing VDL Electronics Co LTD