Aller au contenu principal

Ce dont vous avez besoin

Cette vue éclatée n'est pas un tutoriel de réparation. Pour réparer votre Xbox 360 Wireless Controller, utilisez notre manuel de réparation.

  1. Xbox 360 Wireless Controller Teardown, Removing the first screws: étape 1, image 1 de 3 Xbox 360 Wireless Controller Teardown, Removing the first screws: étape 1, image 2 de 3 Xbox 360 Wireless Controller Teardown, Removing the first screws: étape 1, image 3 de 3
    • Place the controller face down on your working surface to allow access to rear screws.

    • Take the battery compartment out.

    • Use a TR9 bit and screwdriver to remove all 7 screws.

  2. Xbox 360 Wireless Controller Teardown, Removing the back: étape 2, image 1 de 2 Xbox 360 Wireless Controller Teardown, Removing the back: étape 2, image 2 de 2
    • Remove the rear half of the controller by pulling perpendicular to the front half.

    • The battery terminals have specific grooves that they slide in and out of.

    • If the two halves do not easily separate, you can slide a spudger along the seam and/or slightly depress the left/right triggers.

  3. Xbox 360 Wireless Controller Teardown, Removing the vibration motors: étape 3, image 1 de 2 Xbox 360 Wireless Controller Teardown, Removing the vibration motors: étape 3, image 2 de 2
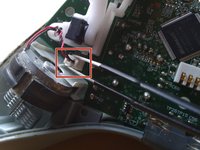
    • Detach the vibration motor cable from the PCB.

    • DO NOT use the cable to remove from the PCB. You may damage the motor, connector, or PCB by pulling on the cable.

    • After detaching the vibration motor cable from the PCB, remove the vibration motor.

    • Utilize the same technique for the other vibration motor on the opposite side.

  4. Xbox 360 Wireless Controller Teardown, Removing the PCB: étape 4, image 1 de 2 Xbox 360 Wireless Controller Teardown, Removing the PCB: étape 4, image 2 de 2
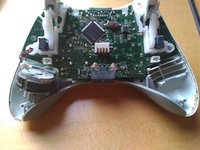
    • Make sure the front half of the controller is facing towards you.

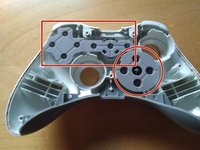
    • The PCB should simply lift out with little to no force when being held by the areas highlighted.

    • If the PCB doesn't freely lift out, apply light consistent leverage under the highlighted area.

    • Be cognizant of the components on the opposing side of the PCB.

  5. Xbox 360 Wireless Controller Teardown: étape 5, image 1 de 1
    • Full IC Identification:

    • You may need to enlarge it to view the text.

  6. Xbox 360 Wireless Controller Teardown, Removing the buttons and the bumper: étape 6, image 1 de 3 Xbox 360 Wireless Controller Teardown, Removing the buttons and the bumper: étape 6, image 2 de 3 Xbox 360 Wireless Controller Teardown, Removing the buttons and the bumper: étape 6, image 3 de 3
    • Gently peel off the conductive rubber pads to expose the backsides of the buttons

    • Remove the A, B, X, Y, Back, Start and Guide buttons. The Guide button sleeve may also be removed.

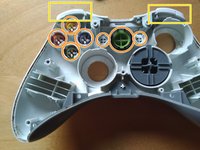
    • You can now remove the bumper assembly at the top.

  7. Xbox 360 Wireless Controller Teardown, Removing the D-Pad: étape 7, image 1 de 1
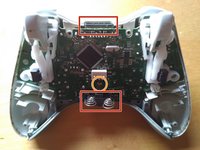
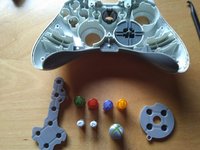
    • Remove the last two screws in the D-pad with a #0 Phillips screwdriver.

    • Use a pair of tweezers to squeeze the clips together and remove the D-pad.

  8. Xbox 360 Wireless Controller Teardown, End result: étape 8, image 1 de 1
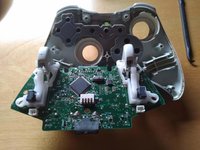
    • And here is the final result: a completely disassembled Xbox 360 Wireless Controller.

Mart-Jan

Membre depuis le 05/26/19

305 Réputation

1 tutoriel rédigé

3 commentaires

Excelente trabajos

RIGO NOLASCO - Réponse

Very clear, helped me clean my controller. Thank you :)

Taydolf Swiftler - Réponse

Hello. I just did clean one of mine that i did bye 2011. The Rumble on left end right are the opposit to this guide.

I did never disconnect them from the pcb. So ma bey its another revision or the left and right is missing.

From the back.

Small left , big right.

https://imgur.com/a/DxXdUNB

Michael Orban - Réponse

Ajouter un commentaire

Nombre de vues :

Dernières 24 heures : 31

7 derniers jours : 238

30 derniers jours : 984

Total : 38,561