Aller au contenu principal

Ce dont vous avez besoin

Cette vue éclatée n'est pas un tutoriel de réparation. Pour réparer votre iPhone 12, utilisez notre manuel de réparation.

  1. iPhone 12  Teardown, Remove the SIM: étape 1, image 1 de 2 iPhone 12  Teardown, Remove the SIM: étape 1, image 2 de 2
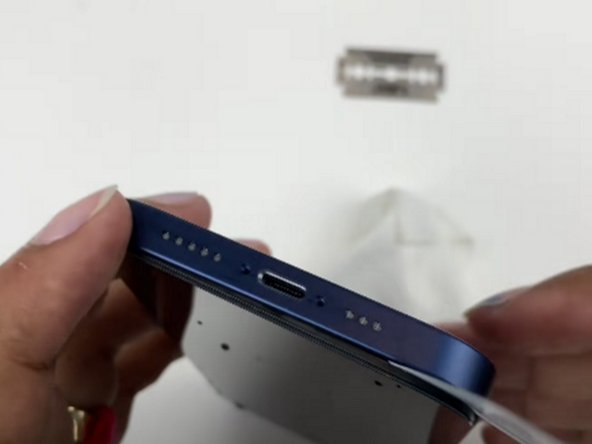
    • Remove the SIM Card tray using a SIM Card eject tool

  2. iPhone 12  Teardown, Unscrew the lower screws: étape 2, image 1 de 3 iPhone 12  Teardown, Unscrew the lower screws: étape 2, image 2 de 3 iPhone 12  Teardown, Unscrew the lower screws: étape 2, image 3 de 3
    • Turn off the device

    • Unscrew the two 6.9 mm long Pentalobe screws.

  3. iPhone 12  Teardown, Raise the display: étape 3, image 1 de 3 iPhone 12  Teardown, Raise the display: étape 3, image 2 de 3 iPhone 12  Teardown, Raise the display: étape 3, image 3 de 3
    • Apply a heated iOpener all around the edge of the screen to loosen the adhesive under the display.

    • Lift the display with a suction cup and insert a thin object to separate the screen from the frame.

    • Slide the fine object along the entire edge to cut the adhesive.

    • Raise the display.

  4. iPhone 12  Teardown, Disconnect the display: étape 4, image 1 de 3 iPhone 12  Teardown, Disconnect the display: étape 4, image 2 de 3 iPhone 12  Teardown, Disconnect the display: étape 4, image 3 de 3
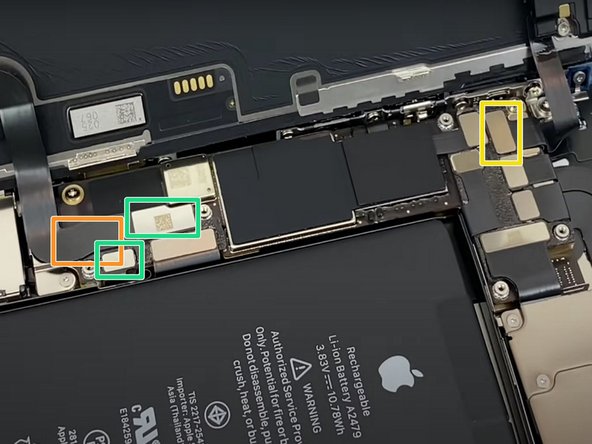
    • Remove the 6 Phillips # 00 screws.

    • With a spudger or with your fingernails, lift the two connectors.

    • Lift the connector underneath.

    • Disconnect the display connector.

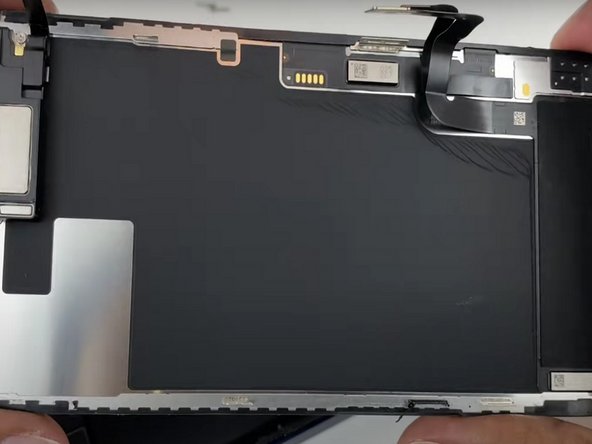
    • Raise the display.

  5. iPhone 12  Teardown, Remove the rear camera: étape 5, image 1 de 3 iPhone 12  Teardown, Remove the rear camera: étape 5, image 2 de 3 iPhone 12  Teardown, Remove the rear camera: étape 5, image 3 de 3
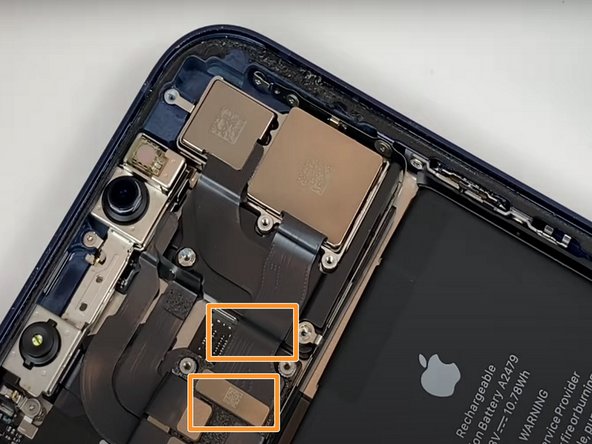
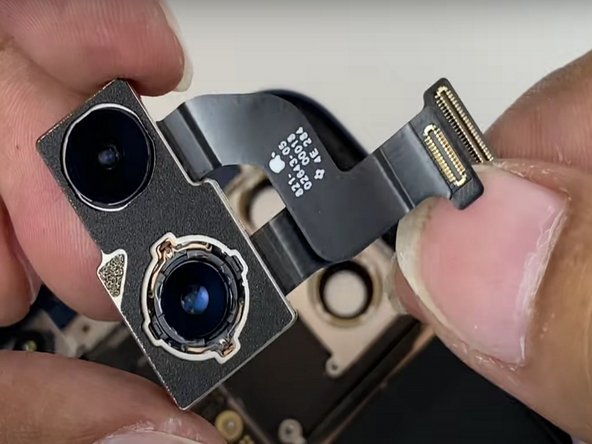
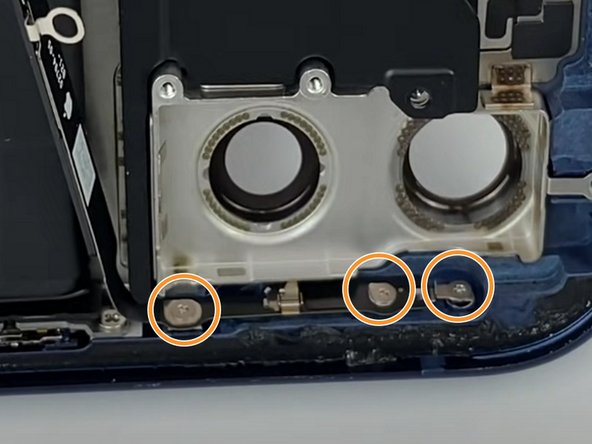
    • Unscrew the 4 Phillips # 00 screws.

    • With a spudger or fingernails disconnect the two rear camera connectors.

    • Remove the rear camera.

  6. iPhone 12  Teardown, Remove the front camera.: étape 6, image 1 de 2 iPhone 12  Teardown, Remove the front camera.: étape 6, image 2 de 2
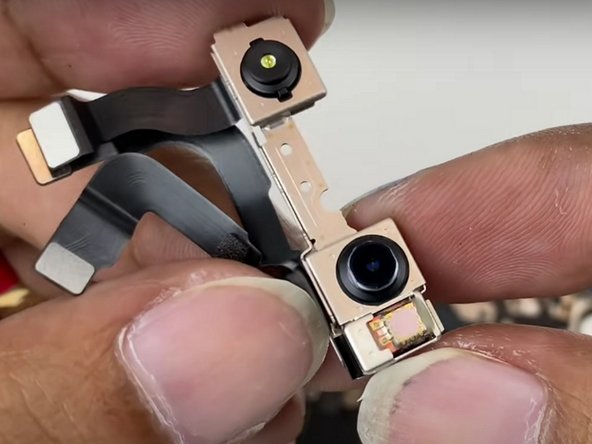
    • With a spudger or fingernails to disconnect the three connectors that connect the front camera.

    • Remove the front camera.

  7. iPhone 12  Teardown, Remove the battery holder: étape 7, image 1 de 2 iPhone 12  Teardown, Remove the battery holder: étape 7, image 2 de 2
    • With a spudger or fingernails disconnect the battery holder connector.

    • Unscrew the 3 Phillips # 00 screws.

    • Remove the battery holder.

  8. iPhone 12  Teardown, Remove the camera flash: étape 8, image 1 de 1
    • With a spudger or fingernails disconnect the rear camera flash connector.

    • Unscrew the 3 Phillips # 00 screws.

    • Unscrew the 2 Phillips # 00 screws.

    • Remove the rear camera flash.

  9. iPhone 12  Teardown, Remove the SIM card holder: étape 9, image 1 de 3 iPhone 12  Teardown, Remove the SIM card holder: étape 9, image 2 de 3 iPhone 12  Teardown, Remove the SIM card holder: étape 9, image 3 de 3
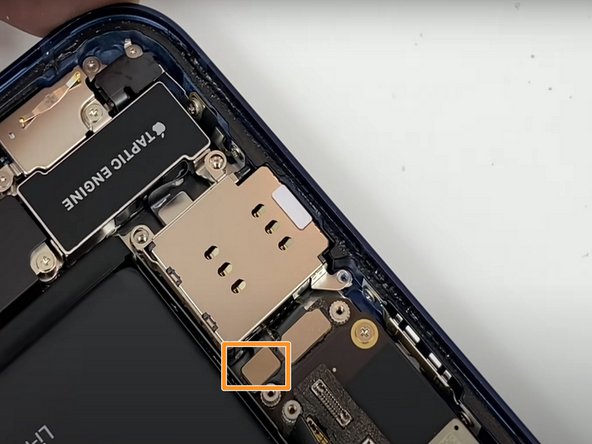
    • Unscrew the 4 Phillips # 00 screws.

    • Unscrew the 2 screw holders with the suitable screwdriver.

    • With a spudger or fingernails to disconnect the SIM card holder connector.

    • Remove the SIM card holder.

  10. iPhone 12  Teardown, Remove the battery logic board: étape 10, image 1 de 2 iPhone 12  Teardown, Remove the battery logic board: étape 10, image 2 de 2
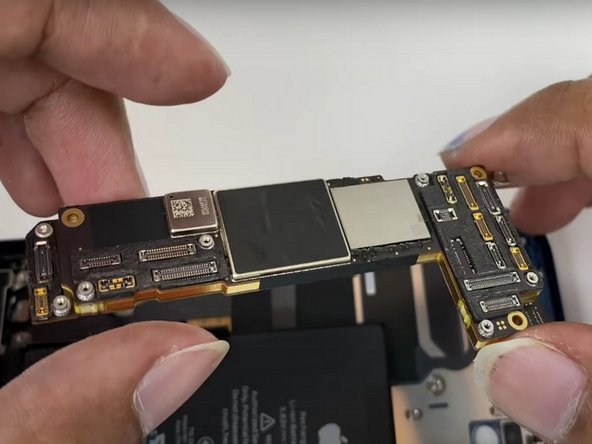
    • Remove the 2 Phillips # 00 screws.

    • With a spudger or fingernails disconnect the 3 battery connectors.

    • Unscrew the screw holder with a standoff screwdriver for iphone.

    • Remove the film with a spudger.

    • Attention this last step is necessary to remove the logic board.

    • Remove the logic board.

  11. iPhone 12  Teardown, Remove the speaker: étape 11, image 1 de 2 iPhone 12  Teardown, Remove the speaker: étape 11, image 2 de 2
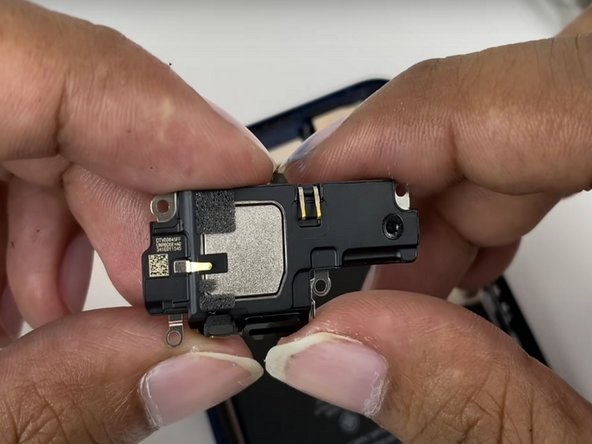
    • Unscrew the 5 Phillips # 00 screws.

    • Remove the speaker.

  12. iPhone 12  Teardown, Remove the taptic engine: étape 12, image 1 de 2 iPhone 12  Teardown, Remove the taptic engine: étape 12, image 2 de 2
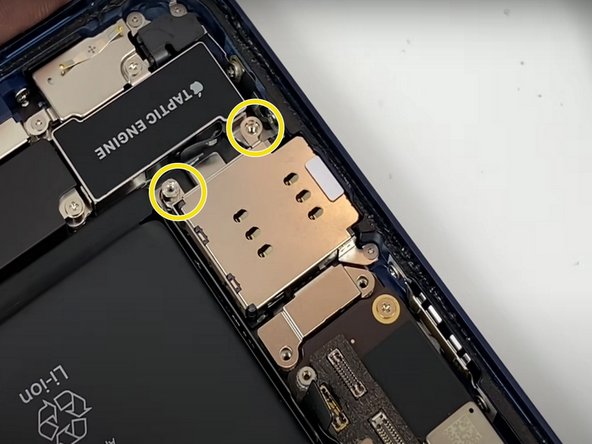
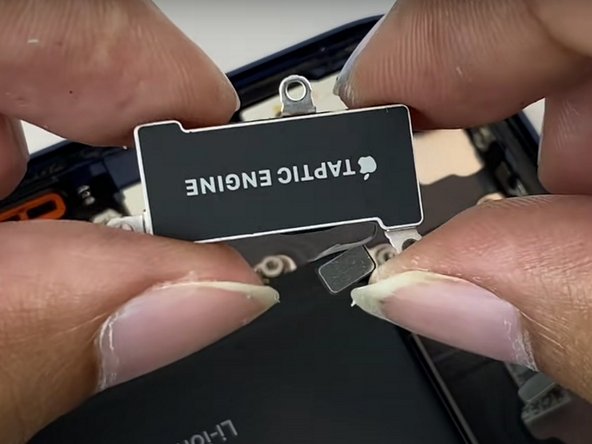
    • Remove the 2 screw holders with a standoff screwdriver for iphone

    • Unscrew the 3 Phillips # 00 screws.

    • Remove the taptic engine connector with a spudger or fingernail.

    • Remove the taptic engine.

  13. iPhone 12  Teardown, Remove the battery: étape 13, image 1 de 2 iPhone 12  Teardown, Remove the battery: étape 13, image 2 de 2
    • Remove the adhesive under the battery.

    • To remove the adhesive under the battery, remove the stickers marked in red in the first photo.

    • Remove the battery.

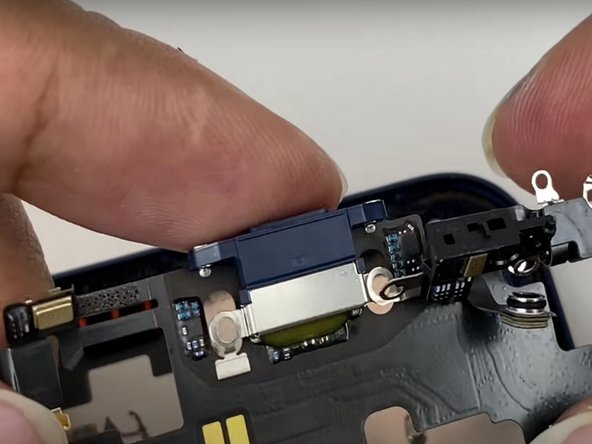
  14. iPhone 12  Teardown, Remove the charging port: étape 14, image 1 de 2 iPhone 12  Teardown, Remove the charging port: étape 14, image 2 de 2
    • Unscrew 6 Phillips # 00 screws.

    • Remove the 4 screw holders with an iPhone standoff screwdriver.

    • Remove the film with a spudger.

    • Attention, the previous step is essential to remove the charging port.

    • Remove the charging port.

    • Be careful not to make too strong, this could damage some components.

  15. iPhone 12  Teardown: étape 15, image 1 de 1
    • And here are all the components that make up the new iPhone 12.

Merci à ces traducteurs :

it en

100%

Ces traducteurs nous aident réparer le monde ! Vous voulez contribuer ?
Commencez à traduire ›

Andrea Alfani

Membre depuis le 04/20/22

7 593 Réputation

5 tutoriels rédigés

Équipe

Kid fixers Membre de l'équipe Kid fixers

Community

156 membres

292 tutoriels rédigés

4 commentaires

I had problem with nfc. When it was changed. Have any solution?

Ak H - Réponse

I don't see any mentioning of the microphone, Is the Microphone an integral part of the charging port harnes?

Paal Halvorsen - Réponse

This guide is missing A LOT of steps

Jason Oestrike​ - Réponse

This is definitely not a US iPhone 12! e careful as the antenna can tear easily and potentially ruin a motherboard.

Kyle Morrell - Réponse

Ajouter un commentaire

Nombre de vues :

Dernières 24 heures : 59

7 derniers jours : 402

30 derniers jours : 1,789

Total : 28,490