Introduction
Aujourd'hui, nous allons plus loin que tout démontage d'iPhone auparavant. L'innovation du nouvel écran tactile 3D Touch est tellement alléchante que nous ne pouvions pas laisser ce panneau frontal tel quel.
Cette fois-ci, nous démantelons l'écran Retina HD, couche par couche, pour vous donner une image claire de ce qui rend le matériel de cette année tellement unique. Cette vue éclatée ne comportera pas de score de réparabilité : le processus de démontage et de remontage d'un écran de téléphone intelligent fusionné est réservé aux pros et à leurs outils très spécialisés (et incroyables).
Restez au courant de toutes nos prouesses techniques en nous suivant sur Facebook, Instagram et Twitter.
Ce dont vous avez besoin
-
-
L'iPhone 6s récemment lancé a apporté de nouvelles fonctionnalités à un ensemble familier. Suite à cette tendance, l'écran comporte quelques modifications et fonctionnalités intégrées :
-
3D Touch facilitée par une couche de capteur capacitif
-
Panneau en verre pliable fabriqué par double échange d'ions
-
Écran Retina HD 4,7 pouces, 1334 sur 750 pixels (326 ppp)
-
Vitre tactile intégrée
-
-
-
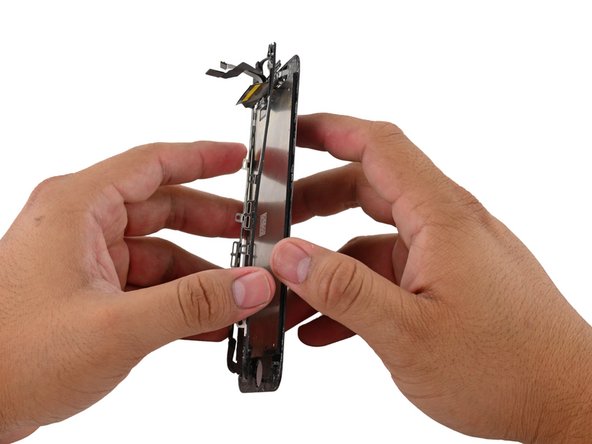
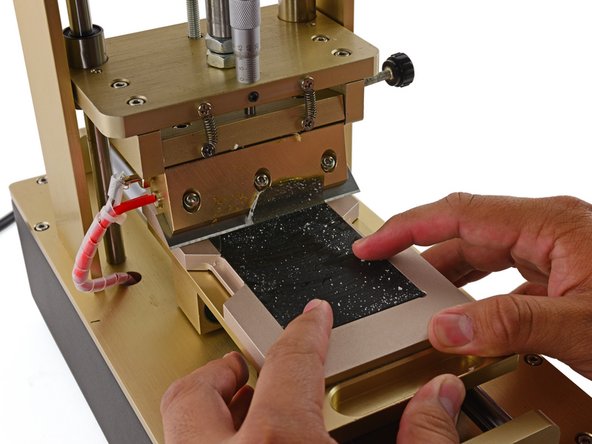
Le premier à tomber est le cadre en plastique de montage comportant les clips qui fixent l'écran au reste de l'iPhone. (Essayez de dire ça cinq fois à la suite très vite ... bon, ok..c'est dans la version anglaise qu'on parle de ça, en français on se contentera de démonter l'écran en silence ...si, si, ou pas !.)
-
Aujourd'hui, nous avons décidé de prendre la route panoramique et d'enlever le cadre en plastique de montage d'une seule pièce, en coupant le périmètre de l'assemblage.
-
-
-
Après un peu de découpage, un peu de chaleur et beaucoup de patience, nous avons réussi à retirer le cadre de montage du panneau frontal.
-
Cependant, lors du récent démontage de l'iPhone 6s, nous avons découvert un nouveau joint adhésif aidant à sécuriser l'écran sur le téléphone. Ce joint a également l'avantage d'améliorer l'étanchéité du nouvel iPhone.
-
-
-
-
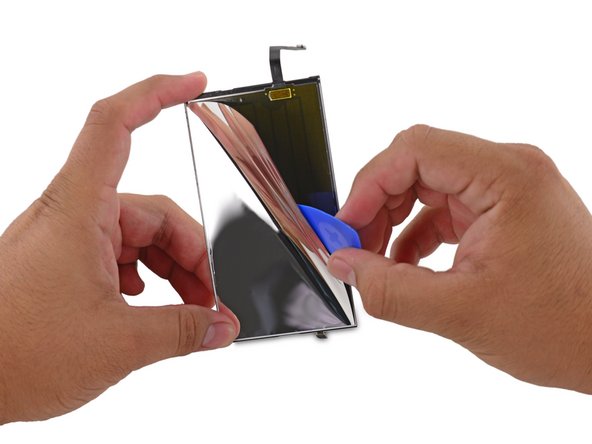
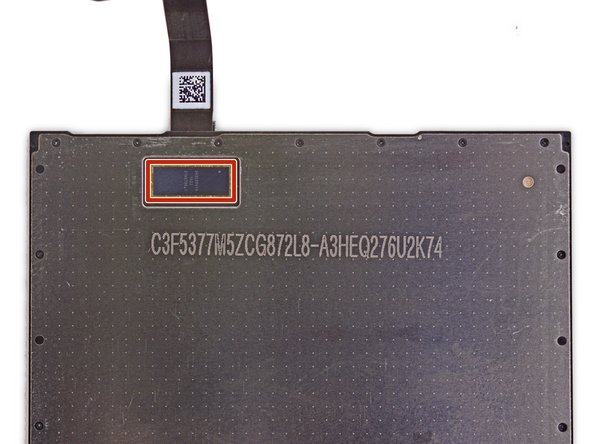
Chacun des rectangles dorés de ce panneau arrière est la plaque unique d'un condensateur à plaque parallèle.
-
Chaque boîte a une petite trace (les zones sombres sont en fait des autoroutes composées de nombreuses traces) en retour à la puce de contrôle. Lequel ...
-
... se trouve à l'arrière du panneau, probablement. Cette puce sur mesure pour Apple est responsable de l'échange entre les condensateurs – en les maintenant chargés et en mesurant les changements de courant entre les différents condensateurs.
-
-
-
Appuyer sur le verre plie le verre très légèrement au point de contact, ce qui raccourcit la distance entre votre doigt et la plaque de condensateur correspondante dans le tableau sous l'écran. Cela enregistre une «poussée» plutôt qu'un «toucher».
-
La vitre tactile "réelle" est encore présente pour le suivi de précision, ces plaques doivent seulement détecter un fléchissement dans le verre et non où il se produit.
-
-
-
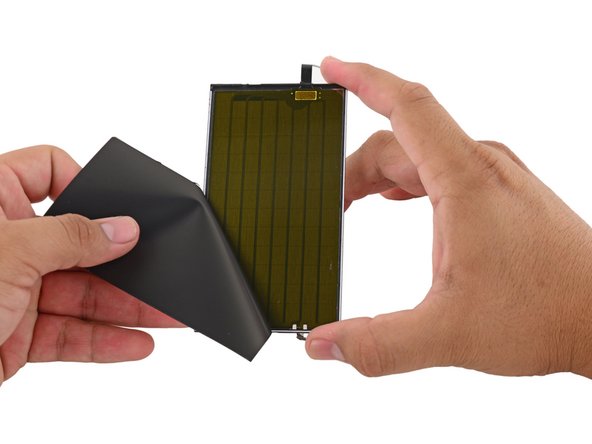
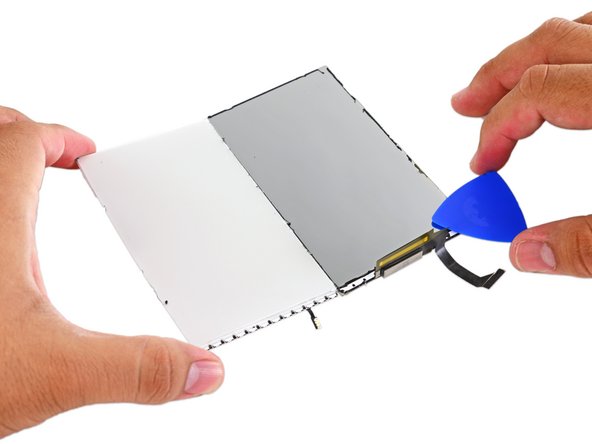
Une fois la vitre enlevée, il ne reste qu'un écran LCD en plutôt piteux état, retirer la vitre a vraiment fait son effet au film polarisant.
-
Heureusement pour nous, nos amis de STS Parts ont apporté leur guillotine (également connue sous le nom de Polarizer Remover Machine) qui la racle comme si c'était juste un chewing-gum collé à une chaussure.
-
-
-
Tout d'abord, le rétro-éclairage envoie de la lumière à travers une mince couche de cristaux liquides. Quand la lumière passe, elle se reflète sous différents angles résultant de l'orientation des cristaux.
-
L'angle de réflexion détermine la couleur de la lumière que nous voyons. Afin de modifier l'angle (et par conséquent, la couleur), le matériel de l'écran doit mettre sous tension sur les cristaux liquides pour modifier leur orientation.
-
Afin de produire une large gamme de couleurs, chaque pixel est divisé en trois sous-pixels : rouge, vert et bleu.
-
Des tensions différentes sont utilisées pour ajuster l'intensité de chaque sous-pixel dont la combinaison peut créer des millions de couleurs différentes.
-
-
-
Eh bien, vous dites, toutes ces histoires de pixels et de tension sont passionnantes, mais où le film polarisant entre-t-il en jeu ?
-
Le film polarisant est ce qui rassemble tous les éléments. Il agit comme un filtre qui permet à la bonne combinaison de couleurs de créer toutes les belles images sur votre téléphone. Merci, film polarisant !
-
-
-
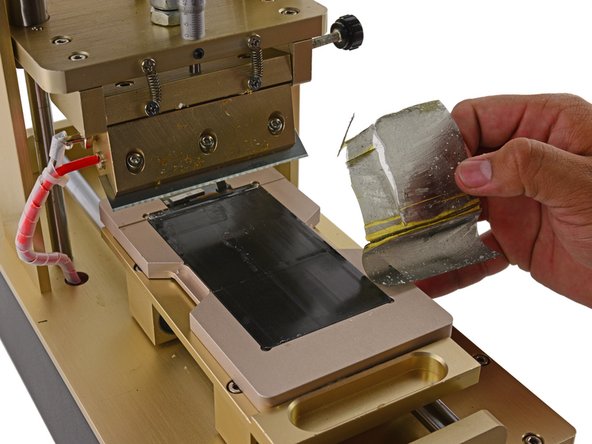
La dernière partie de l'écran à être décortiqué est le rétro-éclairage LED Edge (bord), un type de rétro-éclairage, qu'on trouve souvent dans les smartphones.
-
Comme mentionné précédemment, la couche mylar réfléchissante était auparavant l'une des couches du dispositif de rétro-éclairage.
-
Dans cette itération de l'iPhone, la couche mylar a maintenant deux fonctions. La nouvelle utilisation est de dissimuler les capteurs 3D Touch, l'utilisation traditionnelle est de refléter la lumière diffusée vers l'extérieur au lieu de la gaspiller à l'intérieur de l'iPhone.
-
-
-
Voilà un présentation artistique des huit couches (survivantes) de l'écran iPhone 6 pour le plaisir des yeux.
-
Cette vue éclatée n'était pas une mince affaire, nous vous recommandons vivement de ne pas tenter le coup chez vous, sans les bons outils et l'expérience.
-
À propos d'outils et d'expériences, un énorme merci à STS Parts, et surtout à Israel, pour l'équipement et l'expertise qui ont rendu cette vue éclatée possible !
-


Merci à ces traducteurs :
100%

Ces traducteurs nous aident réparer le monde ! Vous voulez contribuer ?
Commencez à traduire ›

31 commentaires
This an amazing display. Are any other displays you've taken apart this complicated? I don't see a teardown number for the display. Do you see any repair shop, including Apple, even trying to perform a component replacement of the display or will it simply be replaced in its entirety?
Typically repair shops (including Apple) have always just swapped out the screens. However as the LCDs get more complicated and the price goes up on these repairers are turning towards more economical methods like screen refurbishment. A lot of times the cost of a glass-only repair vs a full display assembly is less than half! But it's a lot more complicated, as evidenced.
No phone has this many layers in the screen. The 5-6 had the glass, polarizer, then LCD, then the backlight. This has a lot more parts now, its not complicated if you know what goes where, but you need to assemble the pieces in the right order for the screen to be flawless.
Repair shops can replace just the glass if they have the right tools (what is shown above and more). At the Apple store, Apple will continue to replace the screens as a whole assembly, and send the broken screens back to where it is that Apple refurbishes them out (probably China). Apple will separate the screen and replace anything that it feels is necessary and then send it back to be used for another screen replacement.
Alec -
We actually went back and ripped up an iPhone 5s Screen for comparison and research; it turned out it was very similar to this (minus the 3D Touch Sensors and the mylar being part of the backlight). The only other teardown we've done specifically on a device's screen was for the Retina MacBook Pro.
I can't be sure about Apple's policy on screen replacement, though I assume to maintain good success rates for repairs and turnaround times they'll just replace the screen assembly. Independent repair shops are another story; depending on their experience level and access to the necessary tools and parts, it is totally possible to perform. Ultimately it seems a bit more time consuming for something that is usually a 10-20 minute part swap. On top of all this, the people who provide parts will almost always provide displays in their entirety instead of layer by layer.
I think this will be a refurbisher only kind of procedure.
Awesome breakdown! However I'm getting dust under my display. I've had apple look at it 3 times now and they can't figure it out so I got a new phone. Is there anything that could point to a cause for dust to form under the screen near the cell carrier?
Dylan, if this is due to screen being refurbished keep in mind the "assembling" of the screen in the refurbishing process is done in a clean dust free environment.
Israel -
Seems unlikely. The glass is glued to the LCD assembly, and there are no gaps where dust could get under anything. I've heard of people replacing the glass without reglueing it, which could allow dust in. But I'm not sure how dust would get in the phone in the first place.
Greg M -
So am I to understand that the backlight is not soldered on as it is in previous models? It just comes off with the 3d touch module?
The backlight power flex is still soldered to the flex cable like other models. The only difference is that the force touch is part of the backlight.
Israel -
I have searched the internet and am currently having trouble finding a method to spot weld the speaker mesh tag with the LCD frame , as currently the Original Foxconn displays from China surprisingly do not have them. Any ideas anyone ?
What do you mean spot weld? The ear speaker mesh is glued around the ear speaker hole, you can purchase these individually.
Israel -
Use just a dot of B-7000 adhesive at each end. It has a pinpoint applicator that makes it easy to get just the right amount, in just the right place. You don't really need the glue, the speaker will hold it in place as you assemble it if you are careful. Also great for gluing the frame to the glass. (Some replacement frames come with glue already applied. Just heat with your LCD separates machine and it will melt enough to adhere.)
Greg M -
what is the at the top and over one? I need it to make SICK glasses.
where and how can i buy This particular machine in iran ? and how much is it in abroad?
Just Google it. There are a number of manufacturers. Some are available on eBay. There is a nice basic temperature controlled LCD Separator Machine for just $35. Expect to destroy a few LCD assemblies learning how to do it, so practice with some scrap displays.
Greg M -
Thanks for the teardown. You should correct step 10 though! You make it seem as if there is only (1) polarizer. This is not true. There are (2) polarizers. One is adhered to the back of the lcd panel and one adhered to the front. They are out of phase by 90 degrees. It is the voltages applied to the liquid crystals that affects the light that has already passed through the rear polarizer before it goes through the front polarizer. Thus, the lcd gives the ability to affect the amount/intensity of light that passes through the front polarizer.
If i have a new digitizer installed on my iphone 6s and the backlight only works sometimes. where should i start with troubleshooting? It worked for a few hours then stopped working for the most part. Only sometimes does it want to work. Hopefully you can point me in right direction as to where i should check on logic board or connection wise.
Thank you
Try resoldering the flex cable. Otherwise one of the flex PCBs is likely damaged.
Greg M -
Shame on iFixit to copy other peoples sites ideas and implement them in your own, you lack of ideas grabbers.
I'm not sure what you are referring to. This teardown was done in-house, with full cooperation and assistance from STS. All the photographs and text are original.
Hi, this is chris from germany.
I am very interested in a material a friend of mine found when tearing down a mobile phones screen. I saw it for five seconds and i cant tell which layer. It was a reflective layer, that was shining like diamond (awesome surreal colours) when crumpled up. If u could help me find out which layer that was, which name oder part number, i am superhappy. Thank you people of iFixit !!!
Chris
Do I have to change the 3d touch panel for change the backlight of the LCd?
may i change backlight independently of the 3d Touch?
thanks for answer.
Ok, so my backlight was not working and I purchased an aftermarket new backlight. I removed all the layers as in the above tear down but accidently removed that last very shiny layer which is heavily glued to the glass. What is this last layer called and could it be replaced?…
It sounds like maybe the mylar layer remained adhered. I do need to caution you that, as it says at the top of every teardown, “This teardown is not a repair guide. To repair your iPhone 6s, use our ++service manual++.” We don’t have repair guides for component disassembly, you can try looking at non-iFixit guides on the iPhone 6s device page, or ask an question on our Answers forum. Best of luck.
Good Day!
Hope you can help we with a Problem.
Due the Prozess of changing the glass, the black film on the lcd is damaged, more its completely removed. What function has this and can it be replaced? The polarizer is removed. Can i just replace the polarizer and ist done? Thank you very much, and i apologize my english!
Wow very nice. For those step i finally found out what in side my phone.
It’s great work for illustration view here. Many thanks to all your tries. Honestly I’m here to learn as a brand new comer!