Introduction
Every once in a while, cloud software giant Valve tries their hand at hardware—see the Steam Machine of old. This time around they've promised to revolutionize the way we game with their Steam Controller. They've impressed us with highly modular tech in the past, so let's dig in and find out how much game this controller's got.
While you're at it, keep up with the iFixit crew by following us on Instagram, Facebook, and Twitter.
Ce dont vous avez besoin
-
-
We open the valve and the specs come pouring out:
-
High-definition haptic feedback
-
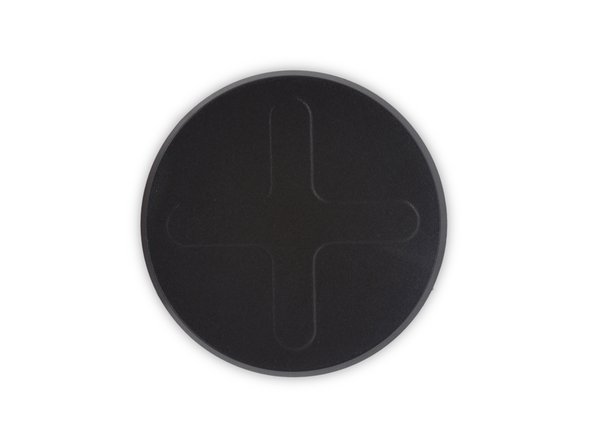
Dual trackpads
-
USB 2.0 via Micro-USB port
-
6-axis combination gyroscope-accelerometer sensor
-
Dual-stage digital triggers with 10° of travel, magnetic flux sensor, and tactile switch
-
Up to 80 hours of gameplay from a pair of removable AA batteries
-
5 meters of wireless communication range
-
-
-
-
Underneath the rear casing, we find a couple of snazzy battery eject levers—something we haven't seen in other controllers.
-
While battery eject levers are nice, what we're actually interested in is Valve's decision to abstain from using an integrated battery.
-
This design choice eliminates a commonly-failing component to extend the Steam Controller's lifetime, and gives users a choice: disposable or rechargeable batteries. The future of the planet is (literally) in your hands.
-
-
-
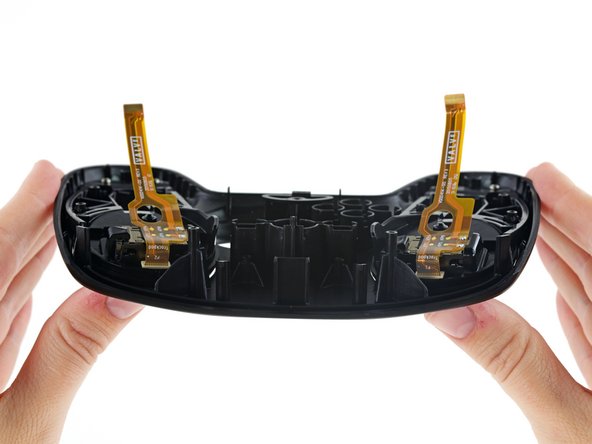
It's a trap! Lifting the motherboard out of its housing reveals a couple hidden ribbon cables connecting the touchpads to the underside of the board.
-
We're never fans of treacherous cables like these, but this is hardly the worst we've seen.
-
Moving right along, we disconnect the ribbon cables with a firm tug, freeing the upper assembly for closer inspection and giving us a glimpse at the inner workings of the touchpads.
-
-
-
We finally break out our favorite tools to bust the touchpad out from behind its bracket bars. This time, we're using a plastic opening tool from our all-new Pro Tech Toolkit.
-
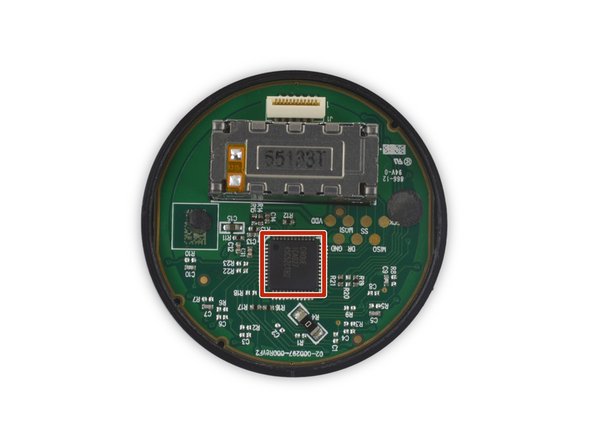
The ribbon cable plugs into a socket on the touchpad daughterboard and is soldered to the haptic feedback actuators, adding some redundancy and durability to the touchpad module.
-
The whole assembly is a touchpad solution from Cirque, likely the GlidePoint TM040040.
-
The brains of the operation is a Cirque 1CA027 companion MCU.
-
Also hiding on the daughterboard we find one of our least favorite things: glue. Those two black globs are mounds of adhesive, securing the touchpad to its bracket.
-
-
-
We deftly dispatch a few more screws and the dual-stage triggers come along for a ride.
-
Much to our surprise they simply slot into the motherboard. No adhesive nor mechanical tricks here!
-
The dual-stage trigger can be broken down into two stages:
-
The first is the smooth motion of the trigger when initially pressed. The magnetic flux sensor measures the position and speed of the trigger based on a time-varying flux.
-
The second part is the click at the end where the trigger physically presses a button on the motherboard.
-
-
-
The motherboard is a fiberglass plane home to a smattering of circuit elements. We do our due diligence and identify:
-
NXP LPC11U37F 32-bit ARM Cortex-M0 microcontroller
-
Nordic Semiconductor nRF51822 Bluetooth Smart and 2.4GHz proprietary SoC
-
Invensense MPU-6500 Six-Axis (Gyro + Accelerometer) MEMS MotionTracking device
-
Allegro Microelectronics A1304 Hall-effect sensor
-
Texas Instruments TPS61029 200 mA / ADJ DC-DC boost converter
-
Texas Instruments TLV70230 300 mA / 3.0 V LDO regulator
-
-
-
Steam Controller Repairability Score: 8 out of 10 (10 is easiest to repair)
-
The only adhesive we encountered was on the touchpads. All other mechanical connections are made with screws.
-
The Controller's relatively modular construction means replacing a single component will be a simple task.
-
While we always say screws before glue, the non-magnetic screws used in this controller are apt to get misplaced and throw a wrench into repairs.
-
The most likely-to-fail component, the thumbstick, is soldered directly to the motherboard.
-


39 commentaires
Does swapping the touchpads and reconnecting them work?
In theory yes in practice no, if you swap them you will end up with an off angle dpad. shape almost like an X Same goes for A B X Y, I tried to do the original nintendo layout but they where angled so it did not work well.
It doesn't work in theory or in practice. I mean it can work. But the effects wouldn't be what you would think. You would actually have to mod the chassis itself which takes patience and artistic craftsmanship. But it can be done just not as easy as one would think. I tried this last night. No cigar. You can always attempt a cross wire and play without the top chassis but it would be uncomfortable and exposed.
So the thumbstick potentiometer is soldered, that's normal, but can the stick itself be replaced? My DS4 has 3rd party metal sticks.
I'd like to know this as well, if I get one of these I'd want to replace it with an Xbox One thumbstick if possible.