Ce tutoriel a des changements plus récents. Passer à la dernière version non vérifiée.
Introduction
Factory dampers should be checked after 50,000 miles to see if they need to be replaced. Whenever working on suspension components you should keep one side completely assembled as a reference.
Ce dont vous avez besoin
-
-
Jack up the front of the car and place it on jack stands.
-
Use an impact wrench or tire iron to remove the five 19 mm lug nuts from the front wheel.
-
Pull the front wheel off the wheel lugs and set it aside.
-
-
-
-
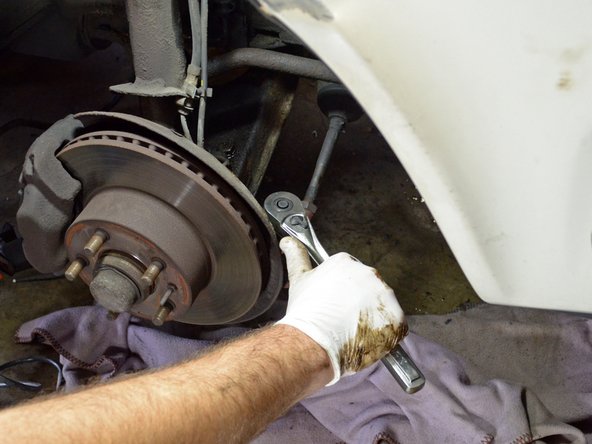
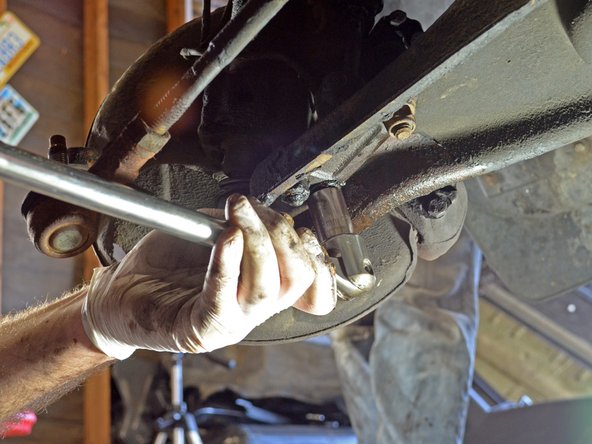
Remove the bottom two nuts with a breaker bar or long wrench.
-
Place a breaker bar over the gold nut on the bottom of the control arm.
-
Place an 18 mm box end wrench over the bolt on top of the control arm.
-
Turn the breaker bar and the wrench in their respective counterclockwise directions to loosen and remove the third ball joint-to-control arm bolt.
I have just finished replacing the shocks and mount. Instead of above, I found it convenient to remove the 4 bolts holding the ball joint plate to the strut pole. Don't forget to replace the old bolts with new OR at least use LocTite if you want to re-use the old bolts. DO NOT use a lot of the LocTIte, only a couple of drops, one on each side of the bolt. Use a big trolley jack and make it a good one. See the one in Step 9 - this is best for the job. If you can get the job done in a DIY garage then do it there. Consider the cost as a learning fee for yourself.
-
-
-
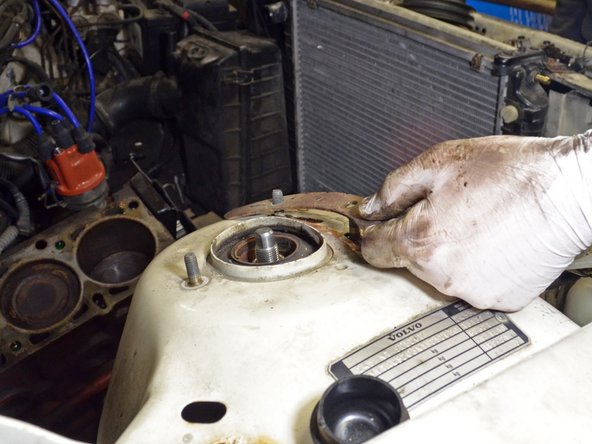
Open the hood and locate the three strut mounting bolts on the strut tower.
-
Make an alignment mark on the shoe at the dimple in the top of the strut tower before removing the mounting nuts.
-
Use a ratcheting socket wrench or impact wrench with a 13 mm deep socket to remove the three nuts.
-
-
-
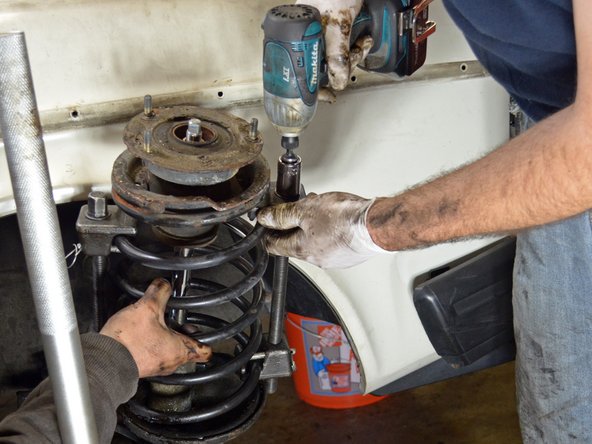
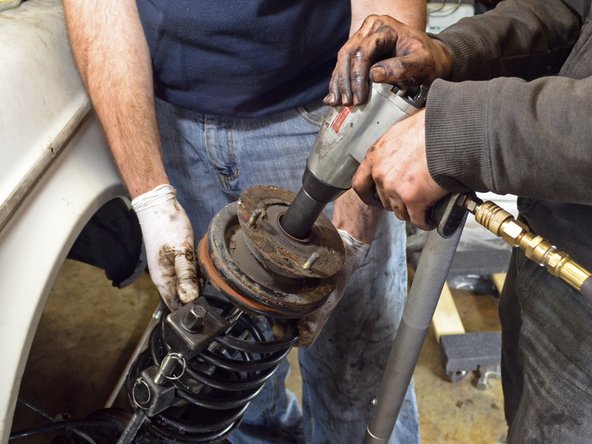
Use a large adjustable wrench or pair of groove joint pliers to remove the strut gland nut.
I have had good luck using a:
AutoCraft 2-3/8" 4 Lug Spindle Nut Wrench
to remove the gland nut that holds the strut in the strut housing. I believe it is designed as a Ford/GM 4WD Locknut Tool
-
-
-
Grab the top of the strut and pull it out of the strut assembly.
Excellent clarity with the photos AND description. I happened to do a search on “Specialized tools for the removal of Volvo 240 struts?” and found this article. So to me, the comprehensive tool listing to do a Volvo 240 strut job was absolutely great! Thank you most sincerely!
Very helpful for a newbie like me. Thanks a lot for sharing your knowledge.
-


To reassemble your device, follow these instructions in reverse order.
To reassemble your device, follow these instructions in reverse order.
Annulation : je n'ai pas terminé ce tutoriel.
15 autres ont terminé cette réparation.

10 commentaires
This is so helpful. When I did this for the first time a while back, it took me and a buddy almost 9 hours to complete it. Now that I'm changing the other side, I decided to see if there were any guides online and WOW THIS IS SO HELPFUL. YOU ARE AMAZING FOR DOING THIS!!!
You note years 86-93. I have an 84 244 Turbo that I want to swap front strut assembly from 90 240. Will this work?
thanks for the help you been most helpfull
Step 14 (removing the strut gland nut) was literally impossible for me. I live in an area with long winters and salted roads. All of the bolts and nuts gave me !&&*, but that one in particular was so rusted together that days of penetrating oil followed by torch heating had no effect. I just replaced the springs and gave up on the struts. This took me days to complete. I’d recommend paying a mechanic rather than attempting this if you live in a rusty area.
The pictures were helpful for understanding disassembly, but I got to the step of removing the ball joint nuts and strut mount nuts before realizing this is a two-person job if you do not disconnect the brake line and ABS sensor, because there is no way in heck you can replace the strut while keeping the whole assembly stable, half out of the wheel well, but still connected via brake and ABS cables.
I understand that the way given above is quick and efficient versus fully removing the strut assembly from the vehicle, but a little note at the top saying it’s a two-person job would be appreciated.
I'm going to tackle my struts this weekend on my 1985 244 DL Volvo..Since this ( CORONAVIRS ) Is going on..Thanks alot ..and everyone BESAFE!!!
I'm going to tackle my struts on my 1985 244 DL Volvo, since this ( CORONAVIRS PANDEMIC ) Is going on..EVERYONE BE SAFE!!!!
Just finished my 1985 244 DL Volvo..this was very helpful..I am restoring the 1985..Thanks alot..
We might need to re-arrange this.
we jacked the car up and then cheated and used a impact gun
if you don't have an impact gun you'll have to do it on the ground
Scott Dingle - Réponse