Aller au contenu principal

Acer Aspire V5-571P-6815 Charging Port Replacement

Ce dont vous avez besoin
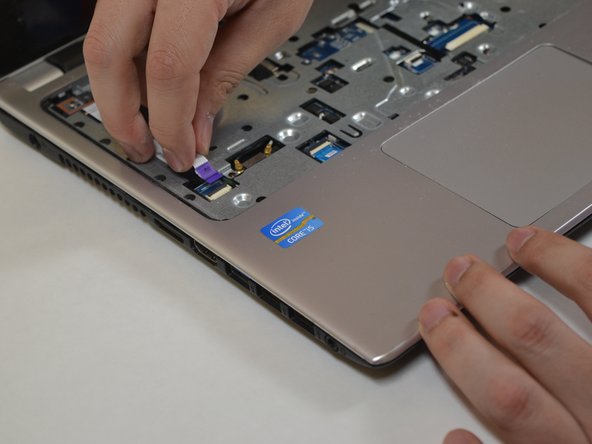
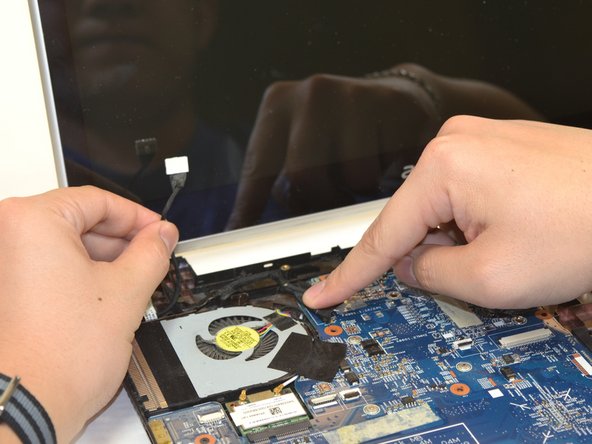
  1. Acer Aspire V5-571P-6815 Charging Port Replacement, Battery: étape 1, image 1 de 1
    • Turn off the computer and unplug all power.

  2. Acer Aspire V5-571P-6815 Charging Port Replacement: étape 2, image 1 de 2 Acer Aspire V5-571P-6815 Charging Port Replacement: étape 2, image 2 de 2
    • Slide the locking latch to the right and hold while pulling the battery out with your other hand.

  3. Acer Aspire V5-571P-6815 Charging Port Replacement, Keyboard: étape 3, image 1 de 1
    • Remove the two 7mm Phillips #00 screws from the bottom of the laptop.

  4. Acer Aspire V5-571P-6815 Charging Port Replacement: étape 4, image 1 de 3 Acer Aspire V5-571P-6815 Charging Port Replacement: étape 4, image 2 de 3 Acer Aspire V5-571P-6815 Charging Port Replacement: étape 4, image 3 de 3
    • Insert a plastic opening tool underneath the keyboard and pry upwards.

    • Slide the plastic opening tool around the perimeter to free the keyboard.

    • Flip the keyboard over and onto the palm rest.

  5. Acer Aspire V5-571P-6815 Charging Port Replacement: étape 5, image 1 de 3 Acer Aspire V5-571P-6815 Charging Port Replacement: étape 5, image 2 de 3 Acer Aspire V5-571P-6815 Charging Port Replacement: étape 5, image 3 de 3
    • Use a spudger to flip up the retaining flap on the keyboard ribbon cable ZIF socket.

    • Pull the ribbon cable out of the socket.

    • Remove the keyboard from the laptop.

  6. Acer Aspire V5-571P-6815 Charging Port Replacement, Charging Port: étape 6, image 1 de 1
    • Remove the six 6mm Phillips #0 screws from underneath the keyboard.

  7. Acer Aspire V5-571P-6815 Charging Port Replacement: étape 7, image 1 de 1
    • Remove the sixteen 6mm Phillips #0 screws from the bottom cover.

  8. Acer Aspire V5-571P-6815 Charging Port Replacement: étape 8, image 1 de 3 Acer Aspire V5-571P-6815 Charging Port Replacement: étape 8, image 2 de 3 Acer Aspire V5-571P-6815 Charging Port Replacement: étape 8, image 3 de 3
    • Use a spudger to flip up the retaining flap on the ribbon cable ZIF socket.

    • Pull the ribbon cable from the socket.

  9. Acer Aspire V5-571P-6815 Charging Port Replacement: étape 9, image 1 de 2 Acer Aspire V5-571P-6815 Charging Port Replacement: étape 9, image 2 de 2
    • Use a spudger to flip up the retaining flap on the ribbon cable ZIF socket.

    • Pull the ribbon cable from the socket.

  10. Acer Aspire V5-571P-6815 Charging Port Replacement: étape 10, image 1 de 3 Acer Aspire V5-571P-6815 Charging Port Replacement: étape 10, image 2 de 3 Acer Aspire V5-571P-6815 Charging Port Replacement: étape 10, image 3 de 3
    • Use a plastic opening tool to pry up the palm rest from the laptop body.

    • Remove the palm rest from the laptop.

  11. Acer Aspire V5-571P-6815 Charging Port Replacement: étape 11, image 1 de 2 Acer Aspire V5-571P-6815 Charging Port Replacement: étape 11, image 2 de 2
    • Disconnect the charging port cable from the motherboard.

    • You might have to remove some electrical tape that is in the way.

  12. Acer Aspire V5-571P-6815 Charging Port Replacement: étape 12, image 1 de 3 Acer Aspire V5-571P-6815 Charging Port Replacement: étape 12, image 2 de 3 Acer Aspire V5-571P-6815 Charging Port Replacement: étape 12, image 3 de 3
    • Lift the charging port up and out of the laptop.

Conclusion

Follow the steps in reverse with a new cable.

Une autre personne a terminé cette réparation.

Gordon Tran

Membre depuis le 04/12/18

225 Réputation

1 tutoriel rédigé

Équipe

UW Tacoma, Team S1-G4, Liner Spring 2018 Membre de l'équipe UW Tacoma, Team S1-G4, Liner Spring 2018

UWT-LINER-S18S1G4

5 membres

8 tutoriels rédigés

0 commentaires

Ajouter un commentaire

Nombre de vues :

Dernières 24 heures : 1

7 derniers jours : 8

30 derniers jours : 23

Total : 5,505