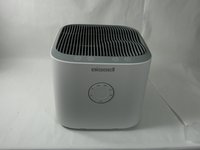
Aller au contenu principal

Bissell Air180 Motherboard Replacement

Ce dont vous avez besoin

  1. Bissell Air180 Motherboard Replacement, Air Filter: étape 1, image 1 de 2 Bissell Air180 Motherboard Replacement, Air Filter: étape 1, image 2 de 2
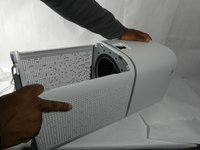
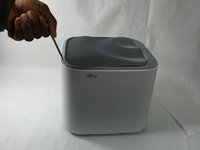
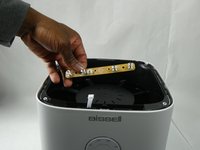
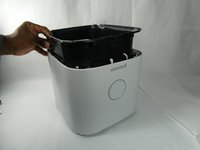
    • Squeeze the clip on the back panel of the bottom housing and pull the panel away from the housing, exposing the air filter.

  2. Bissell Air180 Motherboard Replacement: étape 2, image 1 de 1
    • Grab the sides of the filter and pull it up.

  3. Bissell Air180 Motherboard Replacement: étape 3, image 1 de 1
    • Pull the filter away from the bottom housing, removing it from the rest of the device.

  4. Bissell Air180 Motherboard Replacement, Power Supply: étape 4, image 1 de 1
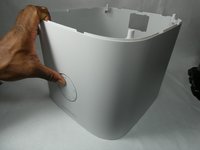
    • Remove the four 18mm Phillips #1 screws connecting the bottom housing to the rest of the device.

  5. Bissell Air180 Motherboard Replacement: étape 5, image 1 de 3 Bissell Air180 Motherboard Replacement: étape 5, image 2 de 3 Bissell Air180 Motherboard Replacement: étape 5, image 3 de 3
    • Pull the bottom housing away from the rest of the device separating the power supply.

    • Unplug the red cord to fully disconnect the power supply from the fan and motherboard housing.

  6. Bissell Air180 Motherboard Replacement, Control Buttons: étape 6, image 1 de 3 Bissell Air180 Motherboard Replacement, Control Buttons: étape 6, image 2 de 3 Bissell Air180 Motherboard Replacement, Control Buttons: étape 6, image 3 de 3
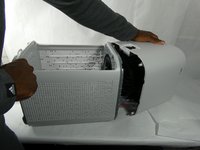
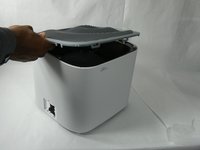
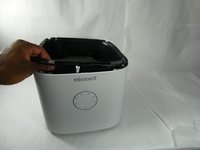
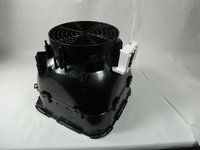
    • Pry off the top vent, separating it from the fan and motherboard housing.

  7. Bissell Air180 Motherboard Replacement: étape 7, image 1 de 2 Bissell Air180 Motherboard Replacement: étape 7, image 2 de 2
    • Pry the button control panel up and away from the rest of the device using a spudger.

  8. Bissell Air180 Motherboard Replacement: étape 8, image 1 de 2 Bissell Air180 Motherboard Replacement: étape 8, image 2 de 2
    • Pull the wire connecting the button controls to the fan housing to fully disconnect the button controls from the device.

  9. Bissell Air180 Motherboard Replacement, Fan: étape 9, image 1 de 3 Bissell Air180 Motherboard Replacement, Fan: étape 9, image 2 de 3 Bissell Air180 Motherboard Replacement, Fan: étape 9, image 3 de 3
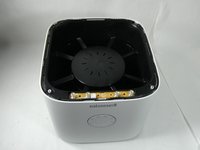
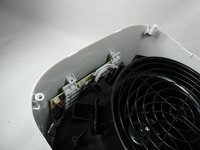
    • Flip the motherboard and fan housing upside down to find where to disconnect the fan from the rest of the device.

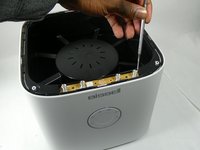
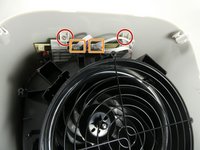
    • Remove the two 11 mm screws using a Phillips #1 screwdriver.

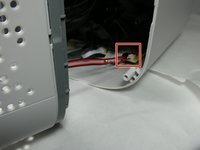
    • Detach the two wires connecting the fan to the motherboard so the fan is now loose inside the housing.

  10. Bissell Air180 Motherboard Replacement: étape 10, image 1 de 2 Bissell Air180 Motherboard Replacement: étape 10, image 2 de 2
    • Flip the motherboard and fan housing back over and pull the fan up separating it from the rest of the device.

  11. Bissell Air180 Motherboard Replacement, Motherboard: étape 11, image 1 de 2 Bissell Air180 Motherboard Replacement, Motherboard: étape 11, image 2 de 2
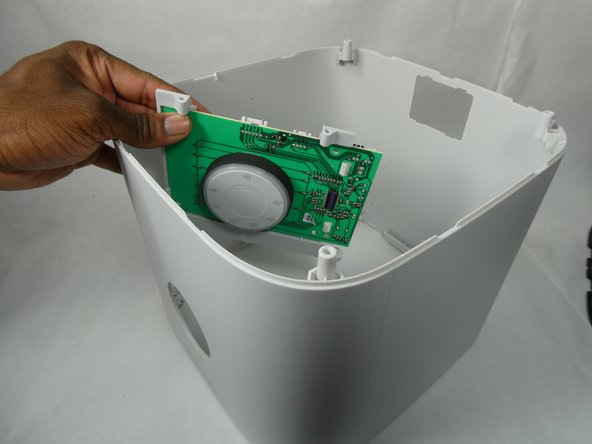
    • Apply pressure and push out the control knob to remove the motherboard from the rest of the device.

    • Removing the two 11mm Phillips #1 screws when disconnecting the fan also disconnected the motherboard from the rest of the device.

Conclusion

To reassemble your device, follow these instructions in reverse order.

Aleah Ramos

Membre depuis le 10/26/22

533 Réputation

5 tutoriels rédigés

Équipe

UMass Dartmouth, Team 3-4, Botvin Fall 2022 Membre de l'équipe UMass Dartmouth, Team 3-4, Botvin Fall 2022

UMASSD-BOTVIN-F22S3G4

4 membres

5 tutoriels rédigés

0 commentaires

Ajouter un commentaire

Nombre de vues :

Dernières 24 heures : 0

7 derniers jours : 1

30 derniers jours : 5

Total : 86