Aller au contenu principal

Canon PowerShot S500 Logic Board Replacement

Ce dont vous avez besoin

  1. Canon PowerShot S500 Logic Board Replacement, Front and Rear Casing : étape 1, image 1 de 2 Canon PowerShot S500 Logic Board Replacement, Front and Rear Casing : étape 1, image 2 de 2
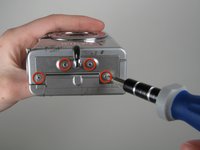
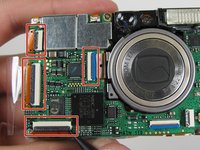
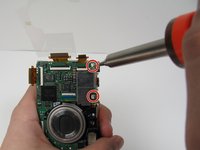
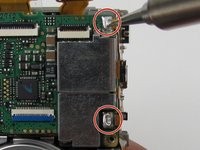
    • Unscrew five Phillips screws using a #0 Phillips screwdriver.

    • One screw is on upper right corner of the back panel.

    • The other four screws are on the bottom of the camera.

  2. Canon PowerShot S500 Logic Board Replacement: étape 2, image 1 de 1
    • Open the memory card cover by moving the slide switch toward the top end of of the camera.

    • Remove the memory card from the slot.

  3. Canon PowerShot S500 Logic Board Replacement: étape 3, image 1 de 1
    • Remove the rear cover from the rest of the camera.

    • This may require gentle rocking of the case to free it.

  4. Canon PowerShot S500 Logic Board Replacement: étape 4, image 1 de 2 Canon PowerShot S500 Logic Board Replacement: étape 4, image 2 de 2
    • Unscrew the four Phillips screws from the side of the casing and one screw from the bottom using a #0 Phillips screwdriver.

  5. Canon PowerShot S500 Logic Board Replacement: étape 5, image 1 de 1
    • Free the front cover from the rest of the camera.

    • The cover may require gentle rocking to remove.

  6. Canon PowerShot S500 Logic Board Replacement, LCD: étape 6, image 1 de 1
    • Unscrew two Phillips screws above the LCD using a #0 Phillips screwdriver.

  7. Canon PowerShot S500 Logic Board Replacement: étape 7, image 1 de 1
    • Gently separate the top of LCD from the rest of the camera using your thumb.

    • Be careful not pull the LCD too far because of the ribbon cable connection.

    • Place the Spudger in the hole of the electrical ribbon.

    • Gently pull the ribbon down using the Spudger until it is free from the camera but still connected to the LCD.

    • The LCD will still be connected to the rest of the camera

  8. Canon PowerShot S500 Logic Board Replacement: étape 8, image 1 de 2 Canon PowerShot S500 Logic Board Replacement: étape 8, image 2 de 2
    • Unscrew single Phillips screw with a #0 Phillips screwdriver.

    • Free the bottom panel and attached ribbon from the rest of the camera.

    • Be careful not to damage the ribbon.

  9. Canon PowerShot S500 Logic Board Replacement: étape 9, image 1 de 1
    • Turn over the camera.

    • Lift the clear plastic from the face of the camera, peeling the adhesive just below the zoom lens.

    • The plastic will still be connected on the left side.

  10. Canon PowerShot S500 Logic Board Replacement: étape 10, image 1 de 1
    • Place the Spudger between the orange ribbon and the black ribbon gate.

    • Lift the ribbon gate using the Spudger.

  11. Canon PowerShot S500 Logic Board Replacement: étape 11, image 1 de 1
    • Place the Spudger in the corner of the ribbon above the hole.

    • Remove the ribbon from the ribbon gate by pulling the Spudger away from the gate.

  12. Canon PowerShot S500 Logic Board Replacement: étape 12, image 1 de 1
    • Free this ribbon and the bottom panel from the rest of the camera.

    • Be careful not to damage the ribbon.

  13. Canon PowerShot S500 Logic Board Replacement: étape 13, image 1 de 1
    • Turn the camera over so you can see the LCD.

    • Remove single Phillips screw below the LCD using a #0 Phillips screwdriver.

  14. Canon PowerShot S500 Logic Board Replacement: étape 14, image 1 de 1
    • Lift the blue ribbon gate using the Spudger.

  15. Canon PowerShot S500 Logic Board Replacement: étape 15, image 1 de 1
    • Insert the Spudger into the hole of the ribbon.

    • Move the Spudger away from the gate to fully remove ribbon.

    • Be careful not to damage the ribbon.

  16. Canon PowerShot S500 Logic Board Replacement: étape 16, image 1 de 1
    • Lift the LCD away from the rest of the camera.

  17. Canon PowerShot S500 Logic Board Replacement, Logic Board: étape 17, image 1 de 2 Canon PowerShot S500 Logic Board Replacement, Logic Board: étape 17, image 2 de 2
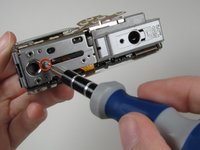
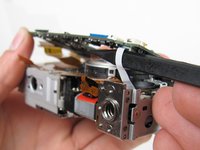
    • Lift off the capture button by wiggling it back and forth while pulling upward.

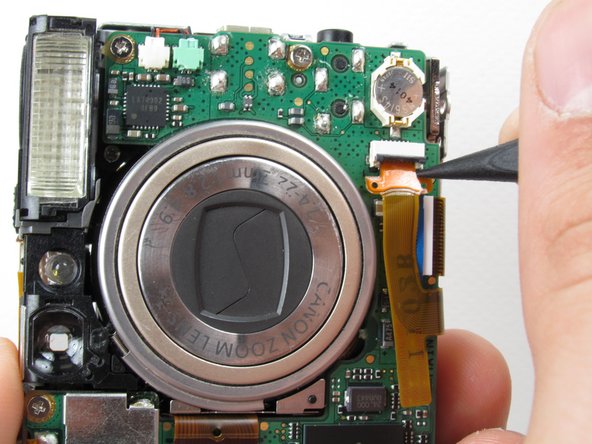
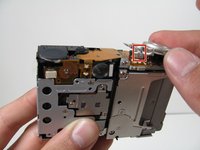
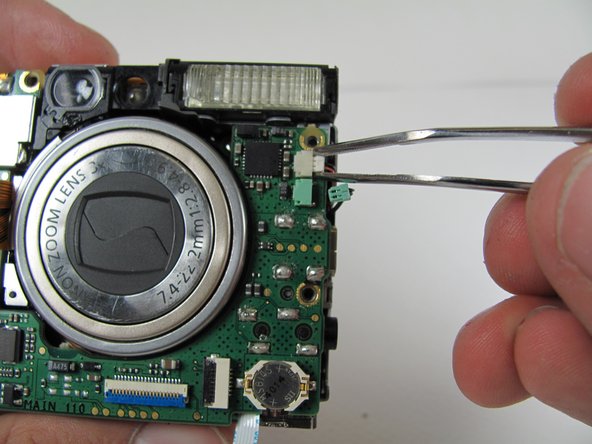
    • Be careful not to damage the two clips.

  18. Canon PowerShot S500 Logic Board Replacement: étape 18, image 1 de 2 Canon PowerShot S500 Logic Board Replacement: étape 18, image 2 de 2
    • Flip open the four ribbon gates using the Spudger.

    • Gently pull out the ribbon cables from the gates using the Spudger.

  19. Canon PowerShot S500 Logic Board Replacement: étape 19, image 1 de 1
    • Unscrew the four Phillips screws using a #0 Phillips screwdriver.

  20. Canon PowerShot S500 Logic Board Replacement: étape 20, image 1 de 2 Canon PowerShot S500 Logic Board Replacement: étape 20, image 2 de 2
    • Gently lift the logic board.

    • Be careful not to pull too hard and damage the white ribbon cable.

    • Place the Spudger so that it is between the logic board, the white ribbon cable, and the rest of the camera.

    • Remove the white ribbon cable by pulling the Spudger away from the camera, keeping it parallel to the logic board.

  21. Canon PowerShot S500 Logic Board Replacement: étape 21, image 1 de 1
    • Lay the logic board back down so that it is resting on the body of the camera.

    • Pull the two plugs (white and green) out to the right from the logic board using the tweezers.

  22. Canon PowerShot S500 Logic Board Replacement: étape 22, image 1 de 2 Canon PowerShot S500 Logic Board Replacement: étape 22, image 2 de 2
    • We're now ready to begin the desoldering process. You'll need a soldering iron, solder, and desoldering wick. You should be able to find these items at a Radio Shack if you don't already have them.

    • Please do not perform this step if you are not comfortable or have previous experience with soldering. Doing so, could cause severe damage to your camera.

    • Desolder the two soldered ribbon cables attached to the logic board.

  23. Canon PowerShot S500 Logic Board Replacement: étape 23, image 1 de 1
    • Free the logic board from the rest of the camera.

Conclusion

To reassemble your device, follow these instructions in reverse order.

Une autre personne a terminé cette réparation.

Nathan Balcom

Membre depuis le 01/21/10

81 Réputation

8 tutoriels rédigés

Équipe

Cal Poly, Team 16-28, Maness Winter 2010 Membre de l'équipe Cal Poly, Team 16-28, Maness Winter 2010

CPSU-MANESS-W10S16G28

4 membres

8 tutoriels rédigés

Un commentaire

How brilliant! Great pictures! But where did you buy the new logic board?

Rosario - Réponse

Ajouter un commentaire

Nombre de vues :

Dernières 24 heures : 0

7 derniers jours : 0

30 derniers jours : 2

Total : 2,786