Aller au contenu principal

Dell Chromebook 5190 WLAN Card Replacement

Ce dont vous avez besoin

  1. Dell Chromebook 5190 WLAN Card Replacement, Battery: étape 1, image 1 de 1
    • Before starting, please make sure you have disconnected and removed all devices populating the laptop's ports.

    • Remove the nine M2.5x7.5 screws located on the bottom side of the laptop.

  2. Dell Chromebook 5190 WLAN Card Replacement: étape 2, image 1 de 3 Dell Chromebook 5190 WLAN Card Replacement: étape 2, image 2 de 3 Dell Chromebook 5190 WLAN Card Replacement: étape 2, image 3 de 3
    • Be cautious, the following instructions are to prevent cracking the base cover.

    • With the opening tool, pry open the upper left corner by the laptop hinge.

    • With the opening tool, pry open the upper right corner by the laptop hinge.

    • Lift off base cover.

  3. Dell Chromebook 5190 WLAN Card Replacement: étape 3, image 1 de 2 Dell Chromebook 5190 WLAN Card Replacement: étape 3, image 2 de 2
    • Unscrew and remove the M2x3 screw holding the silver metal brackets labeled "Battery Bracket" located on the top left side of the battery.

    • Unscrew and remove the M2x3 screw holding the silver metal brackets labeled "Battery Bracket" located on the top right side of the battery.

  4. Dell Chromebook 5190 WLAN Card Replacement: étape 4, image 1 de 2 Dell Chromebook 5190 WLAN Card Replacement: étape 4, image 2 de 2
    • Remove the clear adhesive tape on the system board from the battery cable from where it's seated above the battery.

    • Pull out the keyboard cable toward you to disconnect it.

  5. Dell Chromebook 5190 WLAN Card Replacement: étape 5, image 1 de 2 Dell Chromebook 5190 WLAN Card Replacement: étape 5, image 2 de 2
    • Remove the black adhesive tape on the system board from the battery cable.

    • Dismount the cable from where it's seated above the battery.

  6. Dell Chromebook 5190 WLAN Card Replacement: étape 6, image 1 de 3 Dell Chromebook 5190 WLAN Card Replacement: étape 6, image 2 de 3 Dell Chromebook 5190 WLAN Card Replacement: étape 6, image 3 de 3
    • Unscrew and remove the four M2x3 screws on each corner of the battery.

    • Dismount the battery.

  7. Dell Chromebook 5190 WLAN Card Replacement, WLAN Card: étape 7, image 1 de 2 Dell Chromebook 5190 WLAN Card Replacement, WLAN Card: étape 7, image 2 de 2
    • Unscrew and remove the M2x3 screw.

    • Remove the metal bracket.

  8. Dell Chromebook 5190 WLAN Card Replacement: étape 8, image 1 de 1
    • Remove WLAN antennas.

  9. Dell Chromebook 5190 WLAN Card Replacement: étape 9, image 1 de 1
    • Slide the WLAN card away from the motherboard.

Conclusion

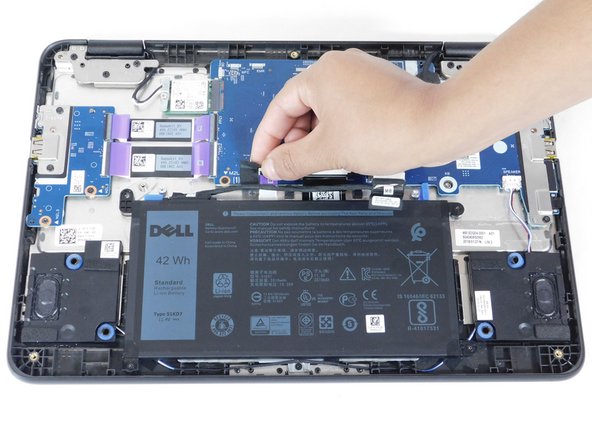
To reassemble your device, follow these instructions in reverse order.

Brian

Membre depuis le 02/10/22

97 Réputation

1 tutoriel rédigé

Équipe

Gateway, Team 1-3, Pee Spring 2022 Membre de l'équipe Gateway, Team 1-3, Pee Spring 2022

GCC-PEE-S22S1G3

3 membres

5 tutoriels rédigés

0 commentaires

Ajouter un commentaire

Nombre de vues :

Dernières 24 heures : 0

7 derniers jours : 1

30 derniers jours : 2

Total : 104