Aller au contenu principal
Dell Inspiron 11-3162 LCD Screen Replacement

Dell Inspiron 11-3162 LCD Screen Replacement

Jared Johnson

Jared Johnson et 2 autres contributeurs

Dernière mise à jour le December 23, 2016

10 - 15 minutes
Modérée

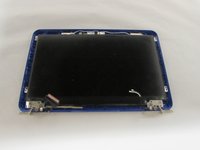
This guide will tell you how to replace your LCD screen. When working with screens, be careful about electrical discharges, and take steps to assure that the battery is disconnected for awhile before you follow this guide.

Ce dont vous avez besoin

Outils

Afficher plus…

  1. Dell Inspiron 11-3162 LCD Screen Replacement, Back Cover Removal: étape 1, image 1 de 2 Dell Inspiron 11-3162 LCD Screen Replacement, Back Cover Removal: étape 1, image 2 de 2
    Outil utilisé dans cette étape :
    Tweezers
    $4.99
    • Before you begin, be sure to turn off your laptop and unplug it from the outlet.

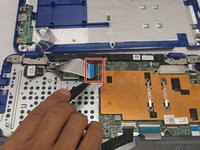
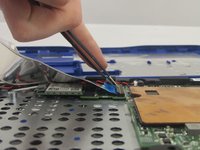
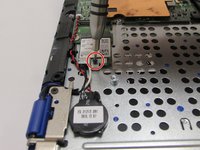
    • Use tweezers to pry and remove the center screw cover on the back cover.

  2. Dell Inspiron 11-3162 LCD Screen Replacement: étape 2, image 1 de 2 Dell Inspiron 11-3162 LCD Screen Replacement: étape 2, image 2 de 2
    • Use a Phillips screwdriver to unscrew the nine 6.8 mm screws securing the back cover.

  3. Dell Inspiron 11-3162 LCD Screen Replacement: étape 3, image 1 de 1
    • Use a spudger to pry around the base edges of the back cover to loosen it from the laptop.

    • Do not fully remove the cover, as it is still attached to the laptop with cables.

  4. Dell Inspiron 11-3162 LCD Screen Replacement: étape 4, image 1 de 3 Dell Inspiron 11-3162 LCD Screen Replacement: étape 4, image 2 de 3 Dell Inspiron 11-3162 LCD Screen Replacement: étape 4, image 3 de 3
    • If you are only replacing the battery, you can skip this step. Be careful not to strain the still-connected cable as you work.

    • Unlock the wide ZIF connector securing the flex cable.

    • To unlock a ZIF connector, use the tip of a spudger or your fingernail to flip up the small, hinged locking flap.

    • Pull the ribbon cable outwards to disconnect the back cover from the motherboard.

  5. Dell Inspiron 11-3162 LCD Screen Replacement, Battery: étape 5, image 1 de 2 Dell Inspiron 11-3162 LCD Screen Replacement, Battery: étape 5, image 2 de 2
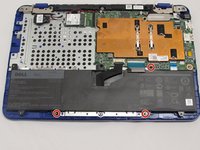
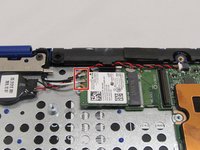
    • Use a Phillips screwdriver to unscrew the three 4 mm screws securing the battery.

  6. Dell Inspiron 11-3162 LCD Screen Replacement: étape 6, image 1 de 3 Dell Inspiron 11-3162 LCD Screen Replacement: étape 6, image 2 de 3 Dell Inspiron 11-3162 LCD Screen Replacement: étape 6, image 3 de 3
    Outil utilisé dans cette étape :
    Tweezers
    $4.99
    • Use your fingers (or a set of tweezers) to disconnect the battery cable from the motherboard by gently pulling it towards the battery.

    • Pull parallel to the battery, not straight up.

    • Lift and remove the battery from its recess.

  7. Dell Inspiron 11-3162 LCD Screen Replacement, Wireless WLAN Card: étape 7, image 1 de 2 Dell Inspiron 11-3162 LCD Screen Replacement, Wireless WLAN Card: étape 7, image 2 de 2
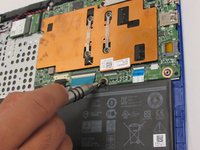
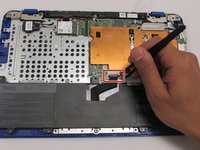
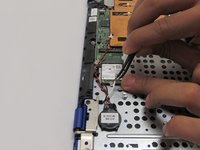
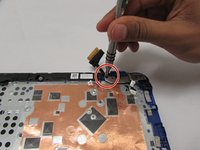
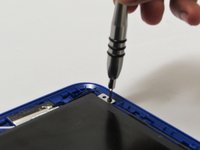
    • Use the phillips screwdriver with the PH000 head to unscrew the 3.8mm screw.

  8. Dell Inspiron 11-3162 LCD Screen Replacement: étape 8, image 1 de 2 Dell Inspiron 11-3162 LCD Screen Replacement: étape 8, image 2 de 2
    Outil utilisé dans cette étape :
    Tweezers
    $4.99
    • Using the tweezers, pull the white and black wires off of the WiFi Chip.

  9. Dell Inspiron 11-3162 LCD Screen Replacement: étape 9, image 1 de 1
    • Pull out the WiFi Chip.

  10. Dell Inspiron 11-3162 LCD Screen Replacement, LCD Screen: étape 10, image 1 de 2 Dell Inspiron 11-3162 LCD Screen Replacement, LCD Screen: étape 10, image 2 de 2
    • Remove the two screws that hold down the LCD hinges.

  11. Dell Inspiron 11-3162 LCD Screen Replacement: étape 11, image 1 de 1
    • Pull the hinges back and remove the screen.

  12. Dell Inspiron 11-3162 LCD Screen Replacement: étape 12, image 1 de 2 Dell Inspiron 11-3162 LCD Screen Replacement: étape 12, image 2 de 2
    • Remove the hinge covers with your spudger tool.

  13. Dell Inspiron 11-3162 LCD Screen Replacement: étape 13, image 1 de 2 Dell Inspiron 11-3162 LCD Screen Replacement: étape 13, image 2 de 2
    • Carefully remove the LCD Bezel with your regular black nylon spudger tool by bringing it all the way around the outer edges of your screen.

  14. Dell Inspiron 11-3162 LCD Screen Replacement: étape 14, image 1 de 3 Dell Inspiron 11-3162 LCD Screen Replacement: étape 14, image 2 de 3 Dell Inspiron 11-3162 LCD Screen Replacement: étape 14, image 3 de 3
    • Remove the four screws with a PH00 sized bit.

    • Flip the screen over.

  15. Dell Inspiron 11-3162 LCD Screen Replacement: étape 15, image 1 de 1
    • Loosen the tape, and remove the LCD Cable.

    • Remove the screen.

Conclusion

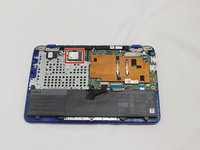
To reassemble your device, follow these instructions in reverse order.

5 autres ont terminé cette réparation.

Jared Johnson

Membre depuis le 09/29/16

589 Réputation

2 tutoriels rédigés

Équipe

2 commentaires

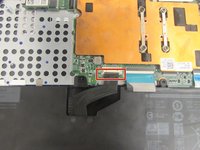
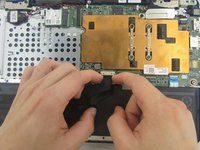
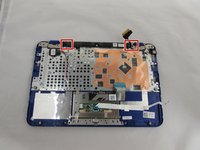
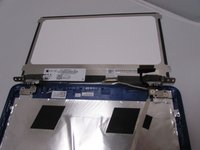
Between steps 9 and 10, the motherboard is removed and no description photos are provided for this. I undid the cable on the right hinge and then removed the hinges and screen with the motherboard in place, but the pictures definitely show it removed. Otherwise a very easy to follow process.

Philip Blakemore - Réponse

I agree with Philip’s comment re: the missing step between 9 and 10. I successfully followed these very clear instructions to repair my daughter’s Chromebook. Thank you!

Katrina Dalrymple - Réponse

Ajouter un commentaire

Nombre de vues :

Dernières 24 heures : 1

7 derniers jours : 12

30 derniers jours : 12

Total : 1,709