Aller au contenu principal

Echo Chain Saw CS590 2019 Oil System Replacement

Ce dont vous avez besoin

  1. Echo Chain Saw CS590 2019 Oil System Replacement, Turn off the chainsaw: étape 1, image 1 de 2 Echo Chain Saw CS590 2019 Oil System Replacement, Turn off the chainsaw: étape 1, image 2 de 2
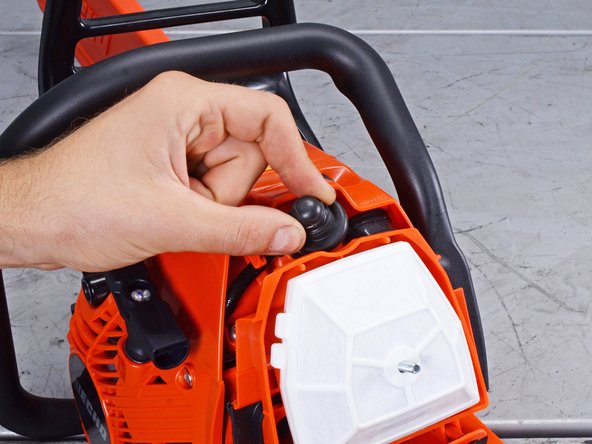
    • Make sure you have the ignition switch turned off before starting your repair.

    • The chainsaw should be cool to the touch before continuing.

  2. Echo Chain Saw CS590 2019 Oil System Replacement, Loosen the air filter cover: étape 2, image 1 de 2 Echo Chain Saw CS590 2019 Oil System Replacement, Loosen the air filter cover: étape 2, image 2 de 2
    • Use your fingers to loosen the air filter cover knob.

  3. Echo Chain Saw CS590 2019 Oil System Replacement: étape 3, image 1 de 3 Echo Chain Saw CS590 2019 Oil System Replacement: étape 3, image 2 de 3 Echo Chain Saw CS590 2019 Oil System Replacement: étape 3, image 3 de 3
    • Remove the air filter cover.

  4. Echo Chain Saw CS590 2019 Oil System Replacement, Disconnect the spark plug: étape 4, image 1 de 3 Echo Chain Saw CS590 2019 Oil System Replacement, Disconnect the spark plug: étape 4, image 2 de 3 Echo Chain Saw CS590 2019 Oil System Replacement, Disconnect the spark plug: étape 4, image 3 de 3
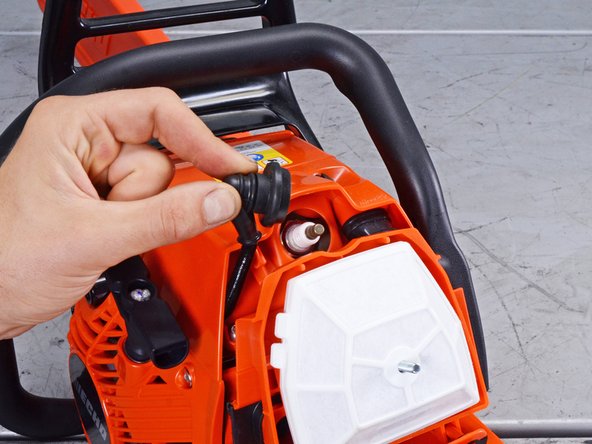
    • Use your fingers to pull up and disconnect the spark plug boot.

  5. Echo Chain Saw CS590 2019 Oil System Replacement, Remove the air filter: étape 5, image 1 de 3 Echo Chain Saw CS590 2019 Oil System Replacement, Remove the air filter: étape 5, image 2 de 3 Echo Chain Saw CS590 2019 Oil System Replacement, Remove the air filter: étape 5, image 3 de 3
    • To minimize debris entering the intake, pull the choke shut before continuing.

    • Remove the air filter

    • During reassembly, clean the air filter with compressed air or with light brushing before reinstalling it.

  6. Echo Chain Saw CS590 2019 Oil System Replacement, Unfasten the front handle: étape 6, image 1 de 2 Echo Chain Saw CS590 2019 Oil System Replacement, Unfasten the front handle: étape 6, image 2 de 2
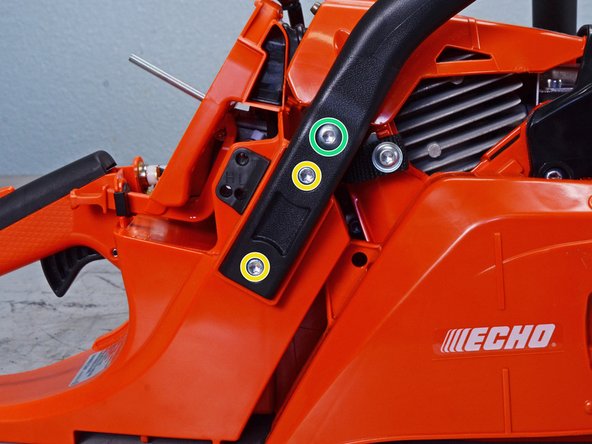
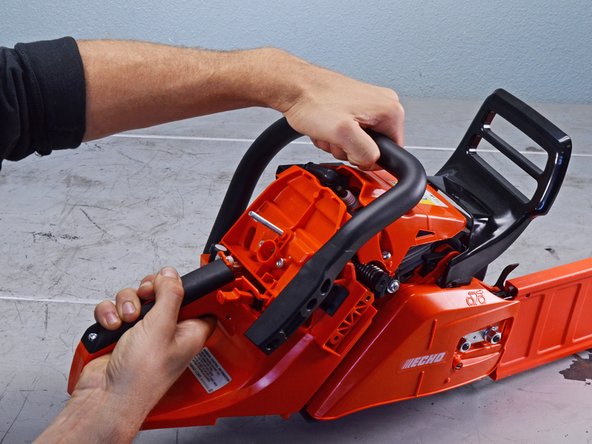
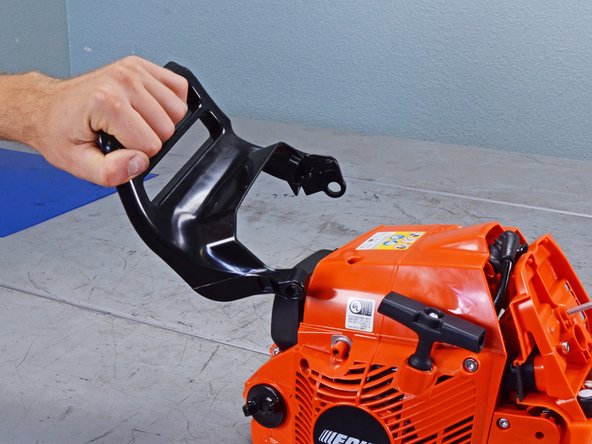
    • Use a T25 Torx screwdriver to remove the five screws securing the front handle to the bottom and right side of the device:

    • Four 24 mm-long screws

    • One 25 mm-long screw

  7. Echo Chain Saw CS590 2019 Oil System Replacement, Remove the front handle: étape 7, image 1 de 3 Echo Chain Saw CS590 2019 Oil System Replacement, Remove the front handle: étape 7, image 2 de 3 Echo Chain Saw CS590 2019 Oil System Replacement, Remove the front handle: étape 7, image 3 de 3
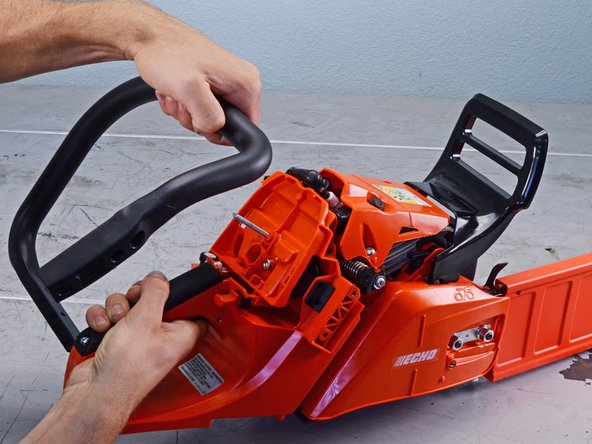
    • Pull the handle toward the rear of the device to remove it.

  8. Echo Chain Saw CS590 2019 Oil System Replacement, Remove the sprocket guard: étape 8, image 1 de 2 Echo Chain Saw CS590 2019 Oil System Replacement, Remove the sprocket guard: étape 8, image 2 de 2
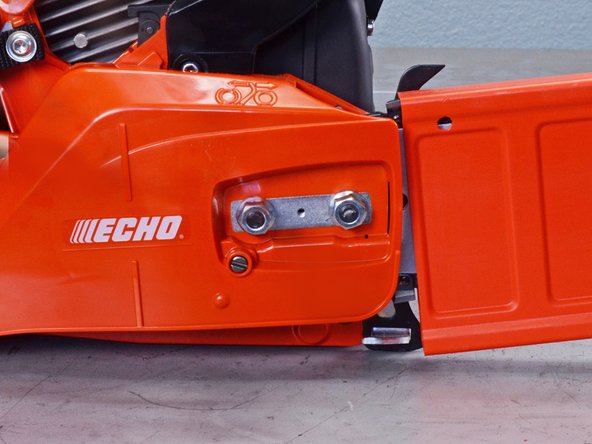
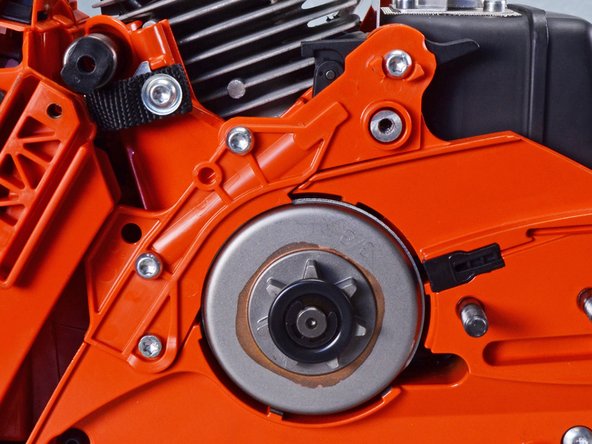
    • Use a 13 mm wrench to remove the two nuts securing the sprocket guard.

  9. Echo Chain Saw CS590 2019 Oil System Replacement: étape 9, image 1 de 3 Echo Chain Saw CS590 2019 Oil System Replacement: étape 9, image 2 de 3 Echo Chain Saw CS590 2019 Oil System Replacement: étape 9, image 3 de 3
    • Remove the sprocket guard.

  10. Echo Chain Saw CS590 2019 Oil System Replacement, Remove the guide bar: étape 10, image 1 de 3 Echo Chain Saw CS590 2019 Oil System Replacement, Remove the guide bar: étape 10, image 2 de 3 Echo Chain Saw CS590 2019 Oil System Replacement, Remove the guide bar: étape 10, image 3 de 3
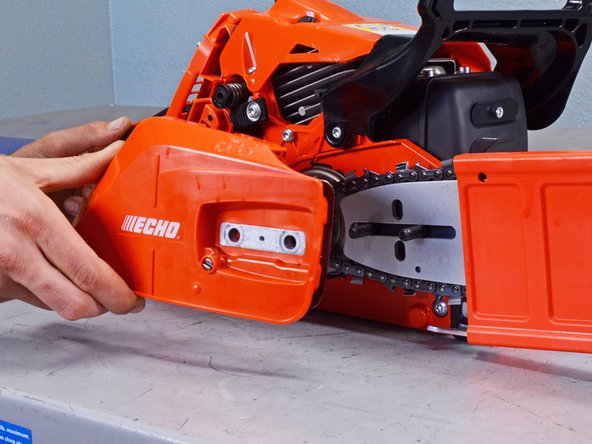
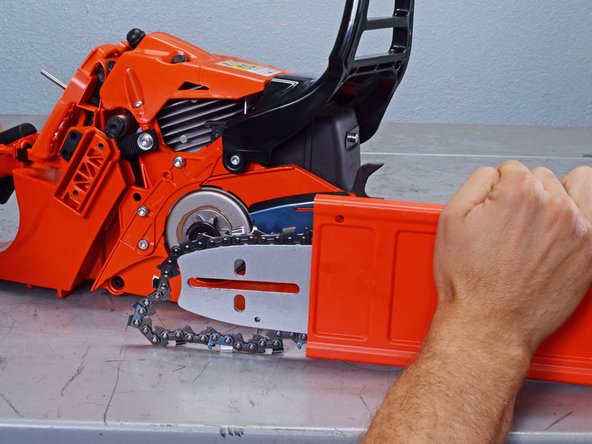
    • Push the guide bar towards the back of the device to create slack in the saw chain.

    • Pull the guide bar away from the device to separate the saw chain from the clutch drum.

    • Remove the guide bar.

  11. Echo Chain Saw CS590 2019 Oil System Replacement, Unfasten the front hand guard: étape 11, image 1 de 2 Echo Chain Saw CS590 2019 Oil System Replacement, Unfasten the front hand guard: étape 11, image 2 de 2
    • Make sure the front hand guard is in the unlocked position before continuing.

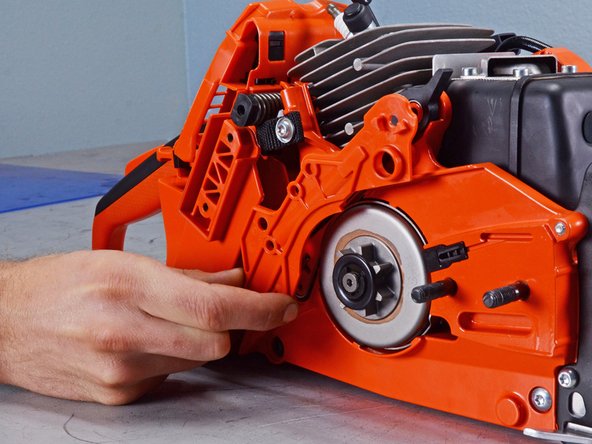
    • Use a T25 Torx screwdriver to remove the two 20 mm screws securing the front hand guard.

  12. Echo Chain Saw CS590 2019 Oil System Replacement, Remove the front hand guard: étape 12, image 1 de 2 Echo Chain Saw CS590 2019 Oil System Replacement, Remove the front hand guard: étape 12, image 2 de 2
    • Pull the front hand guard toward the rear of the device to remove it.

  13. Echo Chain Saw CS590 2019 Oil System Replacement, Unfasten the engine cover: étape 13, image 1 de 2 Echo Chain Saw CS590 2019 Oil System Replacement, Unfasten the engine cover: étape 13, image 2 de 2
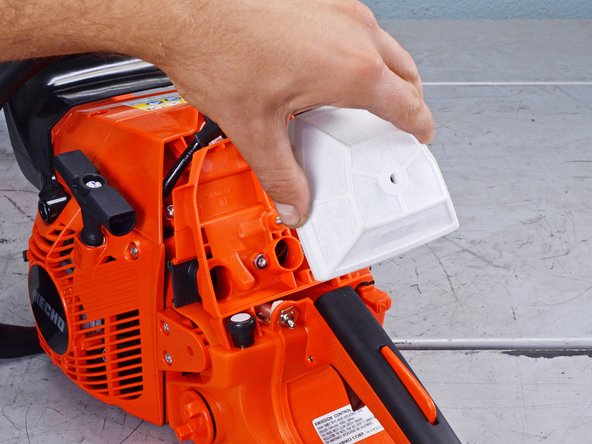
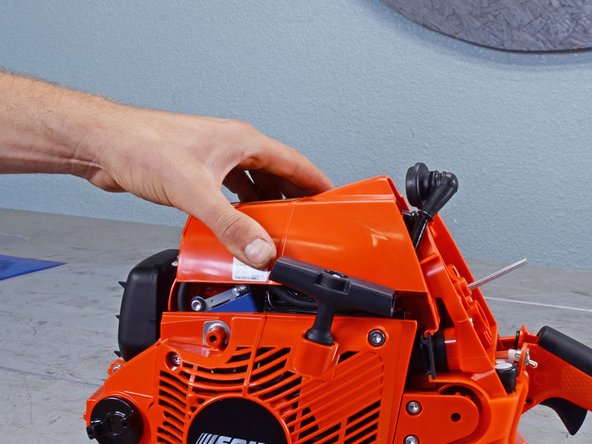
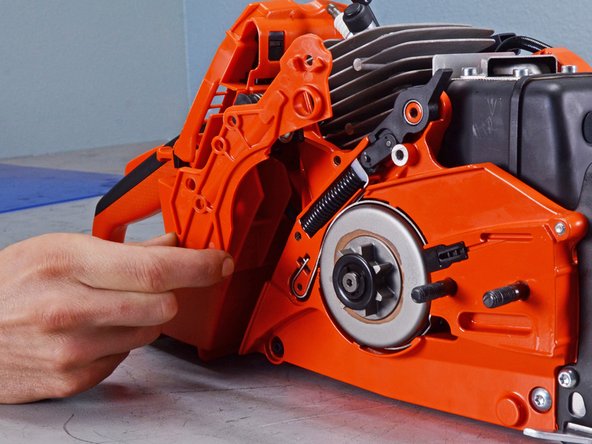
    • Use a T25 Torx screwdriver to remove the three 20 mm screws securing the engine cover.

  14. Echo Chain Saw CS590 2019 Oil System Replacement, Remove the engine cover: étape 14, image 1 de 3 Echo Chain Saw CS590 2019 Oil System Replacement, Remove the engine cover: étape 14, image 2 de 3 Echo Chain Saw CS590 2019 Oil System Replacement, Remove the engine cover: étape 14, image 3 de 3
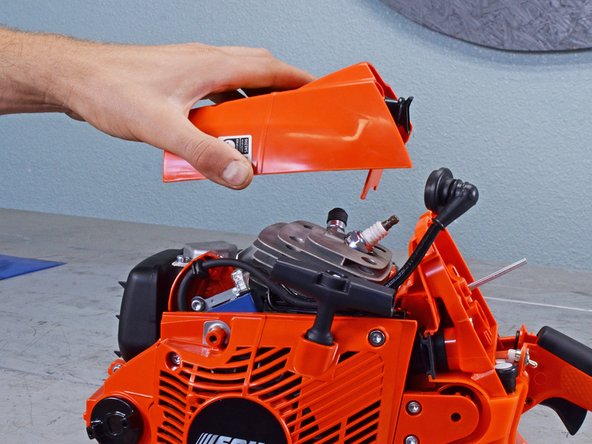
    • Pull the engine cover straight off the device to remove it.

  15. Echo Chain Saw CS590 2019 Oil System Replacement, Remove the oil cap: étape 15, image 1 de 3 Echo Chain Saw CS590 2019 Oil System Replacement, Remove the oil cap: étape 15, image 2 de 3 Echo Chain Saw CS590 2019 Oil System Replacement, Remove the oil cap: étape 15, image 3 de 3
    • Use your fingers to loosen and remove the oil cap.

  16. Echo Chain Saw CS590 2019 Oil System Replacement, Remove the oil filter: étape 16, image 1 de 3 Echo Chain Saw CS590 2019 Oil System Replacement, Remove the oil filter: étape 16, image 2 de 3 Echo Chain Saw CS590 2019 Oil System Replacement, Remove the oil filter: étape 16, image 3 de 3
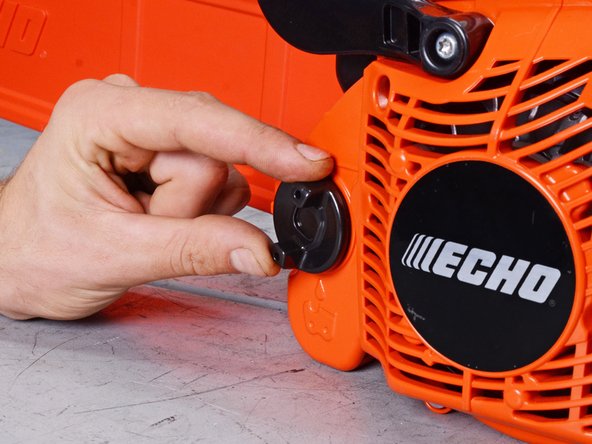
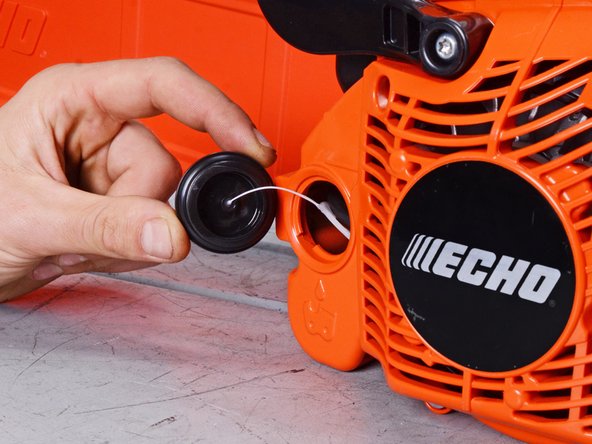
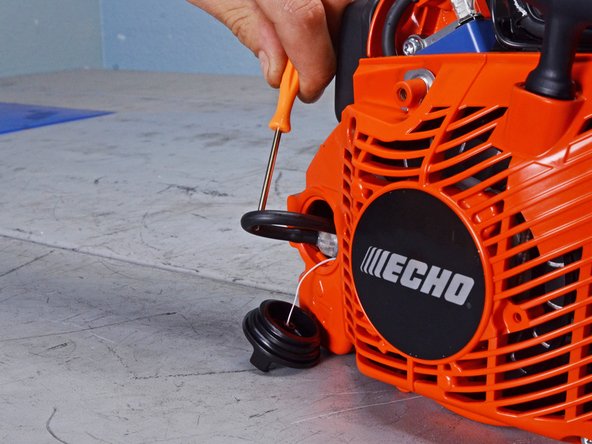
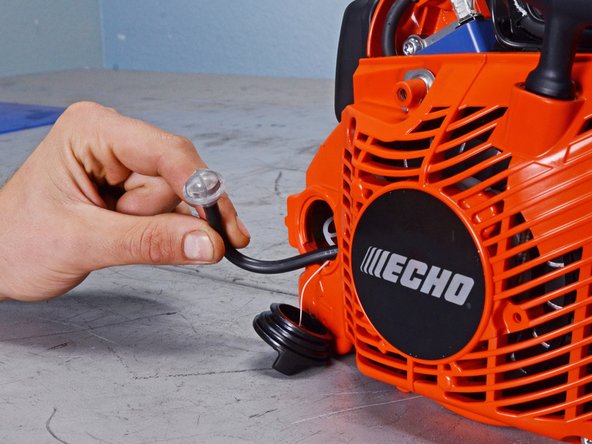
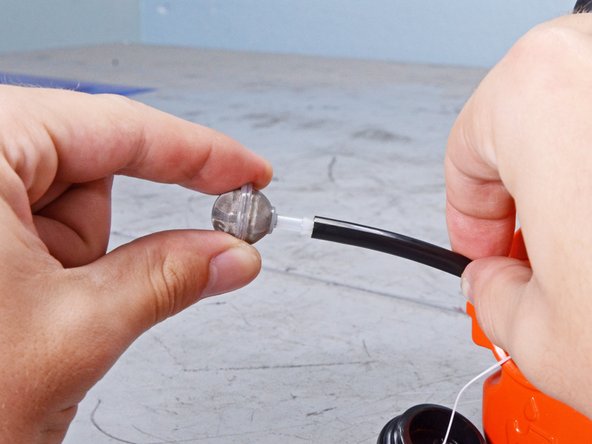
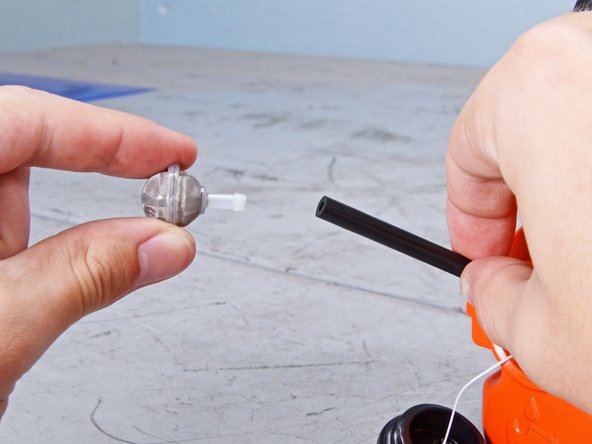
    • Use a flathead screwdriver, or your fingers, to remove the oil filter from its recess in the fuel assembly.

  17. Echo Chain Saw CS590 2019 Oil System Replacement: étape 17, image 1 de 3 Echo Chain Saw CS590 2019 Oil System Replacement: étape 17, image 2 de 3 Echo Chain Saw CS590 2019 Oil System Replacement: étape 17, image 3 de 3
    • Pull on the oil filter to separate it from the fuel pipe.

  18. Echo Chain Saw CS590 2019 Oil System Replacement, Remove the inner guide plate: étape 18, image 1 de 2 Echo Chain Saw CS590 2019 Oil System Replacement, Remove the inner guide plate: étape 18, image 2 de 2
    • Insert the edge of a screwdriver between the inner guide plate and the chassis.

    • Pry up with the screwdriver to initially separate the plate.

    • Slide the plate out of its two bolts to remove it.

  19. Echo Chain Saw CS590 2019 Oil System Replacement, Unfasten the brake cover: étape 19, image 1 de 2 Echo Chain Saw CS590 2019 Oil System Replacement, Unfasten the brake cover: étape 19, image 2 de 2
    • Use a T25 Torx screwdriver to remove the four screws securing the brake cover:

    • Three 20 mm-long screws

    • One 16 mm-long screw

  20. Echo Chain Saw CS590 2019 Oil System Replacement, Remove the brake cover: étape 20, image 1 de 3 Echo Chain Saw CS590 2019 Oil System Replacement, Remove the brake cover: étape 20, image 2 de 3 Echo Chain Saw CS590 2019 Oil System Replacement, Remove the brake cover: étape 20, image 3 de 3
    • Pull the brake cover straight off the clutch drum to remove it.

  21. Echo Chain Saw CS590 2019 Oil System Replacement, Remove the E-ring: étape 21, image 1 de 3 Echo Chain Saw CS590 2019 Oil System Replacement, Remove the E-ring: étape 21, image 2 de 3 Echo Chain Saw CS590 2019 Oil System Replacement, Remove the E-ring: étape 21, image 3 de 3
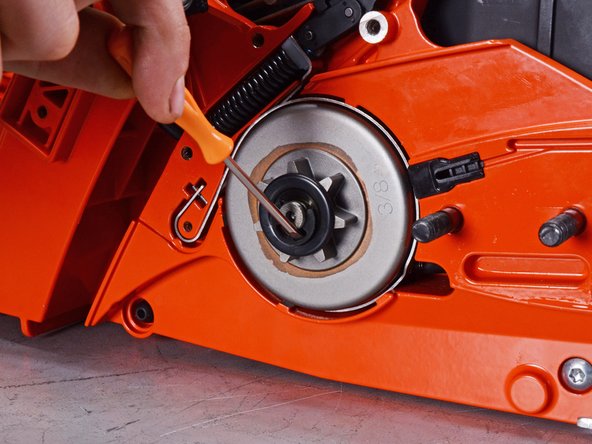
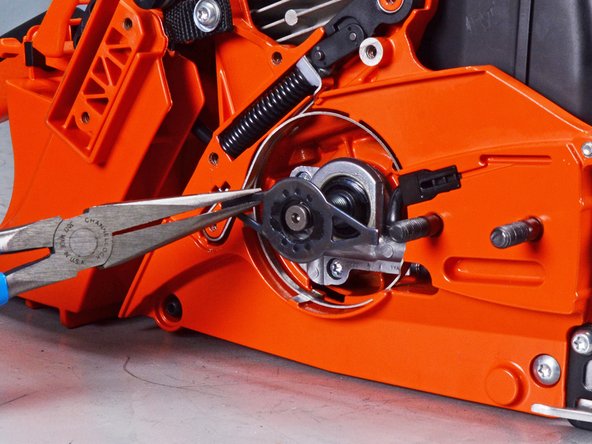
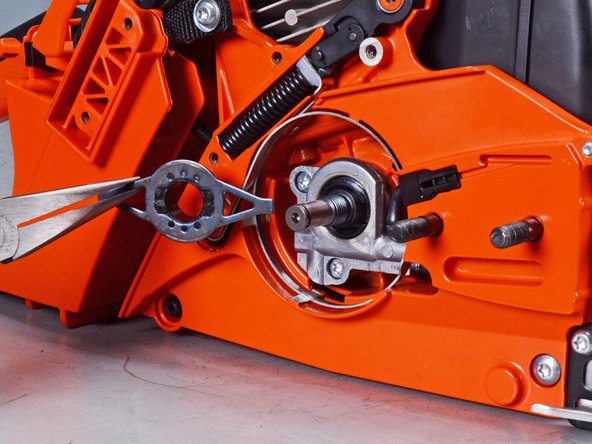
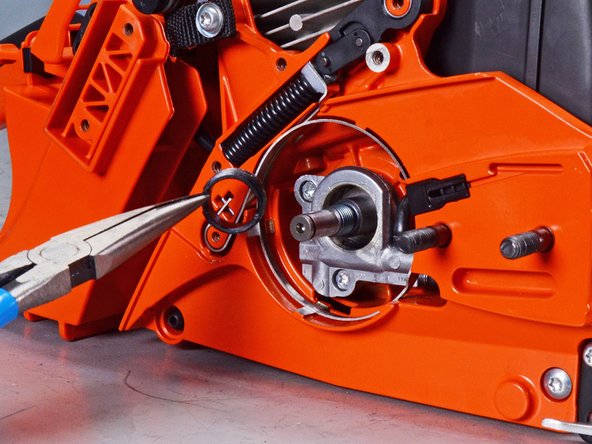
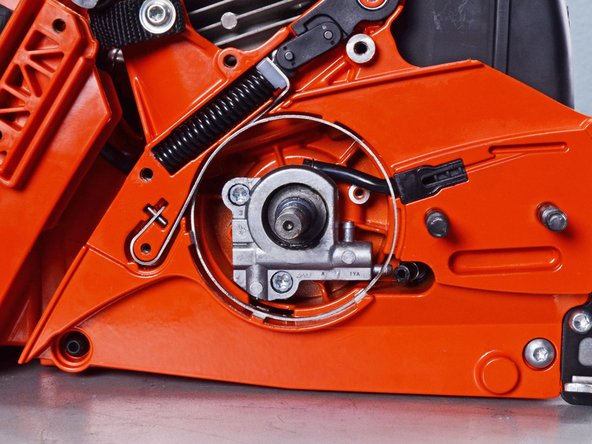
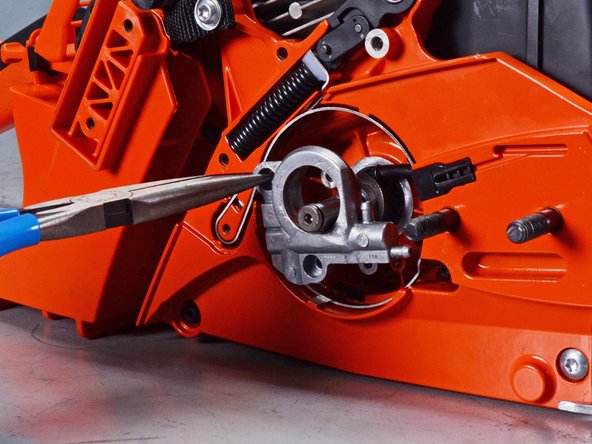
    • Use E-ring pliers, or a flathead screwdriver, to remove the E-ring on the clutch drum.

  22. Echo Chain Saw CS590 2019 Oil System Replacement, Remove the washer: étape 22, image 1 de 2 Echo Chain Saw CS590 2019 Oil System Replacement, Remove the washer: étape 22, image 2 de 2
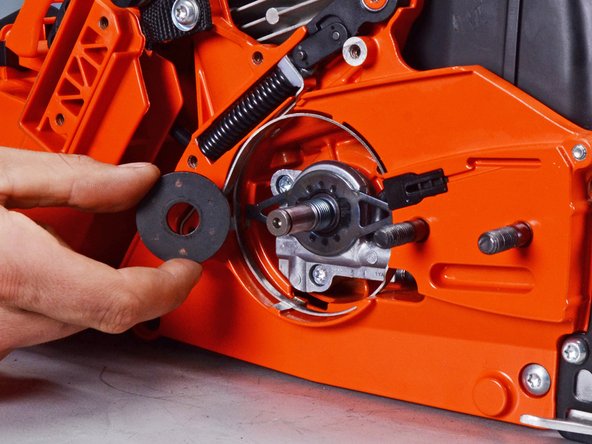
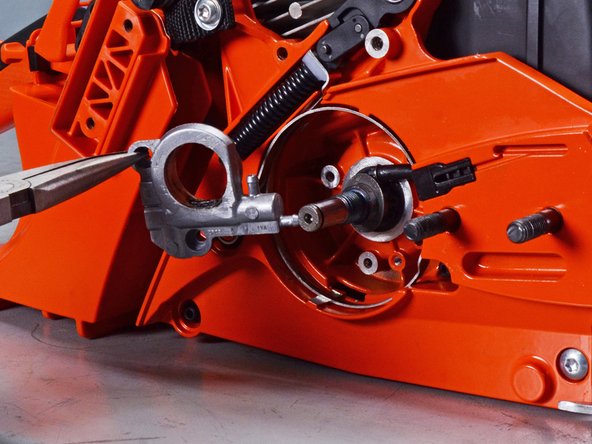
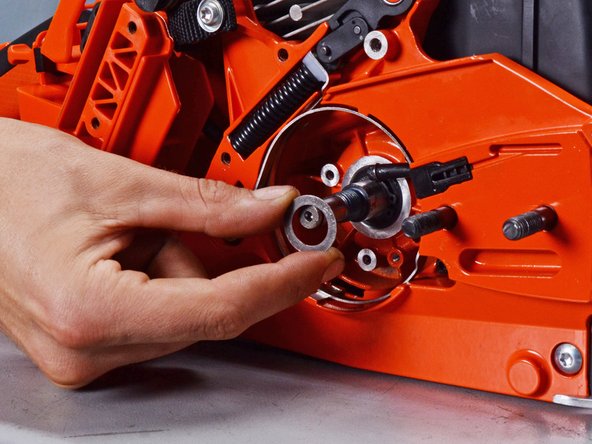
    • Use your fingers to pull the washer straight out of its housing to remove it.

  23. Echo Chain Saw CS590 2019 Oil System Replacement, Remove the clutch drum: étape 23, image 1 de 3 Echo Chain Saw CS590 2019 Oil System Replacement, Remove the clutch drum: étape 23, image 2 de 3 Echo Chain Saw CS590 2019 Oil System Replacement, Remove the clutch drum: étape 23, image 3 de 3
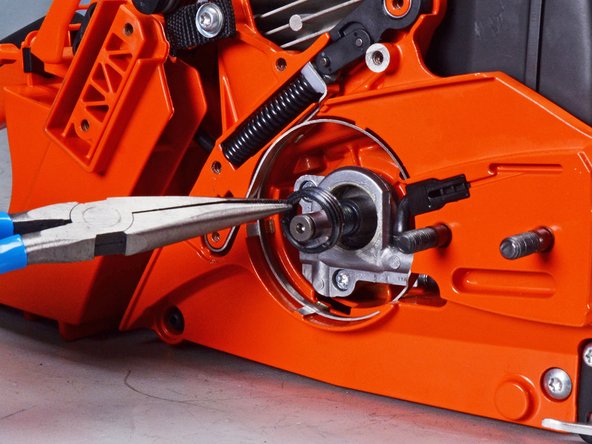
    • Pull the clutch drum straight out of its recess to remove it.

    • The needle bearing should come out with the clutch drum. Make sure bearing is reinserted before reinstalling the clutch drum.

  24. Echo Chain Saw CS590 2019 Oil System Replacement, Remove the spark plug: étape 24, image 1 de 2 Echo Chain Saw CS590 2019 Oil System Replacement, Remove the spark plug: étape 24, image 2 de 2
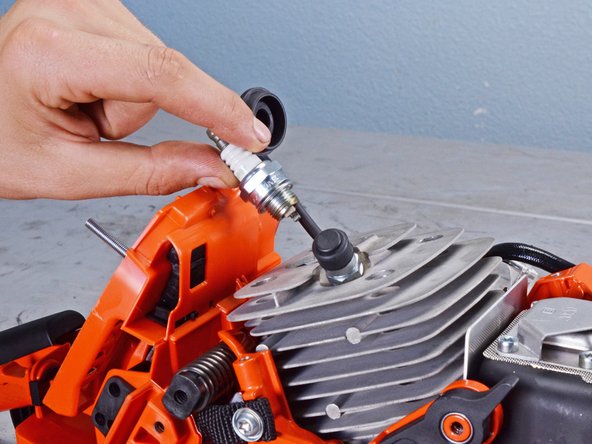
    • Use a spark plug socket to loosen and remove the spark plug.

  25. Echo Chain Saw CS590 2019 Oil System Replacement, Insert a rope: étape 25, image 1 de 3 Echo Chain Saw CS590 2019 Oil System Replacement, Insert a rope: étape 25, image 2 de 3 Echo Chain Saw CS590 2019 Oil System Replacement, Insert a rope: étape 25, image 3 de 3
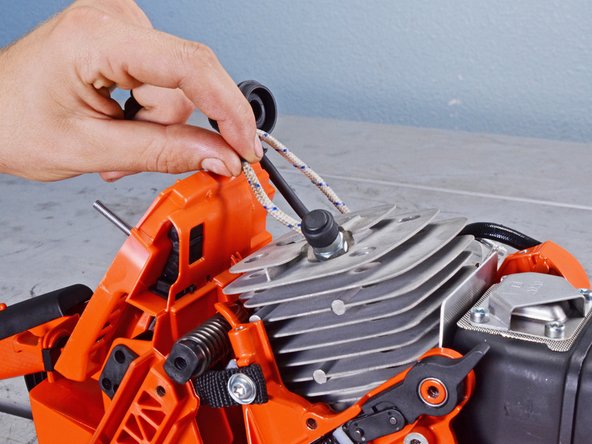
    • Feed a piston stopping cord or rope through the cylinder head into the combustion chamber until the crankshaft can no longer rotate.

    • Do not insert the entire cord into the combustion chamber.

  26. Echo Chain Saw CS590 2019 Oil System Replacement, Remove the clutch assembly: étape 26, image 1 de 2 Echo Chain Saw CS590 2019 Oil System Replacement, Remove the clutch assembly: étape 26, image 2 de 2
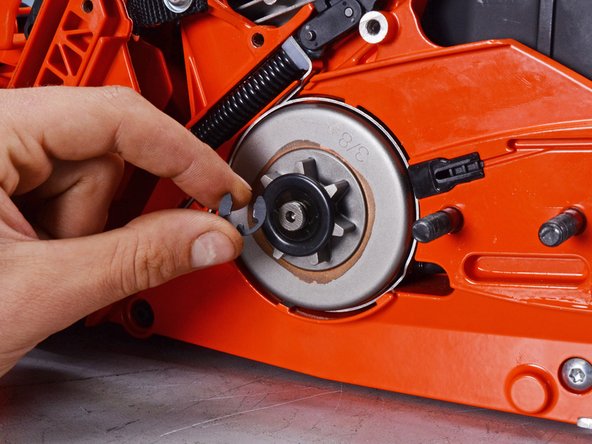
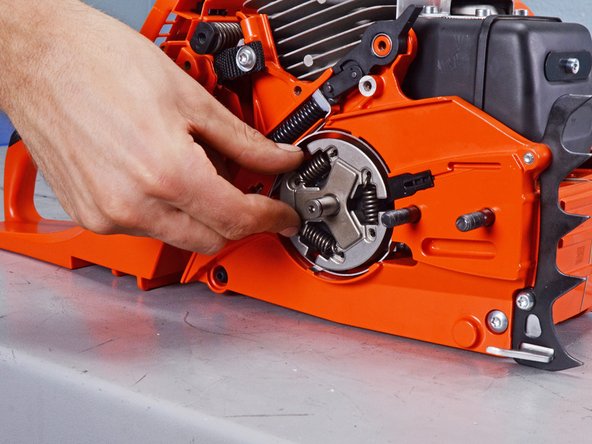
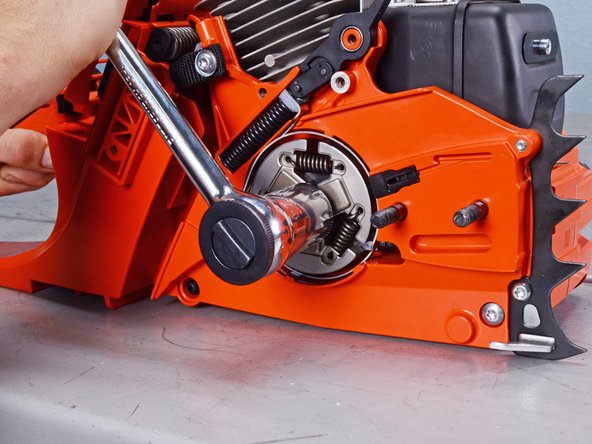
    • Use a clutch removal tool and a wrench to loosen the clutch assembly.

    • Rotate the wrench clockwise instead of clockwise.

  27. Echo Chain Saw CS590 2019 Oil System Replacement: étape 27, image 1 de 3 Echo Chain Saw CS590 2019 Oil System Replacement: étape 27, image 2 de 3 Echo Chain Saw CS590 2019 Oil System Replacement: étape 27, image 3 de 3
    • Use your fingers to loosen the clutch assembly and remove it from the crankshaft.

  28. Echo Chain Saw CS590 2019 Oil System Replacement, Remove the clutch plate: étape 28, image 1 de 3 Echo Chain Saw CS590 2019 Oil System Replacement, Remove the clutch plate: étape 28, image 2 de 3 Echo Chain Saw CS590 2019 Oil System Replacement, Remove the clutch plate: étape 28, image 3 de 3
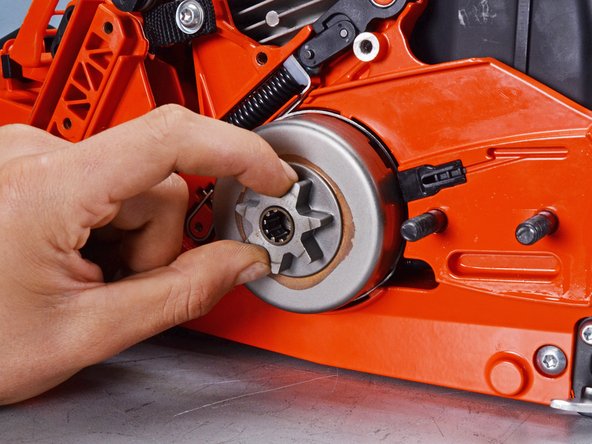
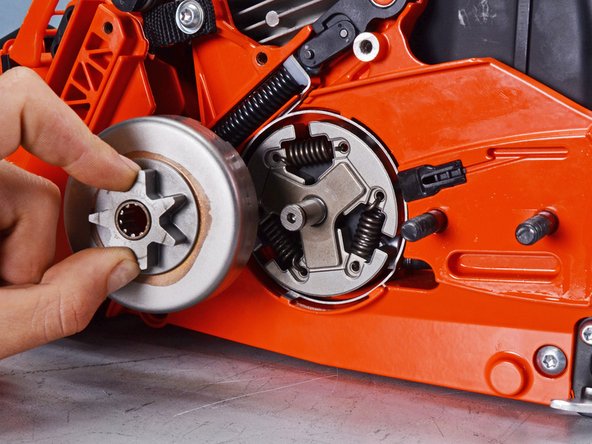
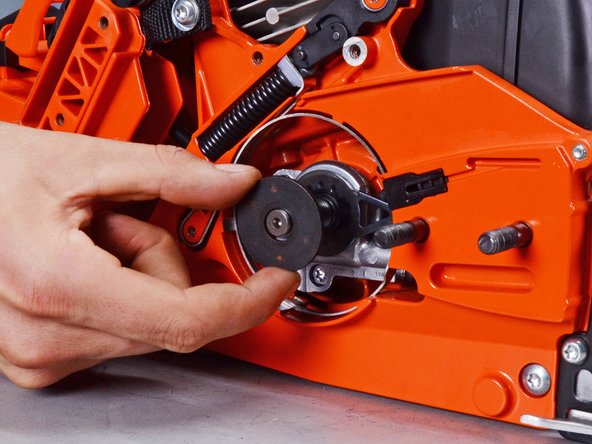
    • Use your fingers to pull the clutch plate straight off of the crankshaft and remove it.

  29. Echo Chain Saw CS590 2019 Oil System Replacement, Remove the collar: étape 29, image 1 de 3 Echo Chain Saw CS590 2019 Oil System Replacement, Remove the collar: étape 29, image 2 de 3 Echo Chain Saw CS590 2019 Oil System Replacement, Remove the collar: étape 29, image 3 de 3
    • Use pliers, or your fingers, to pull the collar off of the crankshaft and remove it.

  30. Echo Chain Saw CS590 2019 Oil System Replacement, Remove the worm gear: étape 30, image 1 de 3 Echo Chain Saw CS590 2019 Oil System Replacement, Remove the worm gear: étape 30, image 2 de 3 Echo Chain Saw CS590 2019 Oil System Replacement, Remove the worm gear: étape 30, image 3 de 3
    • Use pliers to pull the worm gear straight out its housing to remove it.

  31. Echo Chain Saw CS590 2019 Oil System Replacement, Disconnect the oiler assembly: étape 31, image 1 de 3 Echo Chain Saw CS590 2019 Oil System Replacement, Disconnect the oiler assembly: étape 31, image 2 de 3 Echo Chain Saw CS590 2019 Oil System Replacement, Disconnect the oiler assembly: étape 31, image 3 de 3
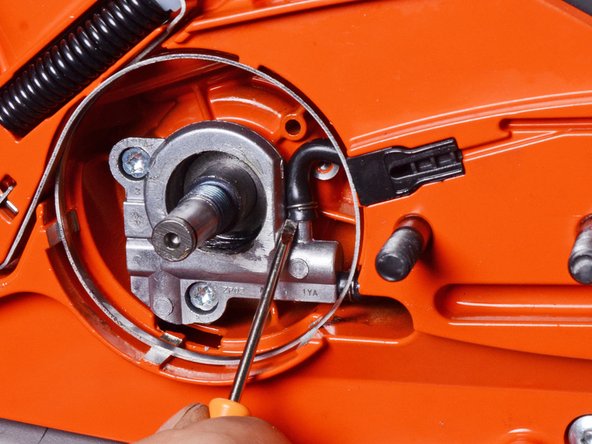
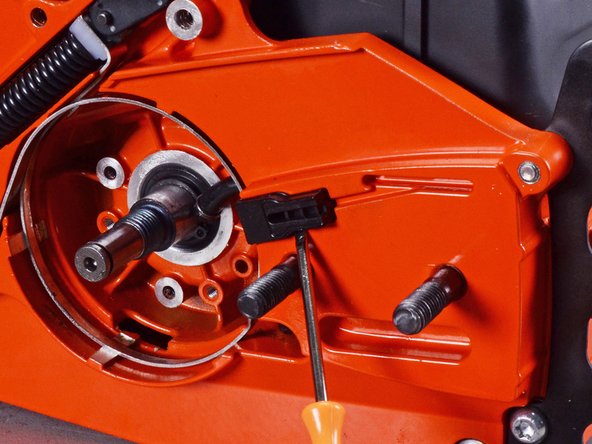
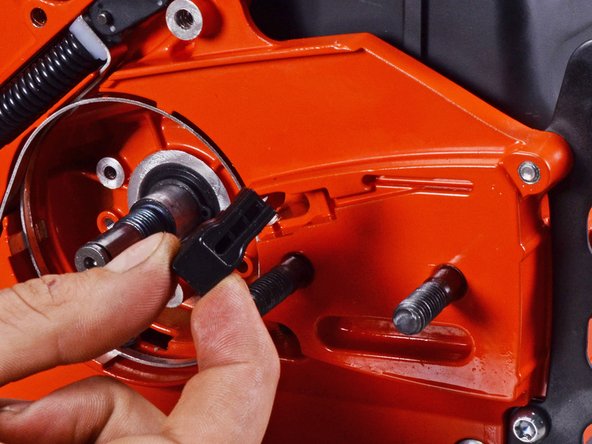
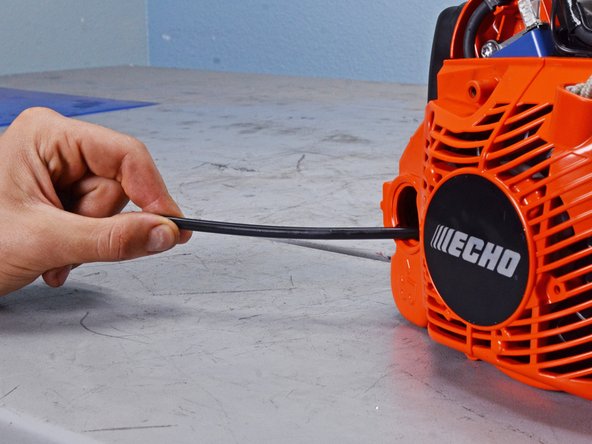
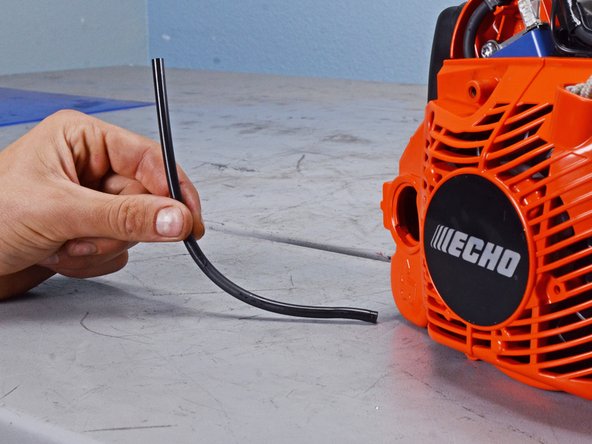
    • Use your fingers, or a flathead screwdriver, to disconnect the top oil pipe from the oiler assembly.

    • Only use a flathead screwdriver if the fuel pipe is too tight. The sharp edge could cause a split in the pipe.

  32. Echo Chain Saw CS590 2019 Oil System Replacement: étape 32, image 1 de 2 Echo Chain Saw CS590 2019 Oil System Replacement: étape 32, image 2 de 2
    • Use your fingers, or a flathead screwdriver, to disconnect the right oil pipe from the oiler assembly.

    • Only use a flathead screwdriver if the fuel pipe is too tight. The sharp edge could cause a split in the pipe.

  33. Echo Chain Saw CS590 2019 Oil System Replacement, Unfasten the oiler assembly: étape 33, image 1 de 2 Echo Chain Saw CS590 2019 Oil System Replacement, Unfasten the oiler assembly: étape 33, image 2 de 2
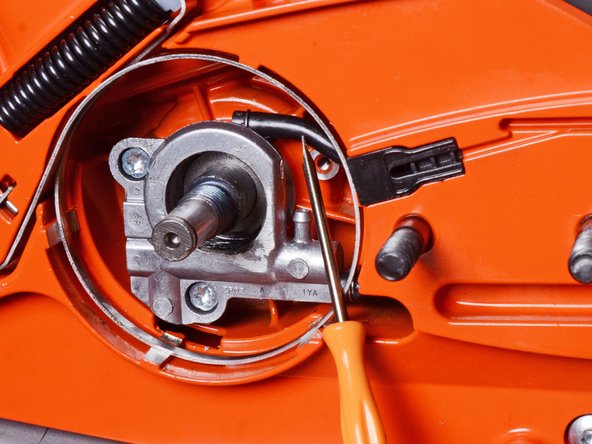
    • Use a T25 Torx screwdriver to remove the two 15 mm screws securing the oiler assembly.

  34. Echo Chain Saw CS590 2019 Oil System Replacement, Remove the oiler assembly: étape 34, image 1 de 3 Echo Chain Saw CS590 2019 Oil System Replacement, Remove the oiler assembly: étape 34, image 2 de 3 Echo Chain Saw CS590 2019 Oil System Replacement, Remove the oiler assembly: étape 34, image 3 de 3
    • Use pliers, or your fingers, to pull the oiler assembly straight out its housing to remove it.

  35. Echo Chain Saw CS590 2019 Oil System Replacement, Remove the washer: étape 35, image 1 de 3 Echo Chain Saw CS590 2019 Oil System Replacement, Remove the washer: étape 35, image 2 de 3 Echo Chain Saw CS590 2019 Oil System Replacement, Remove the washer: étape 35, image 3 de 3
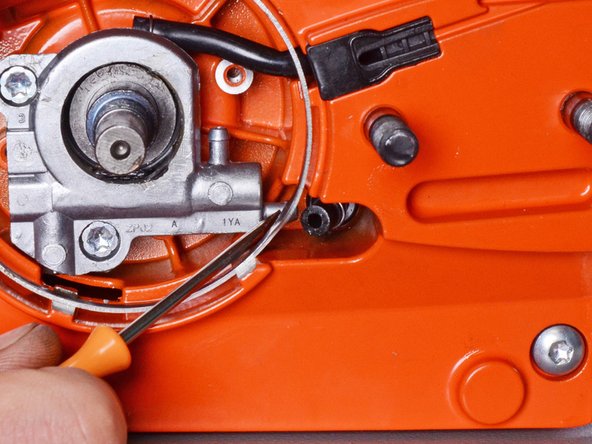
    • Use pliers, or your fingers, to pull the washer off of the crankshaft and remove it.

  36. Echo Chain Saw CS590 2019 Oil System Replacement, Remove the oil outlet port: étape 36, image 1 de 3 Echo Chain Saw CS590 2019 Oil System Replacement, Remove the oil outlet port: étape 36, image 2 de 3 Echo Chain Saw CS590 2019 Oil System Replacement, Remove the oil outlet port: étape 36, image 3 de 3
    • Use a flathead screwdriver to pry the oil outlet port out its recess in the chassis.

    • Remove the oil outlet port.

  37. Echo Chain Saw CS590 2019 Oil System Replacement, Remove the oil pipe: étape 37, image 1 de 3 Echo Chain Saw CS590 2019 Oil System Replacement, Remove the oil pipe: étape 37, image 2 de 3 Echo Chain Saw CS590 2019 Oil System Replacement, Remove the oil pipe: étape 37, image 3 de 3
    • Thread the oil pipe through the oil cap recess to remove it.

  38. Echo Chain Saw CS590 2019 Oil System Replacement, Remove the grommet: étape 38, image 1 de 3 Echo Chain Saw CS590 2019 Oil System Replacement, Remove the grommet: étape 38, image 2 de 3 Echo Chain Saw CS590 2019 Oil System Replacement, Remove the grommet: étape 38, image 3 de 3
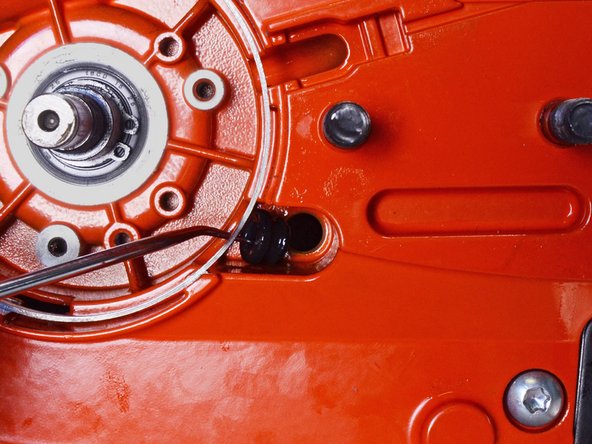
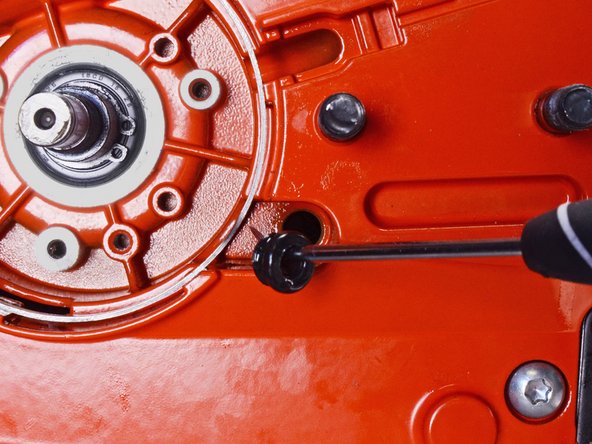
    • Use a pick tool to remove the grommet next to the clutch assembly's recess.

Conclusion

To reassemble your device, follow these instructions in reverse order.

2 autres ont terminé cette réparation.

Alex Diaz-Kokaisl

Membre depuis le 01/16/22

129 330 Réputation

600 tutoriels rédigés

Équipe

iFixit Membre de l'équipe iFixit

Staff

140 membres

18 085 tutoriels rédigés

3 commentaires

***Step 36*** Remove the retaining ring . Is there a reason to remove, unless you're doing a complete teardown?

VAL - Réponse

Hi there.

You're right! That was a left over from a different procedure, and I'll remove the step. Thank you!

Alex Diaz-Kokaisl -

Is there a torque value for the clutch? If so, what is it?

SHANE - Réponse

Ajouter un commentaire

Nombre de vues :

Dernières 24 heures : 7

7 derniers jours : 40

30 derniers jours : 165

Total : 2,424