Cette version peut contenir des modifications incorrectes. Passez au dernier aperçu vérifié.
Ce dont vous avez besoin
-
Cette étape n’est pas traduite. Aidez à la traduire
-
Insert a SIM card eject tool or a paperclip into the small hole in the SIM card tray, located on the left edge of the phone, opposite of the power and volume buttons.
-
Press firmly to eject the tray.
-
-
Étape 3 Procédure d'ouverture
Attention : les étapes 3 à 14 sont issues d'un tutoriel marqué comme en cours.
-
Posez une ventouse le plus proche possible du bord côté fente SIM en évitant la partie incurvée.
-
-
-
N'insérez pas le médiator de plus de 6 mm (0,25") dans le bord inférieur du téléphone. Si votre outil touche la partie repliée de la dalle OLED, cela risque d'abîmer l'écran.
-
Ne coupez pas le long du bord gauche, vous pourriez endommager les nappes de l'écran, qui sont fragiles.
-
Faites des découpes peu profondes dans le coin supérieur gauche pour éviter la caméra frontale.
-
-
-
-
Dévissez les onze vis cruciformes de 3,8 mm qui fixent le châssis central.
-
-
-
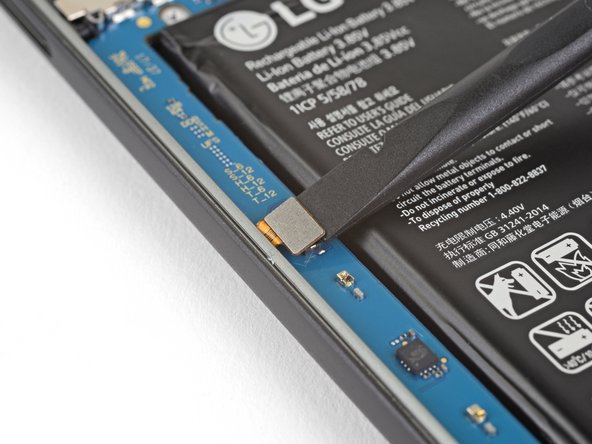
Prenez l'extrémité plate d'une spatule pour débrancher le connecteur de la batterie.
-
-
Cette étape n’est pas traduite. Aidez à la traduire
-
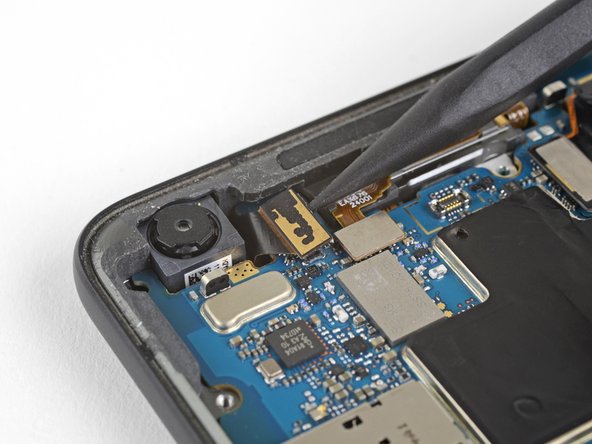
Use the point of a spudger to disconnect the front-facing camera connector.
-
-
Cette étape n’est pas traduite. Aidez à la traduire
-
Use the flat end of a spudger to disconnect the right Active Edge sensor connector.
-
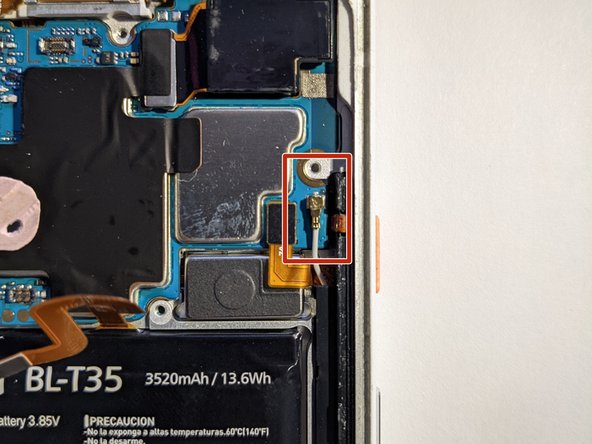
Disconnect the antenna cable.
-
-
Cette étape n’est pas traduite. Aidez à la traduire
-
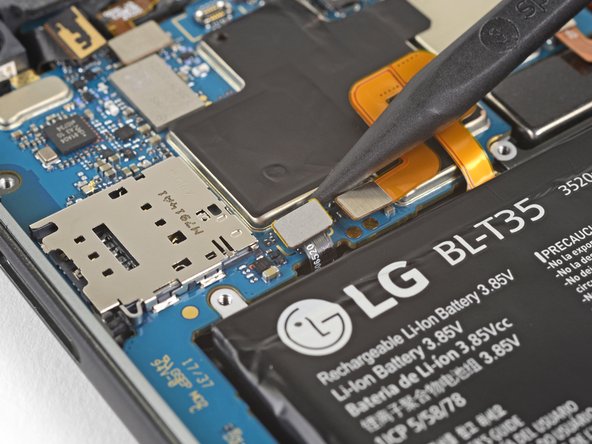
Use the point of a spudger to disconnect the fingerprint sensor connector.
-
-
Cette étape n’est pas traduite. Aidez à la traduire
-
Use the flat end of a spudger to disconnect the left Active Edge sensor connector.
-
-
Cette étape n’est pas traduite. Aidez à la traduire
-
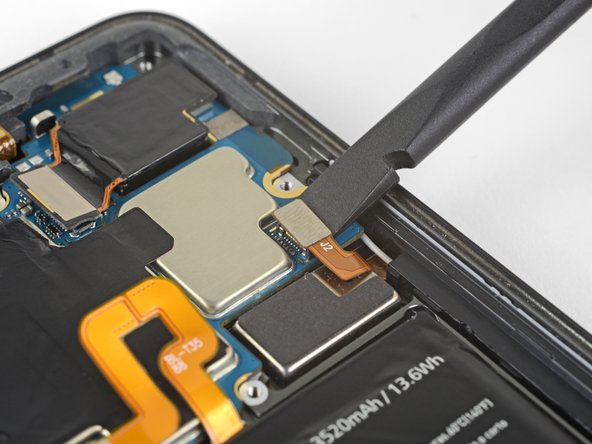
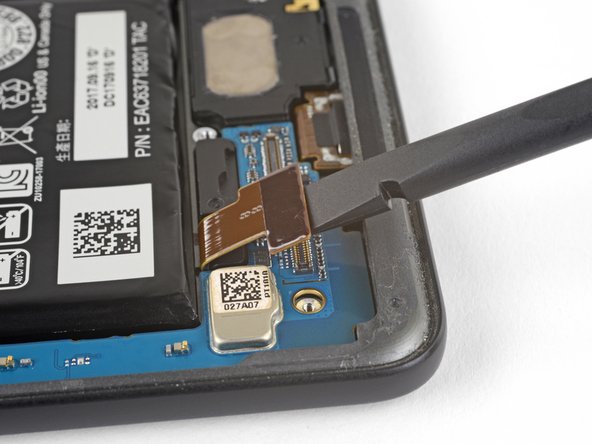
Use the flat end of a spudger to disconnect the charging assembly connector.
-
-
Cette étape n’est pas traduite. Aidez à la traduire
-
Use the point of a spudger to disconnect the front-facing sensor assembly connector.
-
-
Cette étape n’est pas traduite. Aidez à la traduire
-
Make sure all the cables and connectors are clear of the board, and use the flat edge of a spudger to gently lift the bottom of the motherboard.
-
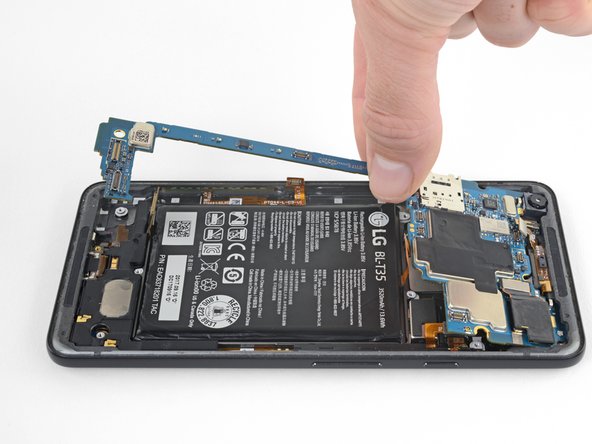
Holding the wide part of the motherboard near the SIM card slot, carefully slide the board toward the bottom of the phone while lifting it out of the phone.
-
Remove the motherboard.
-
Try to keep the phone flat with the battery facing up after you remove the motherboard, as the front-facing camera can fall out of the phone case very easily.
-
-
Cette étape n’est pas traduite. Aidez à la traduire
-
Slide the point of a spudger under the lower left side of the loudspeaker and slowly pry the speaker assembly up from the phone.
-


Annulation : je n'ai pas terminé ce tutoriel.
7 autres ont terminé cette réparation.

2 commentaires
Does this method work with the earpiece one as well?
We don’t have official instructions out for the earpiece speaker, but it’s only accessible underneath the glass panel and antenna assembly on the back of the phone so removing it is a bit different. After removing the motherboard you would have to lift this flex cable from the back of the phone, just enough to separate it from the adhesive holding it down. Then you can carefully pry up the glass panel, and remove antenna assembly and the earpiece speaker underneath. You’ll probably need an iOpener, suction cup, and opening picks to remove the panel and everything underneath—they’re all glued down pretty solidly.