Aller au contenu principal

HP Envy x360 m6-w105dx Fan Replacement

Ce dont vous avez besoin

  1. HP Envy x360 m6-w105dx Fan Replacement, Keyboard: étape 1, image 1 de 3 HP Envy x360 m6-w105dx Fan Replacement, Keyboard: étape 1, image 2 de 3 HP Envy x360 m6-w105dx Fan Replacement, Keyboard: étape 1, image 3 de 3
    • Make sure the laptop is powered off and disconnected from any outlets.

    • Use the opening pick to lift up the eight rubber grips on the underside of the device.

    • With the #1 Phillips screwdriver, remove the twelve 6mm screws from the back case.

  2. HP Envy x360 m6-w105dx Fan Replacement: étape 2, image 1 de 2 HP Envy x360 m6-w105dx Fan Replacement: étape 2, image 2 de 2
    • Open the laptop and turn to the keyboard.

    • Gently insert an opening pick into the edge of the keyboard panel, and slide around the keyboard lining until the clips have all been disengaged.

    • Lift the keyboard panel from the bottom and carefully start to lift up.

    • There are ribbon cables still connected on the under side of the the keyboard. Do not pull the keyboard away from the device.

  3. HP Envy x360 m6-w105dx Fan Replacement: étape 3, image 1 de 2 HP Envy x360 m6-w105dx Fan Replacement: étape 3, image 2 de 2
    • Gently lift the keyboard up from the bottom.

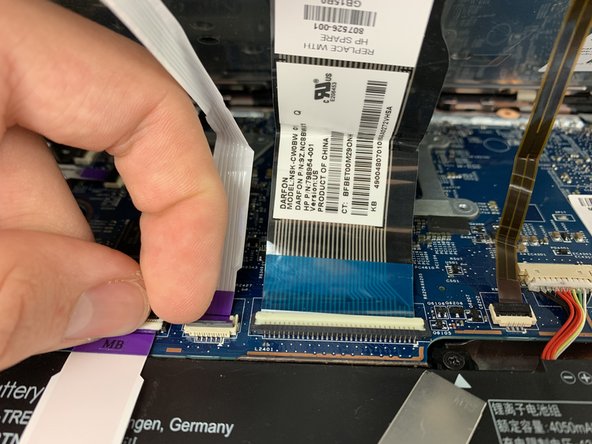
    • Carefully open the locking flap of the three ZIF connectors and detach the three ribbon cables from the motherboard using your fingers.

    • Do not remove the ZIF connectors by pulling on the wires, instead detach them by gently flipping up the plastic tabs located at the ends of the wiring.

    • Fully remove the keyboard from the laptop and install your new keyboard.

  4. HP Envy x360 m6-w105dx Fan Replacement, Fan: étape 4, image 1 de 3 HP Envy x360 m6-w105dx Fan Replacement, Fan: étape 4, image 2 de 3 HP Envy x360 m6-w105dx Fan Replacement, Fan: étape 4, image 3 de 3
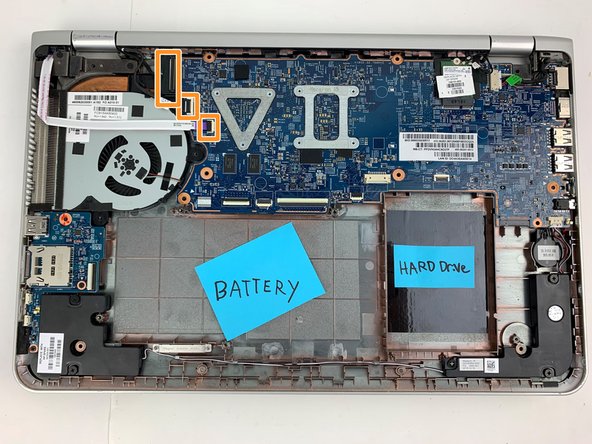
    • Unscrew the five 4mm screws with the #01 phillips head screw driver.

    • Gently flip open the ZIF connectors and remove the ribbon cables.

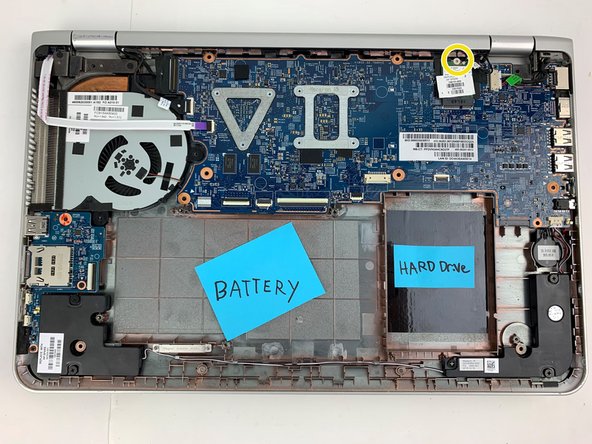
    • Unscrew the WLAN chip and push the chip up and out of the port.

  5. HP Envy x360 m6-w105dx Fan Replacement: étape 5, image 1 de 2 HP Envy x360 m6-w105dx Fan Replacement: étape 5, image 2 de 2
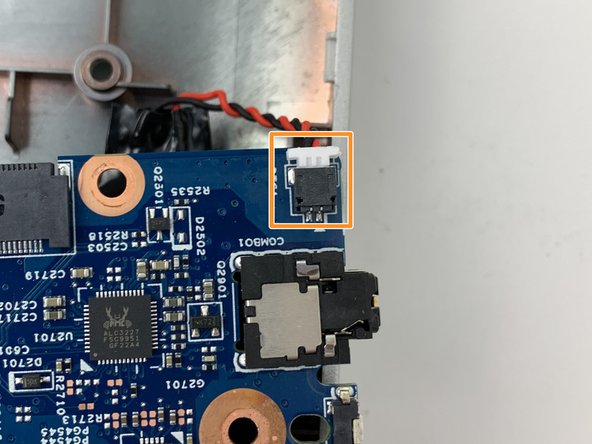
    • Disconnect the cable connectors for each of the speakers.

    • Lift the motherboard up and flip towards you to disconnect an additional cable connector on the rear side.

    • Remove motherboard and fan assembly from the laptop.

  6. HP Envy x360 m6-w105dx Fan Replacement: étape 6, image 1 de 3 HP Envy x360 m6-w105dx Fan Replacement: étape 6, image 2 de 3 HP Envy x360 m6-w105dx Fan Replacement: étape 6, image 3 de 3
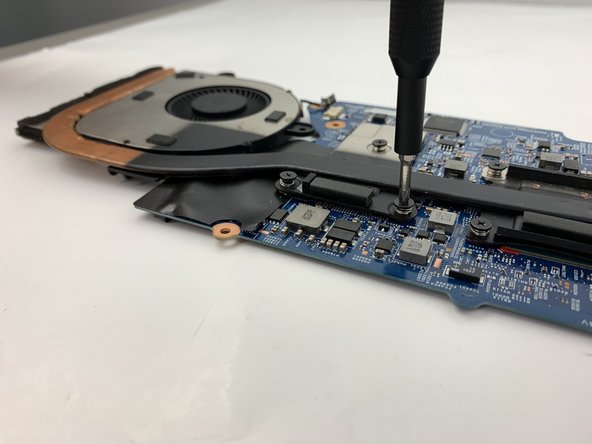
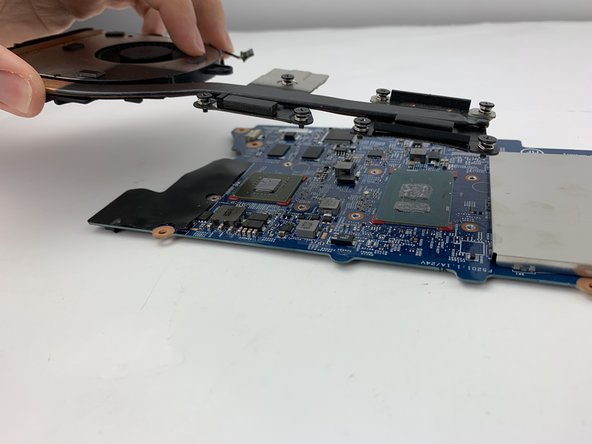
    • Unscrew the seven spring locked screws with the #1 Phillips screwdriver.

    • Once all screws are out, remove the fan by lifting it up from the motherboard.

  7. HP Envy x360 m6-w105dx Fan Replacement: étape 7, image 1 de 1
Conclusion

To reassemble your device, follow these instructions in reverse order.

2 autres ont terminé cette réparation.

0 commentaires

Ajouter un commentaire

Nombre de vues :

Dernières 24 heures : 1

7 derniers jours : 1

30 derniers jours : 11

Total : 668