Aller au contenu principal

HP Pavilion 15 dyl1087nr Screen Replacement

Ce dont vous avez besoin

  1. HP Pavilion 15 dyl1087nr Screen Replacement, Laptop Screen: étape 1, image 1 de 3 HP Pavilion 15 dyl1087nr Screen Replacement, Laptop Screen: étape 1, image 2 de 3 HP Pavilion 15 dyl1087nr Screen Replacement, Laptop Screen: étape 1, image 3 de 3
    • Open the laptop so the screen is in an upright position.

    • Use a spudger on the underside of the bezel to release the clips securing it to the screen assembly.

    • Work your way around the entire bezel until the bezel is free.

  2. HP Pavilion 15 dyl1087nr Screen Replacement: étape 2, image 1 de 1
    • Remove the bezel and set it aside to reveal the laptop screen assembly interior.

    • You will need the bezel for reassembly.

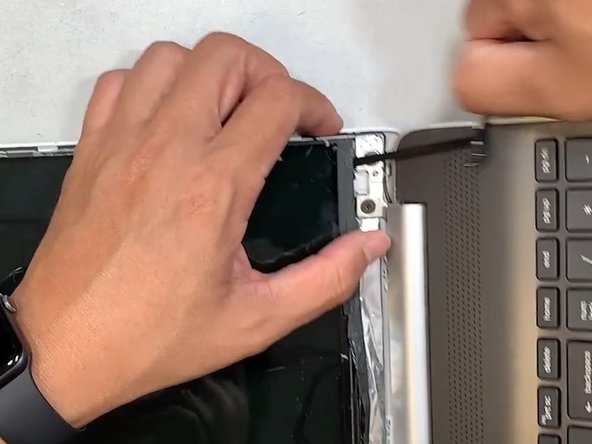
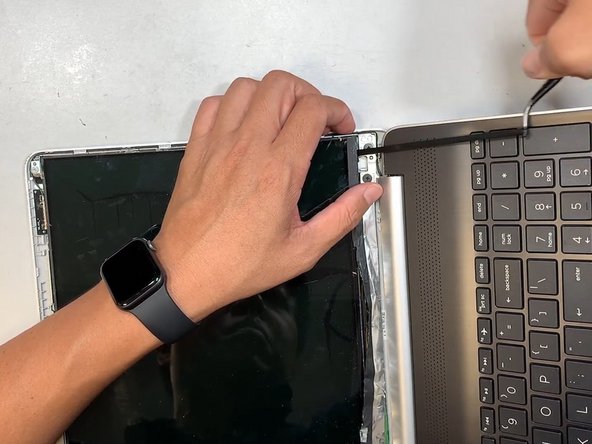
  3. HP Pavilion 15 dyl1087nr Screen Replacement: étape 3, image 1 de 3 HP Pavilion 15 dyl1087nr Screen Replacement: étape 3, image 2 de 3 HP Pavilion 15 dyl1087nr Screen Replacement: étape 3, image 3 de 3
    • Use tweezers to remove the double-sided tape underneath the four corners of the display screen.

    • If you tear the tape, it is okay, it will just be moderately more challenging to pull the display screen off from the laptop.

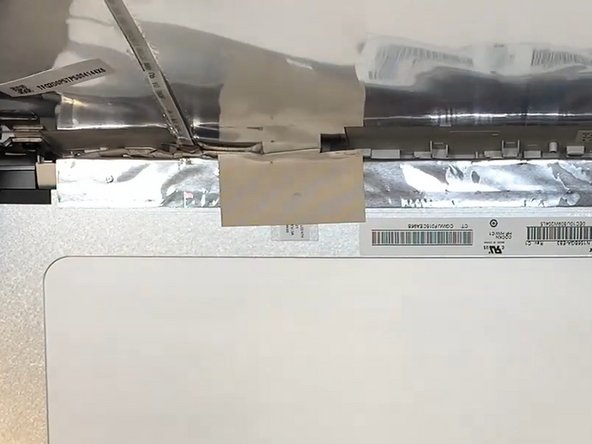
  4. HP Pavilion 15 dyl1087nr Screen Replacement: étape 4, image 1 de 2 HP Pavilion 15 dyl1087nr Screen Replacement: étape 4, image 2 de 2
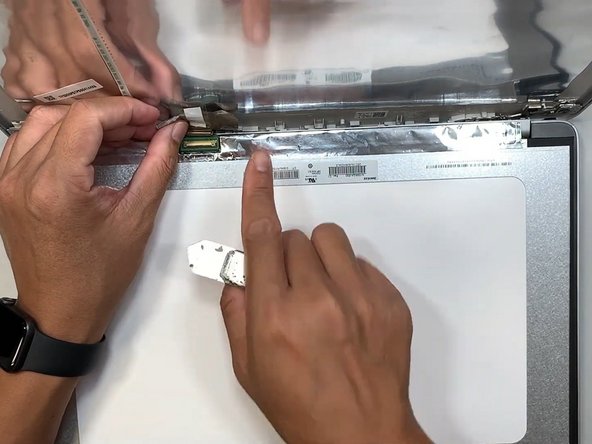
    • Flip the display screen over facedown to reveal the tape connecting the screen to the rest of the computer.

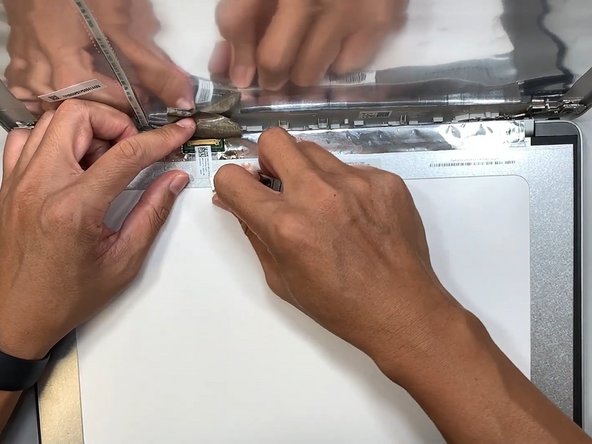
  5. HP Pavilion 15 dyl1087nr Screen Replacement: étape 5, image 1 de 3 HP Pavilion 15 dyl1087nr Screen Replacement: étape 5, image 2 de 3 HP Pavilion 15 dyl1087nr Screen Replacement: étape 5, image 3 de 3
    • Remove the tape covering the display cable connector.

    • Use your spudger to detach the display cable connector. First, gently push the tip of a spudger under the metal buckle to unclip it, then swing it over the socket.

    • Next, hold the buckle and cable together and gently pull the connector straight out of its socket.

    • Grip the cable and buckle together and insert the connector fully into its socket.

    • Aligning the connector can be tricky. Reposition it as necessary and don't try to force it into the socket, or you may damage both the connector and its socket.

    • Flip the buckle over the socket and use a spudger to press the buckle down until it clicks into place.

  6. HP Pavilion 15 dyl1087nr Screen Replacement: étape 6, image 1 de 1
    • Remove the old LCD screen and replace it with your new display screen.

Conclusion

To reassemble your device, follow these instructions in reverse order. Take your e-waste to an R2 or e-Stewards certified recycler.

Rick Tan

Membre depuis le 03/05/24

133 Réputation

1 tutoriel rédigé

Équipe

CSU Los Angeles, Team 7-9, Grodsky Spring 2024 Membre de l'équipe CSU Los Angeles, Team 7-9, Grodsky Spring 2024

CSULA-GRODSKY-S24S7G9

1 membre

1 tutoriel rédigé

0 commentaires

Ajouter un commentaire

Nombre de vues :

Dernières 24 heures : 0

7 derniers jours : 3

30 derniers jours : 5

Total : 35