Aller au contenu principal

HTC Desire 826 Headphone Jack Replacement

Ce dont vous avez besoin

  1. HTC Desire 826 Headphone Jack Replacement, Battery: étape 1, image 1 de 3 HTC Desire 826 Headphone Jack Replacement, Battery: étape 1, image 2 de 3 HTC Desire 826 Headphone Jack Replacement, Battery: étape 1, image 3 de 3
    • Find a seam in the back of the device.

    • Insert the plastic spudger into the seam and pry off the back panel.

    • There will be glue, so keep prying until it comes off or you may need to heat up the edges of the device to loosen the adhesive with the iOpener.

  2. HTC Desire 826 Headphone Jack Replacement: étape 2, image 1 de 3 HTC Desire 826 Headphone Jack Replacement: étape 2, image 2 de 3 HTC Desire 826 Headphone Jack Replacement: étape 2, image 3 de 3
    • Remove the 4.0 mm screw above the battery with a T5 Torx screwdriver.

    • Remove the metal bracket with the tweezers.

  3. HTC Desire 826 Headphone Jack Replacement: étape 3, image 1 de 1
    • Disconnect the battery cable from the motherboard with the tweezers.

  4. HTC Desire 826 Headphone Jack Replacement: étape 4, image 1 de 2 HTC Desire 826 Headphone Jack Replacement: étape 4, image 2 de 2
    • Lift the battery with a plastic spudger and remove it from the device.

  5. HTC Desire 826 Headphone Jack Replacement, Headphone Jack: étape 5, image 1 de 3 HTC Desire 826 Headphone Jack Replacement, Headphone Jack: étape 5, image 2 de 3 HTC Desire 826 Headphone Jack Replacement, Headphone Jack: étape 5, image 3 de 3
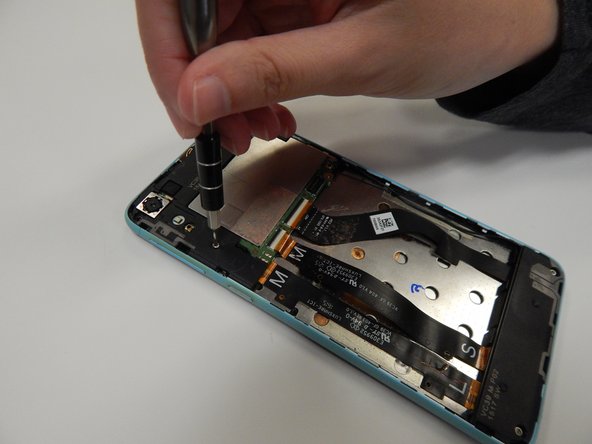
    • Use the T5 screwdriver to remove the three 4.00 mm screws as shown.

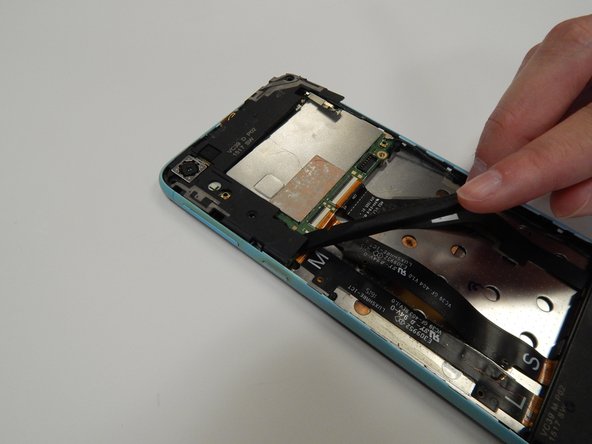
    • Once the screws are removed, pry up the top plastic panel using the black nylon spudger.

  6. HTC Desire 826 Headphone Jack Replacement: étape 6, image 1 de 2 HTC Desire 826 Headphone Jack Replacement: étape 6, image 2 de 2
    • Unscrew the two 4.00 mm screws attaching the bottom plastic panel using a T5 screwdriver.

    • Using the spudger, remove the bottom plastic piece.

  7. HTC Desire 826 Headphone Jack Replacement: étape 7, image 1 de 3 HTC Desire 826 Headphone Jack Replacement: étape 7, image 2 de 3 HTC Desire 826 Headphone Jack Replacement: étape 7, image 3 de 3
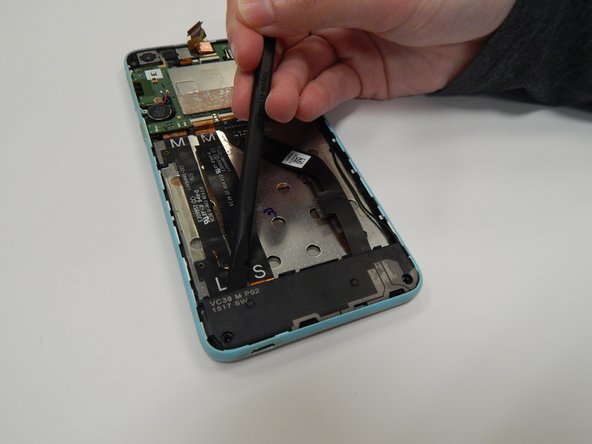
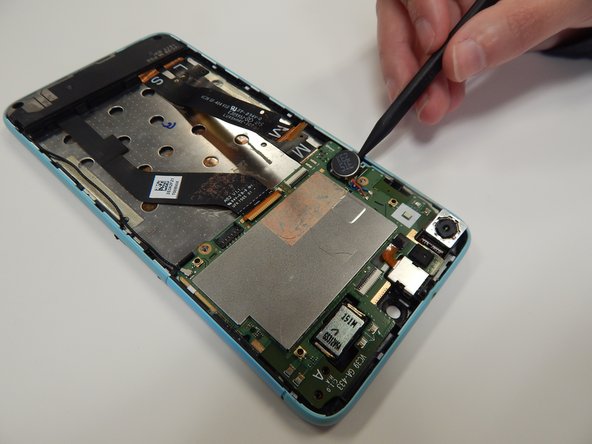
    • Using the spudger, remove the bottom part of the motherboard.

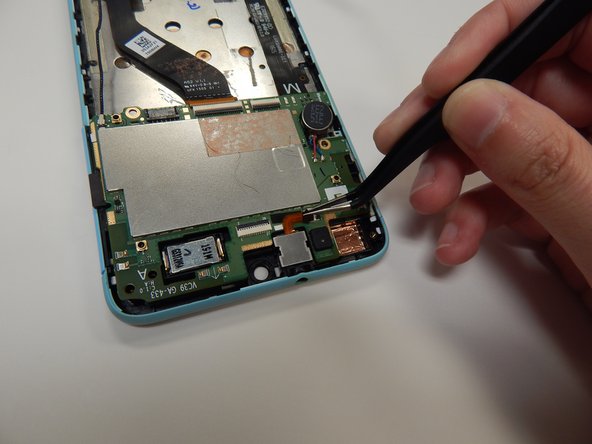
    • Using the angled tweezers, disconnect the headphone jack from the motherboard.

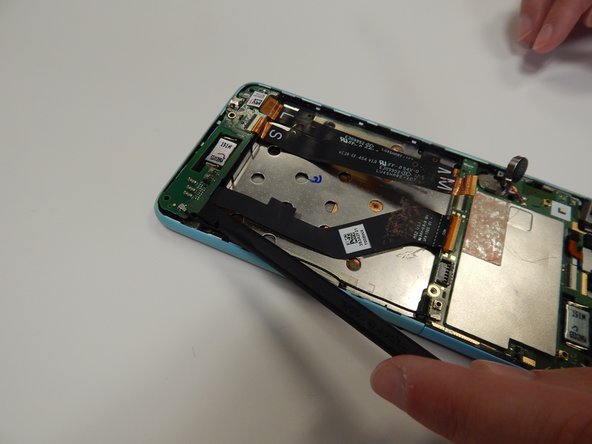
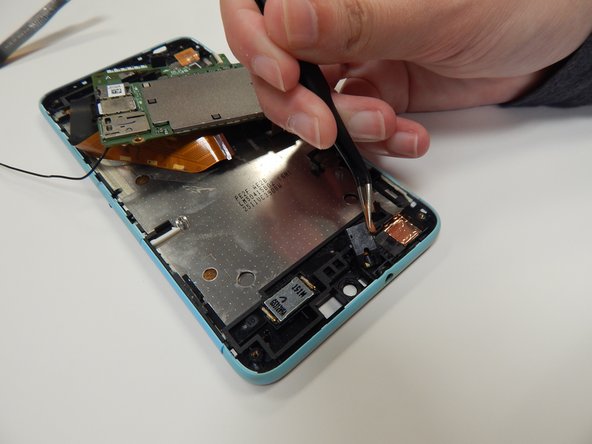
    • Using the plastic spudger, pop out the circular silver piece and lift the top part of the motherboard.

  8. HTC Desire 826 Headphone Jack Replacement: étape 8, image 1 de 2 HTC Desire 826 Headphone Jack Replacement: étape 8, image 2 de 2
    • Using the angled tweezers, pop off the metal piece on top of the headphone jack.

    • Using the angled tweezers, remove the headphone jack.

Conclusion

To reassemble your device, follow these instructions in reverse order.

Payton Rawson

Membre depuis le 09/04/19

109 Réputation

1 tutoriel rédigé

Équipe

University of Alabama, Team S1-G2, Bedsole Fall 2019 Membre de l'équipe University of Alabama, Team S1-G2, Bedsole Fall 2019

UA-BEDSOLE-F19S1G2

4 membres

10 tutoriels rédigés

0 commentaires

Ajouter un commentaire

Nombre de vues :

Dernières 24 heures : 0

7 derniers jours : 0

30 derniers jours : 2

Total : 167