Aller au contenu principal

Cette version peut contenir des modifications incorrectes. Passez au dernier aperçu vérifié.

Ce dont vous avez besoin

  1. Cette étape n’est pas traduite. Aidez à la traduire

    : étape 1, image 1 de 3 : étape 1, image 2 de 3 : étape 1, image 3 de 3
    • Before you begin, it's important that you completely cut power to the tiller by disconnecting the spark plug. This will prevent the engine from accidentally starting up while you're working on the tiller.

    • Grab the spark plug cap and pull it straight out to disconnect the spark plug from the engine.

  2. Cette étape n’est pas traduite. Aidez à la traduire

    : étape 2, image 1 de 1
    • The next two steps demonstrate how to prop up the tiller to work on the tines.

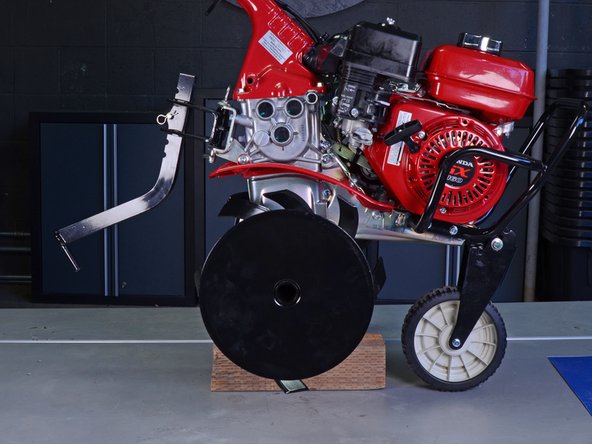
    • Set down a block (or blocks) of wood onto your work surface.

    • Make sure the wood blocks are narrow enough to fit in between the left- and right-side tines.

  3. Cette étape n’est pas traduite. Aidez à la traduire

    : étape 3, image 1 de 3 : étape 3, image 2 de 3 : étape 3, image 3 de 3
    • Lift and roll the tiller over the wood block until the center of the tine axle is hovering over the wood block.

    • Gently set the tiller down so that the center of the tine axle rests on the wood block.

    • You may need to lean the tiller to one side to make sure the tines on the other side are completely off the work surface.

  4. Cette étape n’est pas traduite. Aidez à la traduire

    : étape 4, image 1 de 1
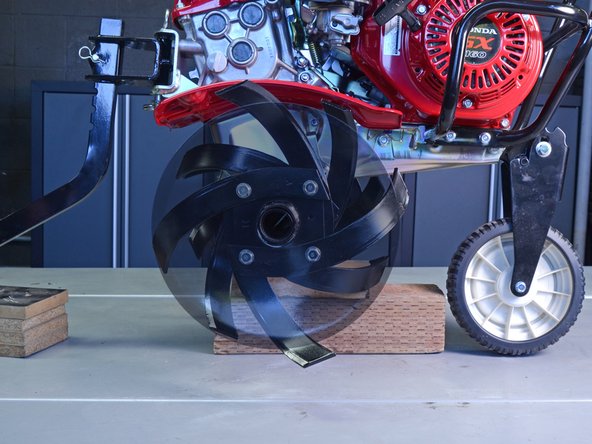
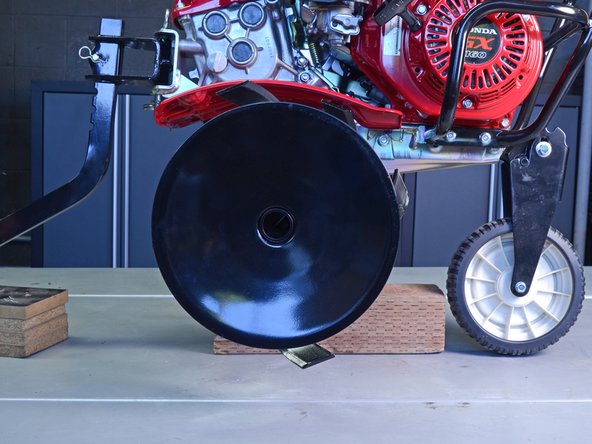
    • Place a block (or blocks) of wood under the tiller's drag bar to prevent the tiller from leaning back.

  5. Cette étape n’est pas traduite. Aidez à la traduire

    : étape 5, image 1 de 3 : étape 5, image 2 de 3 : étape 5, image 3 de 3
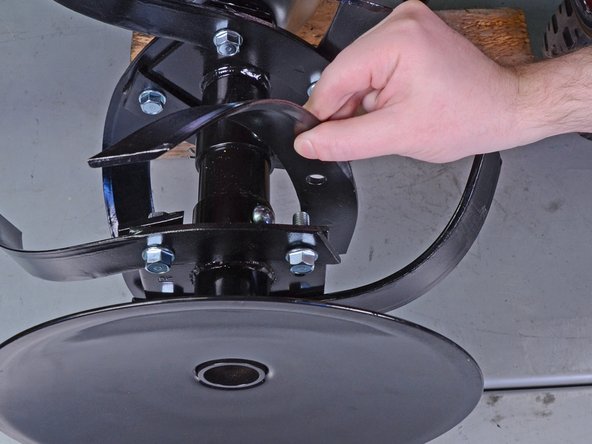
    • Remove the two 14 mm nuts securing the tine to the mounting bracket.

    • It is not required to remove the side disc.

    • Depending on which tine you're replacing, you may need to remove different nuts.

  6. Cette étape n’est pas traduite. Aidez à la traduire

    : étape 6, image 1 de 2 : étape 6, image 2 de 2
    • Grab the tine and pull it straight off of the mounting bracket.

    • Removing the bolts is not required.

Ligne d'arrivée

Craig Lloyd

Membre depuis le 02/10/16

35 486 Réputation

82 tutoriels rédigés

0 commentaires

Ajouter un commentaire

Nombre de vues :

Dernières 24 heures : 3

7 derniers jours : 15

30 derniers jours : 59

Total : 1,746