Introduction
Follow this guide to back up a computer using Clonezilla.
This guide shows how to use Clonezilla Live, a free tool that backs up a computer to a separate device. Clonezilla also has a server version, which we won't be using.
This guide demonstrates how to create a compressed backup of the entire drive as a file, called an image. This image can be stored on a drive with existing content, unlike a traditional drive clone, and is easier to transfer to other devices.
Clonezilla works for x86, ARM64, and RISC-V devices. The ARM64 and RISC-V versions are experimental, so verify the backup after creation.
Clonezilla is incompatible with Apple Silicon Macs without significant modification. We recommend backing them up with Time Machine instead.
It helps to understand disk partitioning before starting this guide.
Ce dont vous avez besoin
-
-
Download the latest stable version of Clonezilla Live from NCHC.org:
-
If you're on Windows, click the file ending in .iso to download it.
-
If you're on MacOS or Linux, click the file ending in .zip to download it.
 Demander à FixBot
-
-
-
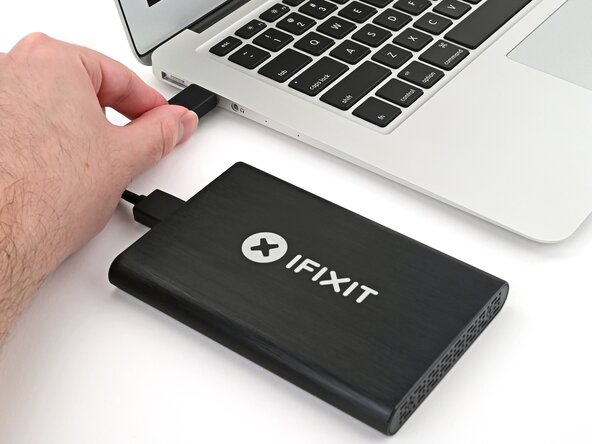
Connect a USB flash drive with at least 1 GB of capacity to an available USB port on the computer.
-
-
-
Download and install Rufus:
-
Open Rufus and allow it to make changes and check for updates. Select the flash drive in the Device drop-down menu at the top. Allow Rufus to access the internet and download files if prompted.
-
Click SELECT and select the Clonezilla Live .iso file from the File Explorer window that pops up. It'll name the flash drive based on the file name, but you can give it a more friendly name like CLONEZILLA.
-
Press START and press OK on each prompt. Make sure it writes in ISO image mode, not DD.
-
-
-
Open Disk Utility and select the flash drive from the left sidebar.
-
Click Erase in the Disk Utility window. Enter a name for the volume, like CLONEZILLA. Select MS-DOS (FAT) for the format and Master Boot Record for the scheme. Then click Erase.
-
Open the terminal and type cd ~/Downloads then press Enter.
-
Type unzip [clonezilla_file_name].zip -d /Volumes/CLONEZILLA then press Enter.
-
-
-
Open your operating system's disk utility (i.e. Disks, GParted, or KDE Partition Manager) and select the flash drive from the Devices list.
-
Look for and select an option like Format Disk or New Partition Table. Format the entire disk as MBR aka ms‑dos.
-
Select the unallocated space and click the button labeled New or + in the toolbar and create a new partition using the FAT32 file system. Give the partition a label like CLONEZILLA.
-
In your file explorer, find the mount location of the new partition. In this example, it's /run/media/nick/CLONEZILLA.
-
Open the terminal (usually called Terminal, Konsole, or opened using Ctrl+Alt+T).
-
Type cd ~/Downloads and press Enter.
-
Type unzip [clonezilla_file_name].zip -d /your/location and press Enter. Substitute /your/location for the path noted earlier in this step.
-
-
-
Connect a backup device like a USB hard drive (to the fastest available USB port), network drive (via a wired connection), or internal drive (via SATA, SAS, or PCIe) to the computer.
-
Use a USB 3 drive connected to a USB 3 port for faster speeds. USB 3 ports are usually colored blue and/or labeled SuperSpeed (SS).
-
-
-
Create a new folder on the drive you want to store your backup on.
-
Note the path of where this folder is located. In this case, it's stored in a folder called Backups on a local drive.
-
-
-
If you're using a Mac, shut it down and hold the Option key right after pressing the power button. Skip the remainder of this step.
-
If you're using GNU/Linux or Windows 7 or older, restart the computer and repeatedly press F11, F12, or the key specific to your device to access the boot options. Skip the remainder of this step.
-
If you're using Windows 8 or newer, open the Settings app and navigate to Update & Security (or System in Windows 11) → Recovery then select "Restart now" under Advanced startup.
-
-
-
-
If you're using GNU/Linux or Windows 7 or older, select the flash drive from the boot menu. Continue to the next step.
-
If you're using a Mac, select the EFI Boot option to boot from the flash drive. Continue to the next step.
-
In Advanced startup navigate to Use a device → UEFI: USB. This will boot the computer from the flash drive.
-
-
-
Highlight the option labeled Clonezilla live (VGA with large font & To RAM) and press Enter.
-
-
-
Highlight your preferred language by pressing the up/down arrow keys and press Enter to select it.
-
Verify the keyboard layout it detects is accurate and press Enter. If it isn't, select Change and select the correct one.
-
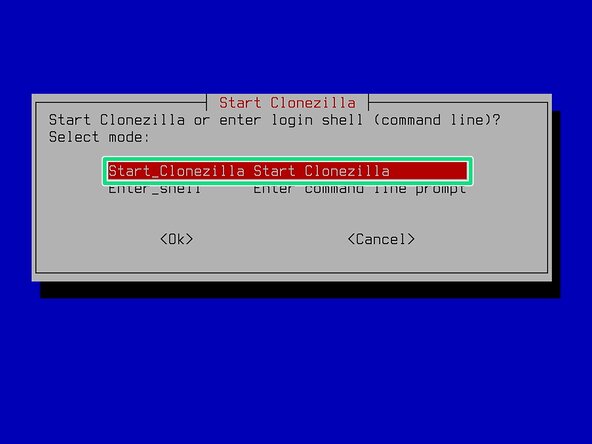
Highlight Start_Clonezilla and press Enter.
-
-
-
Select device-image.
-
Select local_dev to store the backup on a drive connected to the computer.
-
Ensure the device you're backing up to is connected securely. Press Enter to proceed to the next screen.
-
-
-
Review the storage devices in this list. In our example, the devices shown are:
-
The computer's internal 500GB NVMe drive (the one we want to back up) labeled nvme0n1
-
An external 4TB drive (the one we want to back up to) labeled sda
-
The flash drive containing Clonezilla Live itself labeled sdb
-
Ensure the drive you want to back up to is shown in this list, and note the name of each. Press Ctrl+C to proceed.
-
-
-
Select the partition on the drive you want to back up to. Confirm the partition by its size. In this case, it's labeled sda1, since it's the first and only partition on sda, which takes the entire capacity of the drive (3.6T). You'll specify the folder later.
-
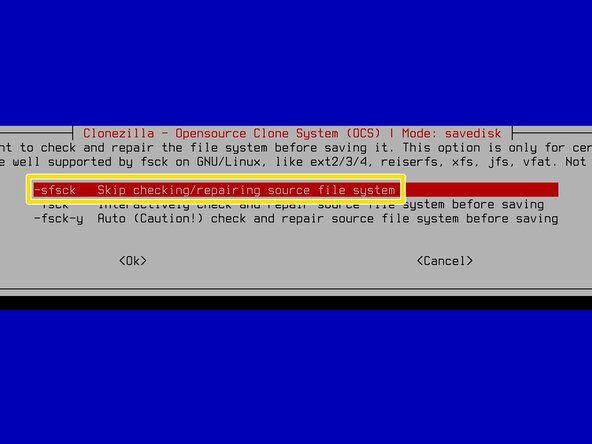
Select whether to check and repair the drive's file system. In general, you can skip this.
-
-
-
Select the folder made in this step. Use the arrow keys to highlight folders, and press Enter to open each one.
-
If needed, select Parent_directory to leave the current folder (shown above it).
-
Double-check the folder path and folder name. Tab over and select <Done>, then press Enter to proceed.
-
-
-
Press Y to synchronize the time, then press Enter to set a time zone.
-
Follow the prompts, beginning with the continent and narrowing down, until you select your time zone.
-
Select savedisk to save the entire disk as an image.
-
-
-
Type a name for the image file. By default, it creates a name based on the time and date. Don't use any spaces or include any of the "reserved image names" listed.
-
Tab over and select <Ok> to proceed.
-
-
-
Select the drive you want to back up from the list. The drive selected has an asterisk in its check box. If there's multiple options, select the drive by pressing the spacebar (Space).
-
Double-check the selected drive is the one you want to back up, then tab over and select <Ok>.
-
-
-
Select the default compression option.
-
Select whether to check the source file system. If you're backing up MacOS or Windows, skip this. For GNU/Linux systems, skip it unless you believe there's a problem.
-
-
-
Select whether to check if the the saved image is restorable. We recommend checking it.
-
Select whether to encrypt the backup or not. We recommend encrypting it if it contains sensitive data. The passphrase to decrypt it will be set later.
-
-
-
Select whether to copy log files onto the Clonezilla Live USB. Keep this at the default option.
-
Select what to do when the back up process is complete. We recommend the poweroff option to shut the computer down once it's complete.
-
-
-
Clonezilla will show you what partitions are being backed up.
-
Verify what's shown is what you want to back up, then type y and press Enter to continue.
-
-
-
Type the passphrase you want to use to encrypt the backup. This is how you'll decrypt the image to view its contents. Press Enter once you've typed it successfully.
-
Type the passphrase again when prompted. Press Enter again to proceed.
-
-
-
Clonezilla will begin backing up the drive. This process can take a while.
-
If you chose the shutdown option, you can safely leave the computer alone and let it finish. Congrats, you're done!
-
If you chose the choose option, you can leave the computer temporarily, but need to complete the back up manually:
-
Press Enter to continue to the selection screen when prompted.
-
Select poweroff to turn off the computer or reboot to restart it.
-


Congratulations! You've successfully backed up a computer.
Didn't go as planned? Try asking our Answers Community for help.
