Introduction
Follow this guide to disconnect the battery in an iPad with a playing card.
If you're having trouble fitting a battery blocker underneath the battery connector on an iPad's logic board, you can try using a playing card to disconnect the battery instead. This procedure requires cutting a playing card to size.
Ce dont vous avez besoin
-
-
Line up the left edge of a playing card with the left edge of the battery connector.
-
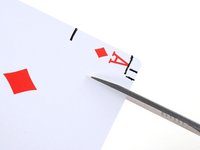
Use a pen to mark both sides of the screw hole and the end of the battery connector as shown.
-
-
-
Line up the top edge of the card with the top edge of the screw hole.
-
Use a pen to mark the bottom edge of the battery connector.
-
-
-
-
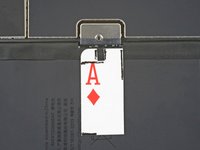
Use a pair of scissors to cut out the playing card battery blocker as shown.
-
-
-
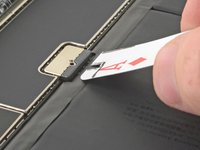
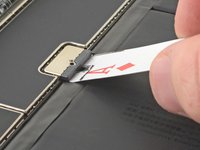
Insert the battery blocker at a 35 degree angle to disconnect the battery.
-
Leave the battery blocker in place as you work.
-


To reassemble your device, follow these instructions in reverse order.
Annulation : je n'ai pas terminé ce tutoriel.
16 autres ont terminé cette réparation.

3 commentaires de tutoriel
Thanks Robert. Great easy to create tool and excellent explanation.
Hello Robert,
thank you for this useful tip.
Let me ask you this question:
I need to rectify a bent 9th gen iPad but after dismantling both the digitizer and the screen, I don't want to go further. The bent is located exactly aside the logic board screen connector.
All I want to do is try to fix the bent, therefore I need the iPad be free of movements. Since this article says the card needs to be kept in place, my question is is really mandatory that the card stays at 15 degrees or may I tape the card to the battery to avoid the card being accidentally removed?
I hope you can reply to my question.
Thank you