Cette version peut contenir des modifications incorrectes. Passez au dernier aperçu vérifié.
Ce dont vous avez besoin
-
Cette étape n’est pas traduite. Aidez à la traduire
-
This is where we begin! At the bottom of the phone, pull the plastic back cover off.
-
Ahh, the battery. Simply pull the battery up and out of the housing.
-
-
Cette étape n’est pas traduite. Aidez à la traduire
-
8x T5 torx screws are what we need to remove next. There is one hiding below a black sticker. WARNING: This will void your warranty!
-
-
Cette étape n’est pas traduite. Aidez à la traduire
-
Now that the screws are removed, grab a spudger tool or a thick guitar pick. Start at the volume rocker and work your way around the phone by carefully pulling back the frame.
-
-
-
Cette étape n’est pas traduite. Aidez à la traduire
-
We're inside! At this step, there are 3 ribbon cables we need to disconnect to continue. Carefully pull these ribbon connections up.
-
-
Cette étape n’est pas traduite. Aidez à la traduire
-
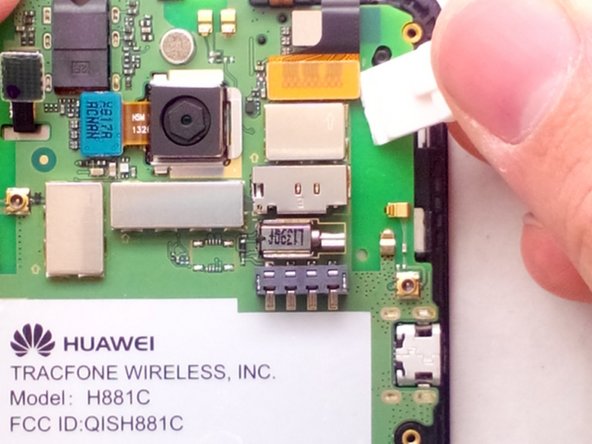
Under the screen/digitizer connection, there is one more cable. Carefully disconnect this one was well.
-
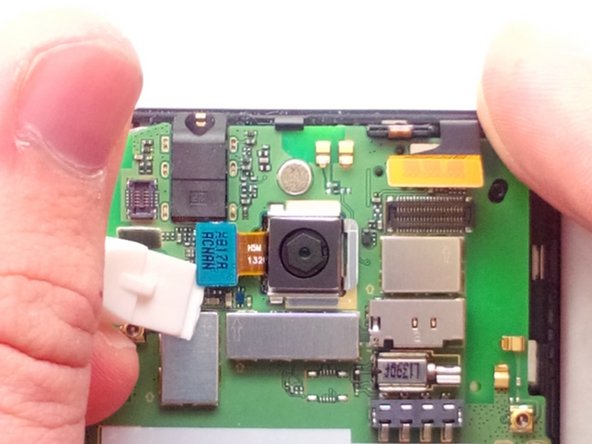
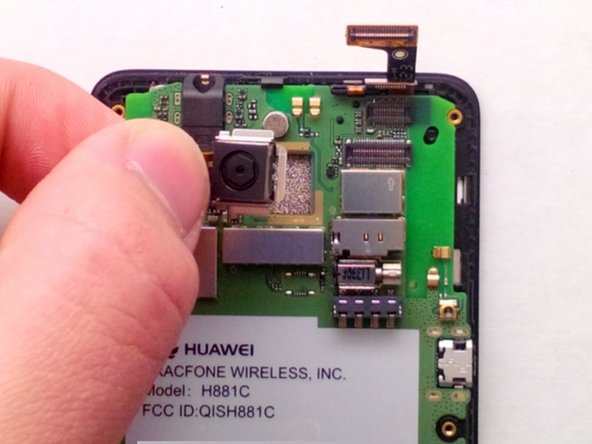
Remove the camera by pulling straight up.
-
-
Cette étape n’est pas traduite. Aidez à la traduire
-
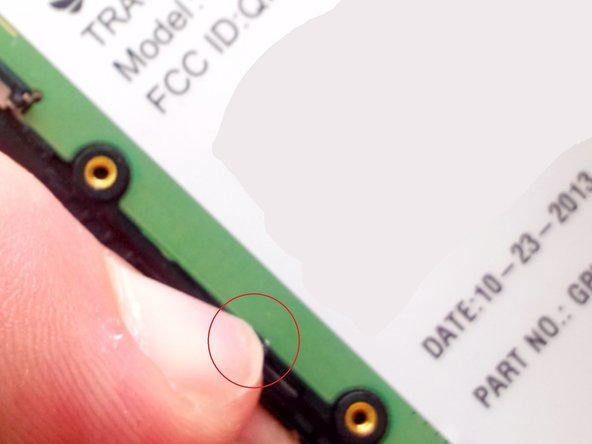
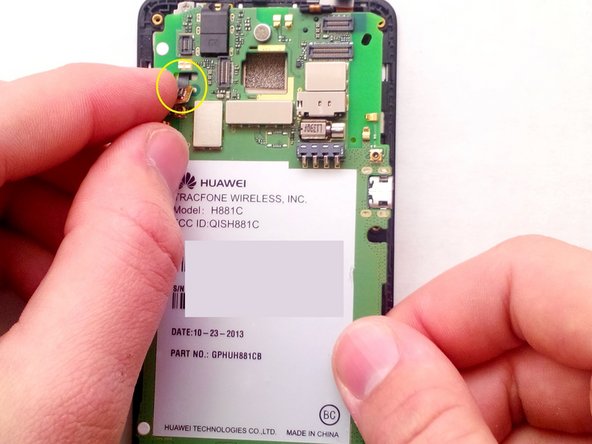
Don't mind the ugly "circles". What is circled is the clips you need to pull back to remove the motherboard from the frame.
-
Your fingernail will work perfect for this.
-
Let's remove the motherboard. With your right hand, slowly pull back the motherboard. With you left hand, guide the ribbon cable through the hole to avoid damaging it.
-
-
Cette étape n’est pas traduite. Aidez à la traduire
-
Now that the motherboard is out, this is the screen/digitizer/LCD assembly. From here, we need to only remove the digitizer.
-
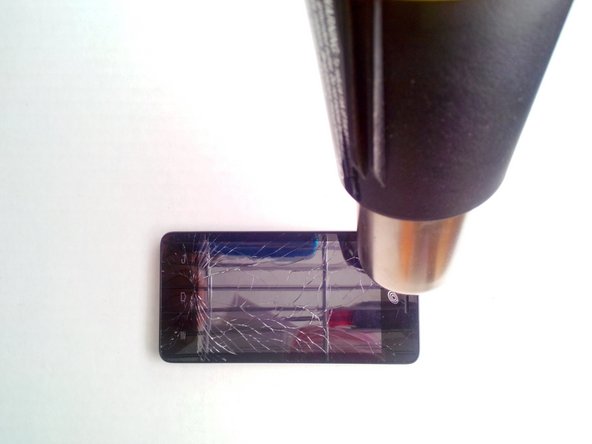
We recommend using a heat gun or a hot plate if you have one. If you don't have either, use a blow dryer!
-
-
Cette étape n’est pas traduite. Aidez à la traduire
-
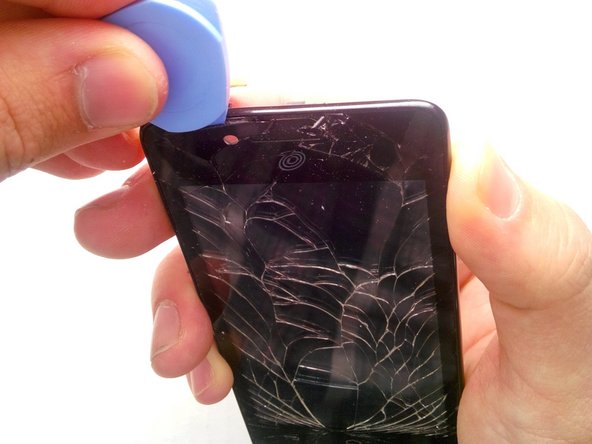
After its hot enough, use a thick guitar pick to peel back the broken screen from the frame. Be careful, it may be hot and glass could get everywhere.
-
Once you've removed the old screen/digitizer, apply new adhesive on the frame and put the new part on. Make sure that you get the old adhesive peeled off. We recommend heating the adhesive before applying the new screen for better bonding.
-
That's it! Now, follow the steps backwards to reassemble your device. Congrats! You've replaced the screen!
-


Annulation : je n'ai pas terminé ce tutoriel.
10 autres ont terminé cette réparation.

Équipe

Minnesota Repair Techs Membre de l'équipe Minnesota Repair Techs
Community
3 membres
2 tutoriels rédigés
2 commentaires
what do you use as an adheasive?
Randy, I'm extremely late responding to your post. I use what the industry calls, "red tape". This stuff is perfect for pretty much any electronic repair, especially iPads.