Aller au contenu principal

Huawei Watch GT 2e Motherboard Replacement

Ce dont vous avez besoin

  1. Huawei Watch GT 2e Motherboard Replacement, Turn off the watch: étape 1, image 1 de 2 Huawei Watch GT 2e Motherboard Replacement, Turn off the watch: étape 1, image 2 de 2
    • Turn off the watch:

    • Press and hold the top button for >3 sec.

    • Tap "Power off".

    • Push the small sliding nub on one of the watch band pins inwards toward the center of the watch band.

    • While holding the nub in, pull one side of the pin out of its recess on the watch housing, then the other side.

    • Remove the band.

    • Repeat this process to remove the second band.

  2. Huawei Watch GT 2e Motherboard Replacement, Remove the four rear screws: étape 3, image 1 de 1
    • Remove the four 3.5 mm-long T3 Torx screws on the back of the watch.

  3. Huawei Watch GT 2e Motherboard Replacement, Open a small gap: étape 4, image 1 de 3 Huawei Watch GT 2e Motherboard Replacement, Open a small gap: étape 4, image 2 de 3 Huawei Watch GT 2e Motherboard Replacement, Open a small gap: étape 4, image 3 de 3
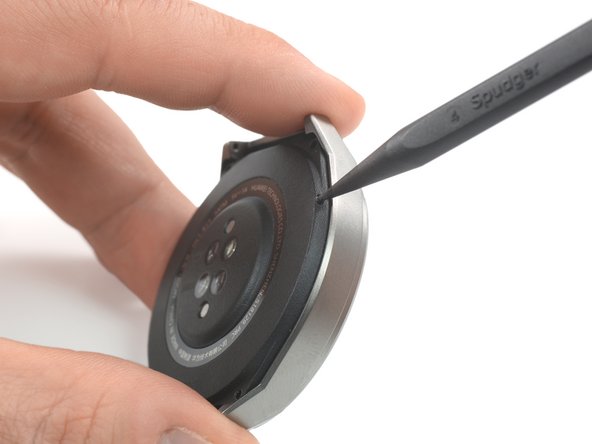
    • Place the point of a spudger in the small hole on the side of the rear case.

    • Use the spudger to push the rear case away from the housing to create a small gap. Use steady force to separate the two parts.

    • Steady the rear case with a finger to avoid it suddenly popping open and damaging the flex cable.

    • Don’t open the rear case all the way just yet. It is still connected to the motherboard with a thin flex cable.

  4. Huawei Watch GT 2e Motherboard Replacement, Flip the rear case open: étape 5, image 1 de 3 Huawei Watch GT 2e Motherboard Replacement, Flip the rear case open: étape 5, image 2 de 3 Huawei Watch GT 2e Motherboard Replacement, Flip the rear case open: étape 5, image 3 de 3
    • Flip the rear case assembly open towards the buttons to access the interconnect flex cable connector.

  5. Huawei Watch GT 2e Motherboard Replacement, Remove the bracket screw: étape 6, image 1 de 1
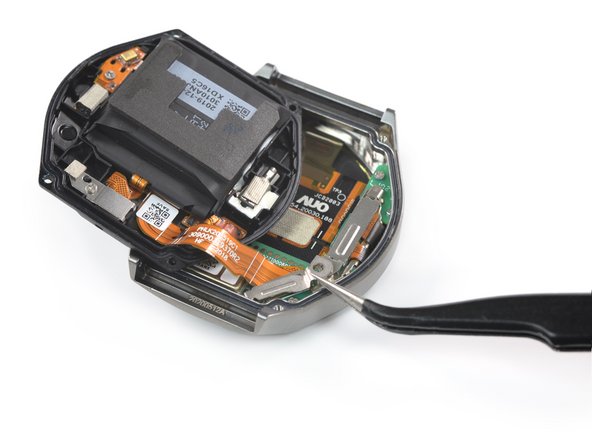
    • Remove the 2.5 mm-long Phillips screw securing the interconnect cable bracket.

    • When re-assembling you might need a pair of pointy angled tweezers to position the screw since they are non-ferrous and therefore don’t stick to the magnetic bit.

  6. Huawei Watch GT 2e Motherboard Replacement, Remove the bracket: étape 7, image 1 de 3 Huawei Watch GT 2e Motherboard Replacement, Remove the bracket: étape 7, image 2 de 3 Huawei Watch GT 2e Motherboard Replacement, Remove the bracket: étape 7, image 3 de 3
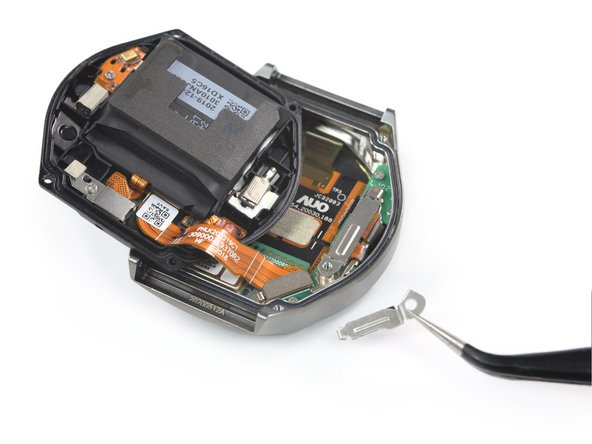
    • Use a pair of tweezers to slide the interconnect cable bracket down and left to unlatch it.

    • Remove the interconnect cable bracket.

    • For reassembly make sure to slide the bracket into place from bottom left towards top right to engage the small latch.

  7. Huawei Watch GT 2e Motherboard Replacement, Unplug the flex cable: étape 8, image 1 de 3 Huawei Watch GT 2e Motherboard Replacement, Unplug the flex cable: étape 8, image 2 de 3 Huawei Watch GT 2e Motherboard Replacement, Unplug the flex cable: étape 8, image 3 de 3
    • Use the flat end of a spudger to pry up and unplug the interconnect cable.

    • Remove the rear case assembly.

  8. Huawei Watch GT 2e Motherboard Replacement, Free the bracket: étape 9, image 1 de 2 Huawei Watch GT 2e Motherboard Replacement, Free the bracket: étape 9, image 2 de 2
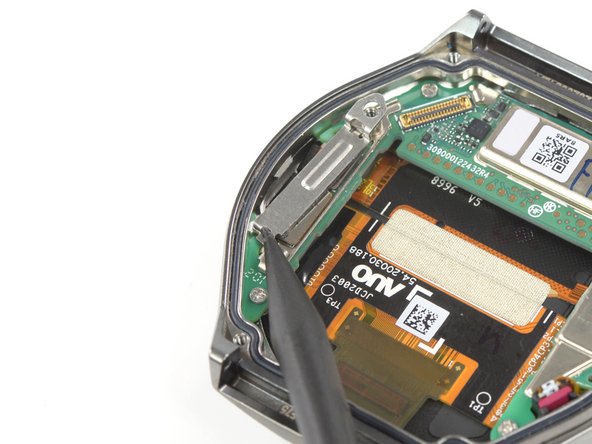
    • Use the point of a spudger to slide the bottom part of the display connector bracket towards the buttons to disengage its latch.

    • When reassembling make sure the top part of the bracket sits properly before sliding the bottom part into place.

  9. Huawei Watch GT 2e Motherboard Replacement, Remove the bracket: étape 10, image 1 de 3 Huawei Watch GT 2e Motherboard Replacement, Remove the bracket: étape 10, image 2 de 3 Huawei Watch GT 2e Motherboard Replacement, Remove the bracket: étape 10, image 3 de 3
    • Grab the bottom part of the bracket with a pair of tweezers and lift it up and out of its top latch.

    • Remove the bracket.

    • For reassembly first position the top part of the bracket into its latch and over the screw boss before sliding the bottom part into place.

  10. Huawei Watch GT 2e Motherboard Replacement, Unplug the connectors: étape 11, image 1 de 3 Huawei Watch GT 2e Motherboard Replacement, Unplug the connectors: étape 11, image 2 de 3 Huawei Watch GT 2e Motherboard Replacement, Unplug the connectors: étape 11, image 3 de 3
    • Use a spudger to pry up and unplug both display connectors.

  11. Huawei Watch GT 2e Motherboard Replacement, Remove the screws: étape 12, image 1 de 1
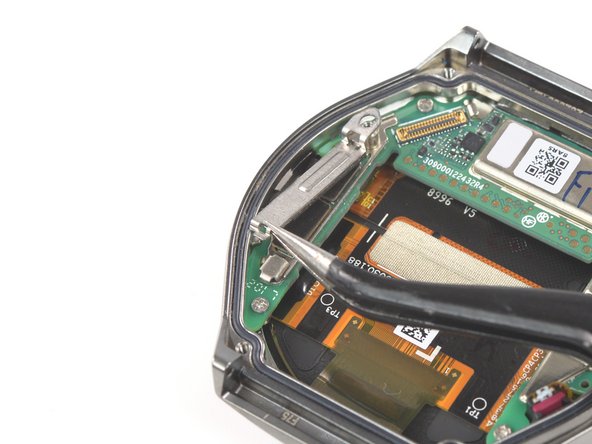
    • Remove the four 2.5 mm-long Phillips screws from the motherboard.

  12. Huawei Watch GT 2e Motherboard Replacement, Check the button cables: étape 13, image 1 de 1
    • Check that the button cables are not obstructing the motherboard.

    • If necessary, gently press the cables toward the buttons to bend them out of the way with a pair of tweezers or a spudger.

  13. Huawei Watch GT 2e Motherboard Replacement, Remove the motherboard: étape 14, image 1 de 3 Huawei Watch GT 2e Motherboard Replacement, Remove the motherboard: étape 14, image 2 de 3 Huawei Watch GT 2e Motherboard Replacement, Remove the motherboard: étape 14, image 3 de 3
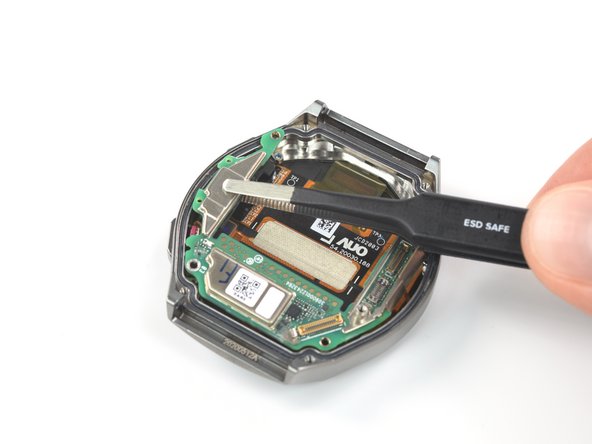
    • Use a pair of tweezers to grab the part of the motherboard closest to the buttons.

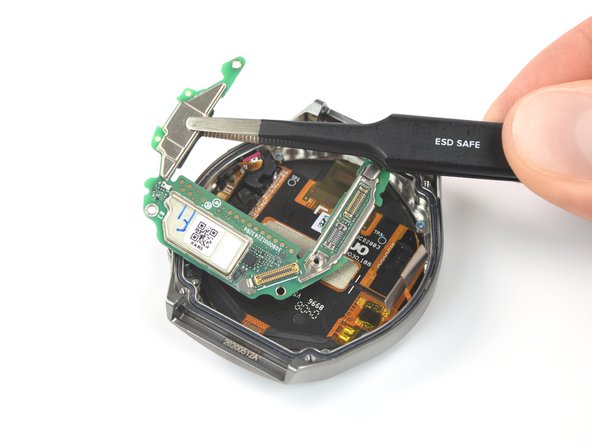
    • Lift up that side of the motherboard first to free it from underneath the case on the opposite side.

    • Remove the motherboard.

    • For reassembly shift the motherboard into place underneath the case near the display cables before lower the part near the buttons.

Conclusion

If possible, turn on your device and test your repair before resealing.

To reassemble your device, follow these instructions in reverse order.

Take your e-waste to an R2 or e-Stewards certified recycler.

Repair didn’t go as planned? Try some basic troubleshooting, or ask our Answer Community for help.

2 autres ont terminé cette réparation.

Tobias Isakeit

Membre depuis le 03/31/14

117 741 Réputation

188 tutoriels rédigés

Équipe

Master Techs Membre de l'équipe Master Techs

Community

322 membres

2 541 tutoriels rédigés

0 commentaires

Ajouter un commentaire

Nombre de vues :

Dernières 24 heures : 0

7 derniers jours : 7

30 derniers jours : 41

Total : 1,558