Introduction
The newer E-models E4 to E8 are an iteration of the C E F versions. Their design is similar. This guide describes how to open them.
Ce dont vous avez besoin
-
-
Remove all attachments: Coffee ground container, trester drawer, water tank and the coffee beans.
-
Pull off the flap above the water tank to the rear.
-
-
-
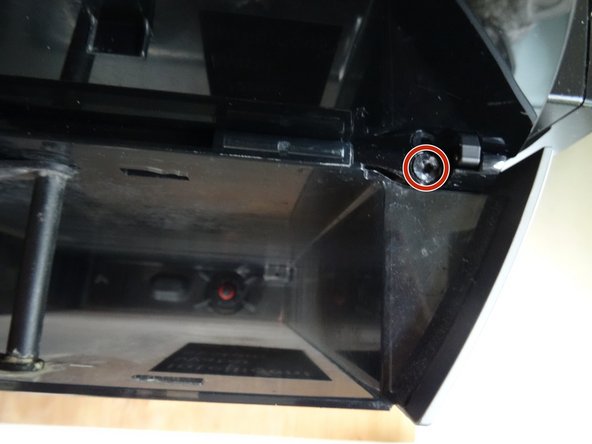
At the very bottom of the back is a hurdle: two oval head screws, they look like rivets. They can be unscrewed with a special tool. At iFixit, the Oval Drive Bit is part of tool collections, you can also get it at law dealers or find it on the Internet. The manufacturer wants to make it more difficult for us!
-
Unscrew the two oval head screws.
-
-
-
-
The side panel on the water tank side is still attached with two Torx T15 screws. Unscrew them.
-
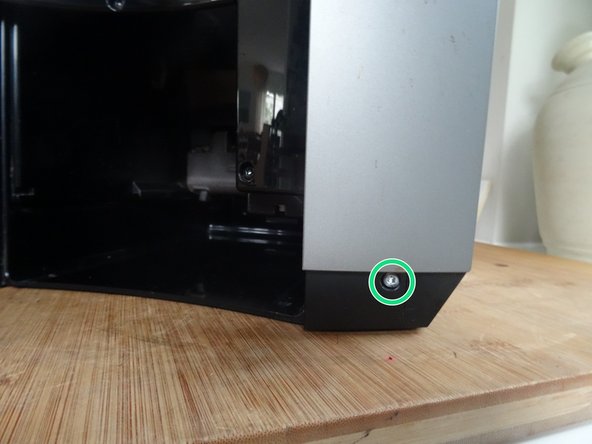
The two side panels are fixed at the bottom front with one Torx T15 screw each. Unscrew those.
-
-
-
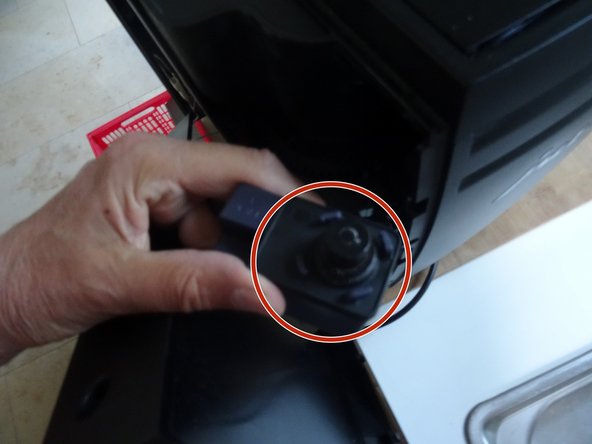
Push the two side panels back a bit and pull them out at the bottom, then you can remove them. Do not remove the side panel with the power switch completely yet.
-
Turn the power switch a little clockwise and remove it.
-
-
-
Pull off the grinder adjuster.
-
Lift out the powder feed chute.
-
Unscrew the Torx T15 screw on the bean hopper.
-
Unscrew the last screw that holds the upper part at the front.
-
Now you can remove the upper cover, it binds a bit.
-
For most repairs, this is enough, you may also have to unscrew the back cover and remove it.
-


To reassemble your device, follow these instructions in reverse order.
To reassemble your device, follow these instructions in reverse order.
Annulation : je n'ai pas terminé ce tutoriel.
Une autre personne a terminé cette réparation.
Merci à ces traducteurs :
100%


Ces traducteurs nous aident réparer le monde ! Vous voulez contribuer ?
Commencez à traduire ›
Équipe

Repair is War on Entropy Membre de l'équipe Repair is War on Entropy
Community
27 membres
1 209 tutoriels rédigés