Aller au contenu principal

Lenovo Yoga 900-13ISK Right Daughterboard Replacement

Ce dont vous avez besoin

  1. Lenovo Yoga 900-13ISK Right Daughterboard Replacement, Back Cover: étape 1, image 1 de 2 Lenovo Yoga 900-13ISK Right Daughterboard Replacement, Back Cover: étape 1, image 2 de 2
    • Using a T5 Torx screwdriver, remove the ten 5.5 mm screws from the back case of the laptop.

  2. Lenovo Yoga 900-13ISK Right Daughterboard Replacement: étape 2, image 1 de 3 Lenovo Yoga 900-13ISK Right Daughterboard Replacement: étape 2, image 2 de 3 Lenovo Yoga 900-13ISK Right Daughterboard Replacement: étape 2, image 3 de 3
    • Use a spudger to pry open the back case at the hinges of the laptop.

    • There are plastic clips around the perimeter of the case holding down the back cover. These will need to be popped off as the cover is removed.

    • Use your fingers to completely pop off the back cover.

  3. Lenovo Yoga 900-13ISK Right Daughterboard Replacement, Battery: étape 3, image 1 de 3 Lenovo Yoga 900-13ISK Right Daughterboard Replacement, Battery: étape 3, image 2 de 3 Lenovo Yoga 900-13ISK Right Daughterboard Replacement, Battery: étape 3, image 3 de 3
    • Remove the five 3.6 mm screws from the battery with a Phillips #00 screwdriver.

  4. Lenovo Yoga 900-13ISK Right Daughterboard Replacement: étape 4, image 1 de 3 Lenovo Yoga 900-13ISK Right Daughterboard Replacement: étape 4, image 2 de 3 Lenovo Yoga 900-13ISK Right Daughterboard Replacement: étape 4, image 3 de 3
    • Grab the bottom corners of the battery and gently pull the battery until the cable disconnects from the connector on the motherboard.

    • While reassembling, use a plastic spudger to push the battery cable into the connector on the underside of the motherboard. This will be easier to do before the screws are replaced.

  5. Lenovo Yoga 900-13ISK Right Daughterboard Replacement, Right Daughterboard: étape 5, image 1 de 3 Lenovo Yoga 900-13ISK Right Daughterboard Replacement, Right Daughterboard: étape 5, image 2 de 3 Lenovo Yoga 900-13ISK Right Daughterboard Replacement, Right Daughterboard: étape 5, image 3 de 3
    Outil utilisé dans cette étape :
    Tweezers
    $4.99
    J'achète
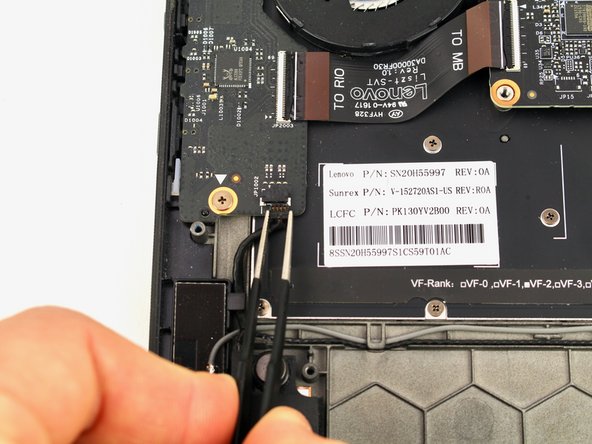
    • Use a pair of blunt nose tweezers or your fingers to pull out the speaker cable from the connector on the lower portion of the daughterboard.

  6. Lenovo Yoga 900-13ISK Right Daughterboard Replacement: étape 6, image 1 de 3 Lenovo Yoga 900-13ISK Right Daughterboard Replacement: étape 6, image 2 de 3 Lenovo Yoga 900-13ISK Right Daughterboard Replacement: étape 6, image 3 de 3
    • Using a Phillips #00 screwdriver, remove the two 3.6 mm screws from the daughterboard.

  7. Lenovo Yoga 900-13ISK Right Daughterboard Replacement: étape 7, image 1 de 3 Lenovo Yoga 900-13ISK Right Daughterboard Replacement: étape 7, image 2 de 3 Lenovo Yoga 900-13ISK Right Daughterboard Replacement: étape 7, image 3 de 3
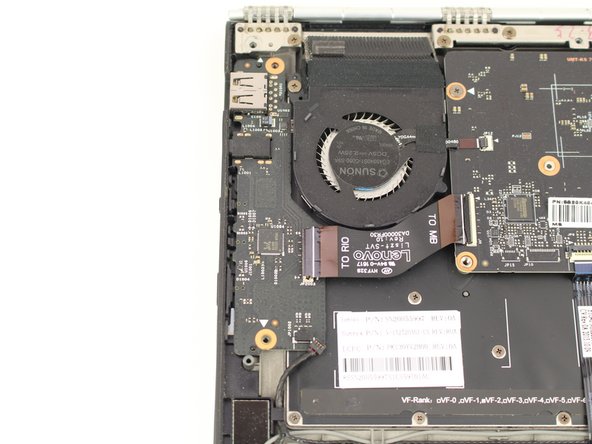
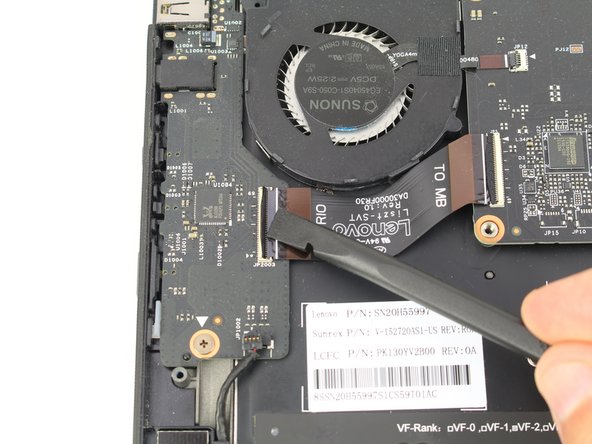
    • Use a spudger to lift up the black locking tab of the ZIF connector holding the interconnect cable.

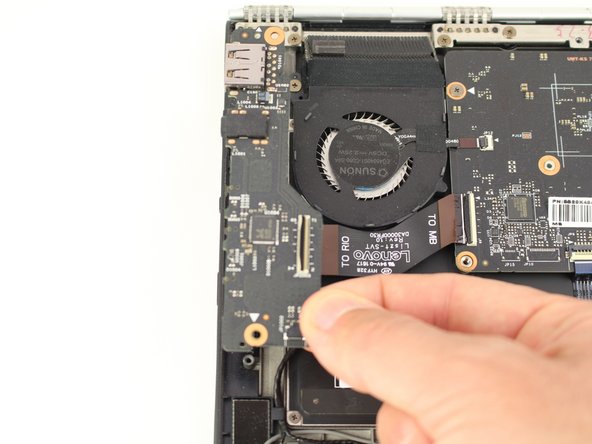
    • Pull out the interconnect cable with a pair of blunt nose tweezers.

  8. Lenovo Yoga 900-13ISK Right Daughterboard Replacement: étape 8, image 1 de 2 Lenovo Yoga 900-13ISK Right Daughterboard Replacement: étape 8, image 2 de 2
    • Pick up the daughterboard from the right side and lift it out from the case.

Conclusion

To reassemble your device, follow these instructions in reverse order.

Austin Blakely

Membre depuis le 03/11/19

19 631 Réputation

53 tutoriels rédigés

Équipe

iFixit Membre de l'équipe iFixit

Staff

136 membres

17 299 tutoriels rédigés

0 commentaires

Ajouter un commentaire

Nombre de vues :

Dernières 24 heures : 0

7 derniers jours : 1

30 derniers jours : 8

Total : 476