Introduction
Install an AirPort Extreme 802.11g card internally.
Ce dont vous avez besoin
-
-
Use a coin or spudger to rotate the battery-locking screw 90 degrees clockwise.
-
-
-
Unscrew the three evenly-spaced Phillips screws from along the rear wall of the battery compartment.
-
-
-
Remove the following 3 screws:
-
One 11 mm Phillips#00 in the middle of the lower case. (Head: 5mm dia. x .75mm thick)
-
Two 14.5 mm Phillips #00 (Head: 5mm dia. x .75mm thick)
-
-
-
-
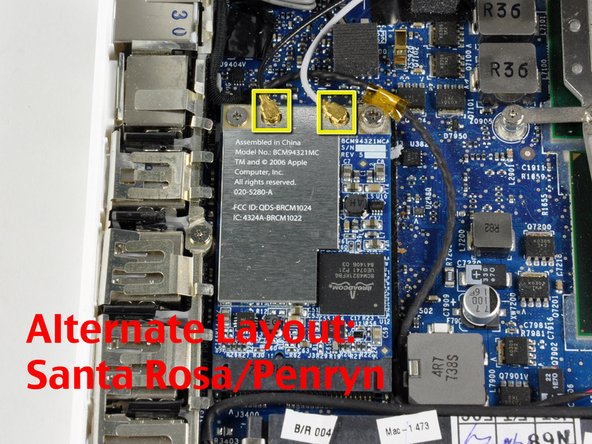
Disconnect the three antenna cables from the Airport card on the left side of the computer. Gently pull an antenna cable straight up to remove it.
-


To reassemble your device, follow these instructions in reverse order.
To reassemble your device, follow these instructions in reverse order.
Annulation : je n'ai pas terminé ce tutoriel.
87 autres ont terminé cette réparation.

Un commentaire
This guide was great but I have the new Unibody MacBook Pro 13-inch, 2.26GHz. Does anyone know how to replace the wireless card in this new type of MacBook? Thanks!