Aller au contenu principal

Moto C Earpiece Speaker Replacement

Ce dont vous avez besoin

  1. Moto C Earpiece Speaker Replacement, Back Cover: étape 1, image 1 de 3 Moto C Earpiece Speaker Replacement, Back Cover: étape 1, image 2 de 3 Moto C Earpiece Speaker Replacement, Back Cover: étape 1, image 3 de 3
    • Power off your phone before beginning disassembly.

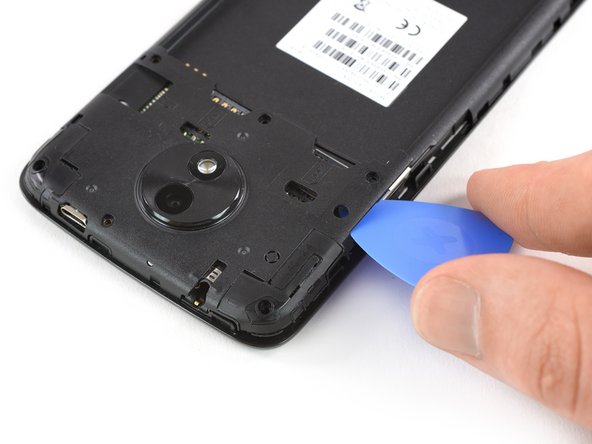
    • Insert a thumbnail, or spudger, into the notch on the bottom right corner to start separating the phone unit from the back cover.

    • Move it to the bottom left corner and pry the phone unit out of the back cover until you can get a good grip.

  2. Moto C Earpiece Speaker Replacement: étape 2, image 1 de 2 Moto C Earpiece Speaker Replacement: étape 2, image 2 de 2
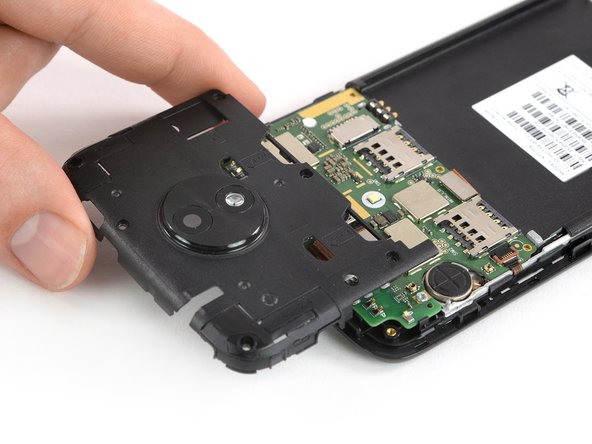
    • Lift the phone out of the back cover.

  3. Moto C Earpiece Speaker Replacement, Battery: étape 3, image 1 de 3 Moto C Earpiece Speaker Replacement, Battery: étape 3, image 2 de 3 Moto C Earpiece Speaker Replacement, Battery: étape 3, image 3 de 3
    • Use a finger or spudger to lever the battery out of its recess and remove it.

  4. Moto C Earpiece Speaker Replacement, Motherboard Cover: étape 4, image 1 de 1
    • Remove the six 3.5 mm long Torx T5 screws.

  5. Moto C Earpiece Speaker Replacement: étape 5, image 1 de 2 Moto C Earpiece Speaker Replacement: étape 5, image 2 de 2
    • Insert an opening pick between the cover and the motherboard near the SIM 2 slot where the power buttons are located.

    • Slide and twist the opening pick to pry open the plastic clips securing the cover.

  6. Moto C Earpiece Speaker Replacement: étape 6, image 1 de 2 Moto C Earpiece Speaker Replacement: étape 6, image 2 de 2
    • Slide an opening pick between the cover and the motherboard on the opposite side next to the SD card slot.

    • Twist the opening pick to pry open the plastic clips securing the cover.

  7. Moto C Earpiece Speaker Replacement: étape 7, image 1 de 2 Moto C Earpiece Speaker Replacement: étape 7, image 2 de 2
    • Remove the motherboard cover.

  8. Moto C Earpiece Speaker Replacement, Motherboard Assembly: étape 8, image 1 de 1
    • Remove the three 2.5 mm long T5 Torx screws.

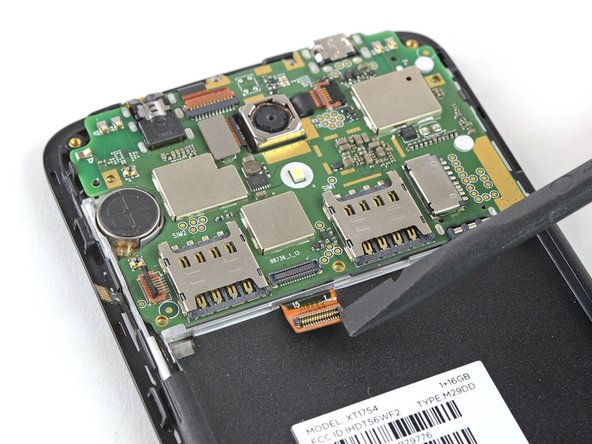
  9. Moto C Earpiece Speaker Replacement: étape 9, image 1 de 2 Moto C Earpiece Speaker Replacement: étape 9, image 2 de 2
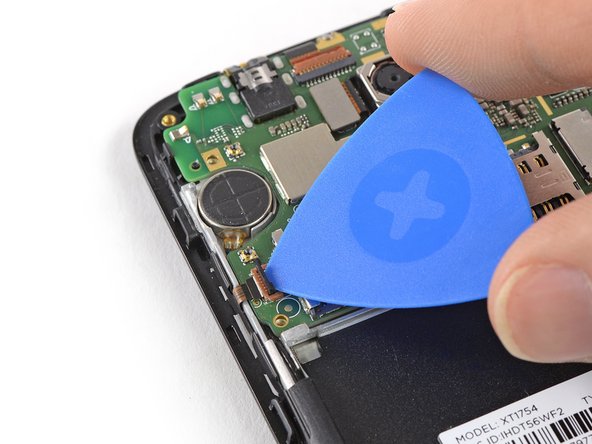
    • Use the tip of an opening pick to pry up and open the black lever of the ZIF connector located on the bottom left of the motherboard.

  10. Moto C Earpiece Speaker Replacement: étape 10, image 1 de 2 Moto C Earpiece Speaker Replacement: étape 10, image 2 de 2
    Outil utilisé dans cette étape :
    Tweezers
    $4.99
    J'achète
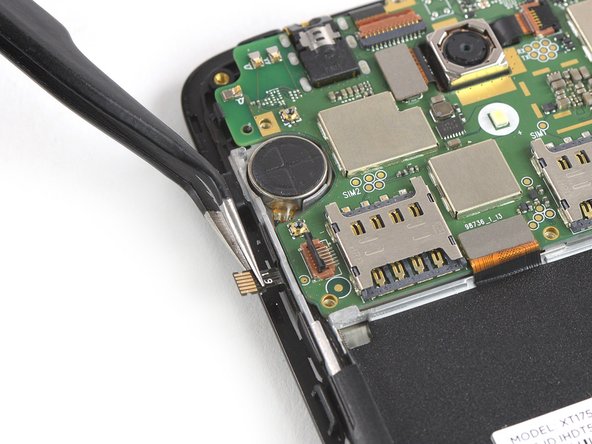
    • Use a pair of tweezers to pull the power and volume button flex cable out of the ZIF connector.

    • Fold the power and volume button flex cable out of the way.

  11. Moto C Earpiece Speaker Replacement: étape 11, image 1 de 2 Moto C Earpiece Speaker Replacement: étape 11, image 2 de 2
    • Use the flat end of a spudger to pry up and disconnect the display flex cable located at the bottom of the motherboard.

  12. Moto C Earpiece Speaker Replacement: étape 12, image 1 de 2 Moto C Earpiece Speaker Replacement: étape 12, image 2 de 2
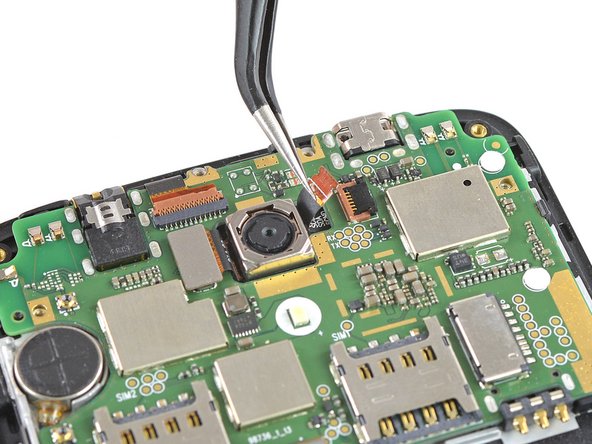
    • Use the tip of an opening pick to pry up and open the black lever of the ZIF connector located at the top of the motherboard next to the rear camera.

  13. Moto C Earpiece Speaker Replacement: étape 13, image 1 de 2 Moto C Earpiece Speaker Replacement: étape 13, image 2 de 2
    • Use a pair of tweezers to pull the digitizer flex cable out of the ZIF connector.

  14. Moto C Earpiece Speaker Replacement: étape 14, image 1 de 1
    • Prepare an iOpener and apply it to the upper half of the display for at least two minutes to loosen the adhesive beneath the vibration motor and the rear facing camera.

  15. Moto C Earpiece Speaker Replacement: étape 15, image 1 de 2 Moto C Earpiece Speaker Replacement: étape 15, image 2 de 2
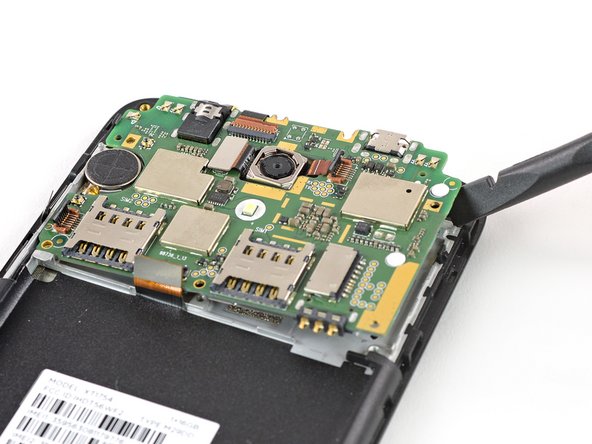
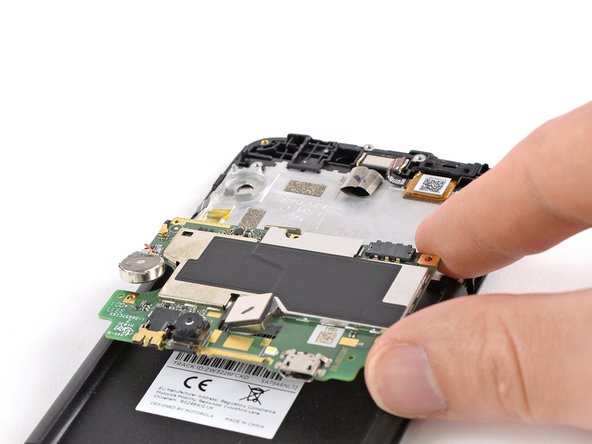
    • Don't try to remove the motherboard all the way yet. The antenna cable is still connected to its rear side.

    • Use a spudger to carefully lift the motherboard until you can get a good grip. Avoid to damage the cables next to the motherboard.

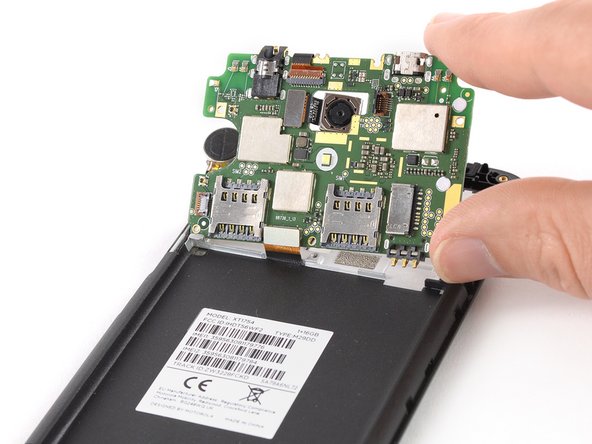
  16. Moto C Earpiece Speaker Replacement: étape 16, image 1 de 3 Moto C Earpiece Speaker Replacement: étape 16, image 2 de 3 Moto C Earpiece Speaker Replacement: étape 16, image 3 de 3
    • Fold the motherboard over the battery cavity to access the coaxial cable connectors.

  17. Moto C Earpiece Speaker Replacement: étape 17, image 1 de 2 Moto C Earpiece Speaker Replacement: étape 17, image 2 de 2
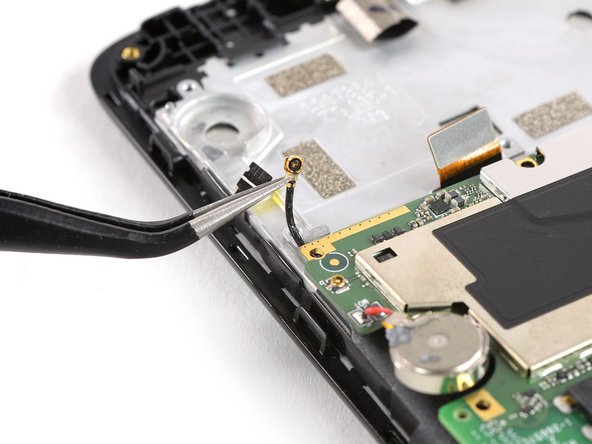
    • Use a pair of tweezers to pry up and disconnect the antenna cable from the back of the motherboard.

  18. Moto C Earpiece Speaker Replacement: étape 18, image 1 de 1
    • Remove the motherboard.

  19. Moto C Earpiece Speaker Replacement, Earpiece Speaker: étape 19, image 1 de 2 Moto C Earpiece Speaker Replacement, Earpiece Speaker: étape 19, image 2 de 2
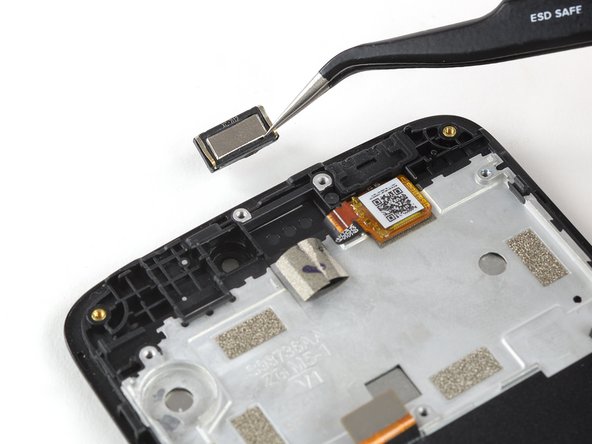
    • Remove the ear piece speaker.

    • When reassembling, be sure to properly orient the earpiece speaker such that the gold contacts are pointing away from the top edge.

Conclusion

To reassemble your device, follow these instructions in reverse order.

Take your e-waste to an R2 or e-Stewards certified recycler.

Repair didn’t go as planned? Check out our Answers community for troubleshooting help.

Une autre personne a terminé cette réparation.

Tobias Isakeit

Membre depuis le 03/31/14

119 234 Réputation

189 tutoriels rédigés

Équipe

Tobias Isakeit - Repairability Engineer Membre de l'équipe Tobias Isakeit - Repairability Engineer

Business

1 membre

1 092 tutoriels rédigés

0 commentaires

Ajouter un commentaire

Nombre de vues :

Dernières 24 heures : 1

7 derniers jours : 2

30 derniers jours : 10

Total : 443