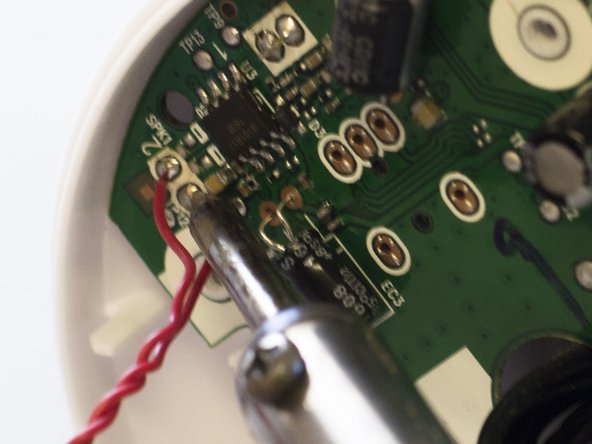
Aller au contenu principal

Motorola MBP33SBU Baby Unit Speaker Replacement

Ce dont vous avez besoin

  1. Motorola MBP33SBU Baby Unit Speaker Replacement, Baby Unit Speaker: étape 1, image 1 de 3 Motorola MBP33SBU Baby Unit Speaker Replacement, Baby Unit Speaker: étape 1, image 2 de 3 Motorola MBP33SBU Baby Unit Speaker Replacement, Baby Unit Speaker: étape 1, image 3 de 3
    • Using precision tweezers, remove the (4) four rubber feet from the bottom of the baby unit.

    • Using a Phillips #1 screwdriver remove the 9.5mm screws that were under the rubber feet.

    • Open the base of the baby unit.

  2. Motorola MBP33SBU Baby Unit Speaker Replacement: étape 2, image 1 de 3 Motorola MBP33SBU Baby Unit Speaker Replacement: étape 2, image 2 de 3 Motorola MBP33SBU Baby Unit Speaker Replacement: étape 2, image 3 de 3
    • Using the Phillips #1 screwdriver remove the 9.5mm washer head screws holding the speaker in place.

    • Gently lift the speaker by the wires from its plastic base.

  3. Motorola MBP33SBU Baby Unit Speaker Replacement: étape 3, image 1 de 2 Motorola MBP33SBU Baby Unit Speaker Replacement: étape 3, image 2 de 2
    • Desolder the wires connecting the speaker to the circuit board.

    • Beware of overheating, the soldering kit is capable of damaging the circuit board.

    • Beware of the potential for personal injury from heated metals.

    • For soldering procedures please refer to iFixit's guide to Soldering Skills.

Conclusion

To reassemble your device, follow these instructions in reverse order.

Ely Tilley

Membre depuis le 09/28/17

714 Réputation

5 tutoriels rédigés

0 commentaires

Ajouter un commentaire

Nombre de vues :

Dernières 24 heures : 0

7 derniers jours : 1

30 derniers jours : 12

Total : 1,923