Aller au contenu principal

Motorola Moto G 1st Generation Front Camera Replacement

Ce dont vous avez besoin

  1. Attention : les étapes 1 à 3 sont issues d'un tutoriel marqué comme en cours.

    Motorola Moto G 1st Generation Front Camera Replacement, Rear Panel: étape 1, image 1 de 3 Motorola Moto G 1st Generation Front Camera Replacement, Rear Panel: étape 1, image 2 de 3 Motorola Moto G 1st Generation Front Camera Replacement, Rear Panel: étape 1, image 3 de 3
    • Before you start following any of the steps of this guide, completely turn the device off.

    • Take the plastic back cover off by either using a plastic Pry tool or simply using your hands. Start from the bottom by the charging port

  2. Motorola Moto G 1st Generation Front Camera Replacement, Removing the Screws: étape 2, image 1 de 1
    • Unscrew the 3.5mm screws, total of 14, located on the back protective cover by using a T5 Torx screwdriver.

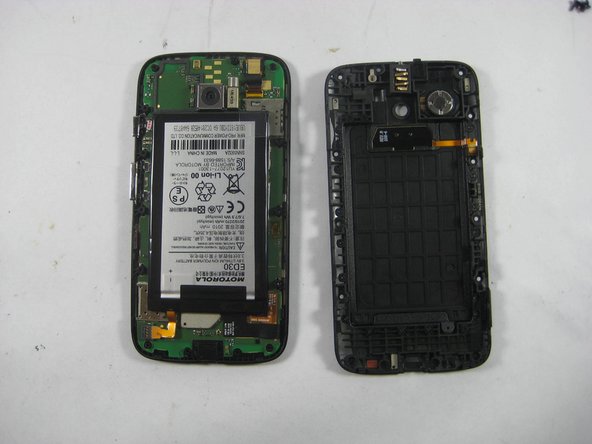
  3. Motorola Moto G 1st Generation Front Camera Replacement, Removing the Battery Cover: étape 3, image 1 de 2 Motorola Moto G 1st Generation Front Camera Replacement, Removing the Battery Cover: étape 3, image 2 de 2
    • Use a plastic opening tool to remove the protective cover.

    • Carefully work the plastic tool around all the edges of the phone.

    • The protective cover holds the Volume and the Home buttons which might fall off the assembly when the cover is removed.

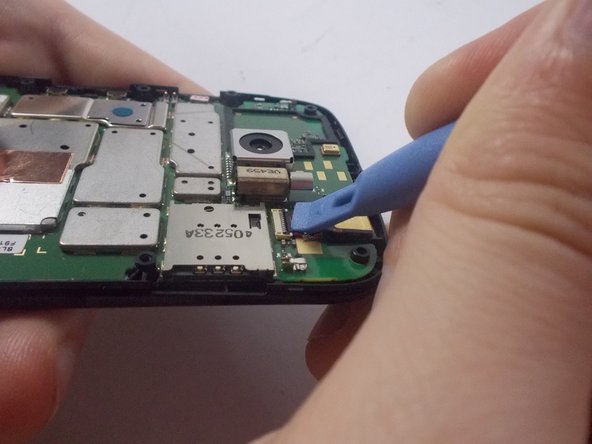
  4. Motorola Moto G 1st Generation Front Camera Replacement, Disconnecting the Front Camera: étape 4, image 1 de 2 Motorola Moto G 1st Generation Front Camera Replacement, Disconnecting the Front Camera: étape 4, image 2 de 2
    • Use the Pry tool to disconnect the Front Camera, found in the upper right corner, from the motherboard.

    • You want to pry up the black tab that locks it in place. It may be under a protective sticker.

    • Though the battery is removed in our second photo, it is not required for removing the front camera.

  5. Motorola Moto G 1st Generation Front Camera Replacement, Removing the Front Camera: étape 5, image 1 de 2 Motorola Moto G 1st Generation Front Camera Replacement, Removing the Front Camera: étape 5, image 2 de 2
    • Remove the camera from the phone by using the tweezers.

    • To reassemble, follow the steps in reverse.

Conclusion

To reassemble your device, follow these instructions in reverse order.

4 autres ont terminé cette réparation.

Radostin Lobodov

Membre depuis le 10/16/14

2 904 Réputation

6 tutoriels rédigés

Équipe

UMass Dartmouth, Team 5-7, Vijaybhaskar Fall 2014 Membre de l'équipe UMass Dartmouth, Team 5-7, Vijaybhaskar Fall 2014

UMASSD-VIJAYBHASKAR-F14S5G7

3 membres

8 tutoriels rédigés

0 commentaires

Ajouter un commentaire

Nombre de vues :

Dernières 24 heures : 0

7 derniers jours : 0

30 derniers jours : 1

Total : 1,258