Aller au contenu principal

Nest x Yale Lock Motherboard Replacement

Ce dont vous avez besoin

  1. Nest x Yale Lock Motherboard Replacement, Motherboard: étape 1, image 1 de 1
    • Before proceeding, make sure the batteries are removed to avoid being electrocuted and damage to the lock

    • If you do not know how to remove the batteries then I would recommend looking at our battery replacement guide for help.

  2. Nest x Yale Lock Motherboard Replacement: étape 2, image 1 de 2 Nest x Yale Lock Motherboard Replacement: étape 2, image 2 de 2
    • Remove 3 screws as shown to remove the first cover.

    • The 3 screws are 0.25 inches length

  3. Nest x Yale Lock Motherboard Replacement: étape 3, image 1 de 1
    • Using a pin to push down the knot holding the wire and the tweezer to safely remove the wire from the motherboard

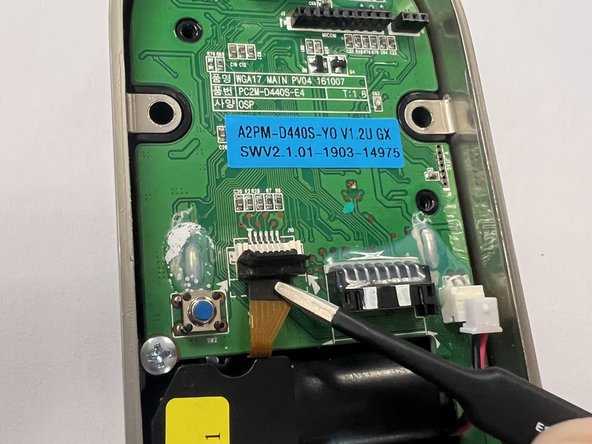
  4. Nest x Yale Lock Motherboard Replacement: étape 4, image 1 de 2 Nest x Yale Lock Motherboard Replacement: étape 4, image 2 de 2
    • Use a spudger or plastic tool to lift the ZIF lock upward (as shown in the first picture).

    • Use tweezers to remove the ribbon cable from the motherboard.

  5. Nest x Yale Lock Motherboard Replacement: étape 5, image 1 de 1
    • Continue to remove 2 screws holding the motherboard to the lock shell.

    • The screws are 0.20 inches in length.

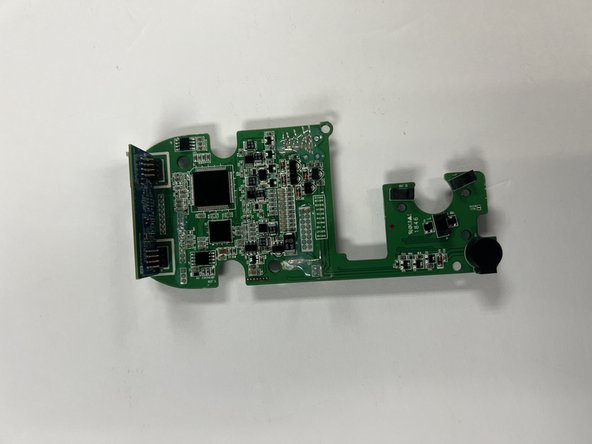
  6. Nest x Yale Lock Motherboard Replacement: étape 6, image 1 de 2 Nest x Yale Lock Motherboard Replacement: étape 6, image 2 de 2
    • Use an opening tool to push the motherboard out as shown in the picture.

Conclusion

To reassemble your device, follow these instructions in reverse order.

Bryant Duong

Membre depuis le 09/26/22

379 Réputation

2 tutoriels rédigés

Équipe

CSU Los Angeles, Team 5-3, Adachi Fall 2022 Membre de l'équipe CSU Los Angeles, Team 5-3, Adachi Fall 2022

CSULA-ADACHI-F22S5G3

5 membres

5 tutoriels rédigés

0 commentaires

Ajouter un commentaire

Nombre de vues :

Dernières 24 heures : 0

7 derniers jours : 1

30 derniers jours : 11

Total : 390